Storey's in the Dirt

Regenerative Farming & Food Sovereignty

Featured Posts
← Back to all series

Natural Farming

Regenerative agriculture, Korean Natural Farming (KNF), sustainable farming practices, and soil health.

40 posts

📍 Start Here

Begin your learning journey with these curated series

CHNOPS: The Chemistry of Life in Your Garden

5 Posts
All 5 Posts FREE
Updated Jan 21, 2026

Start: CHNOPS: Building Blocks of Life

Start →

Agricultural Chemistry Pioneers

2 Posts
All 2 Posts FREE
Updated Jan 19, 2026

Start: Evolution of Agricultural Science

Start →

Explore Related Topics

Dig deeper into specific areas within Natural Farming

All Posts in Series

Rudolf Steiner & Biodynamic Agriculture

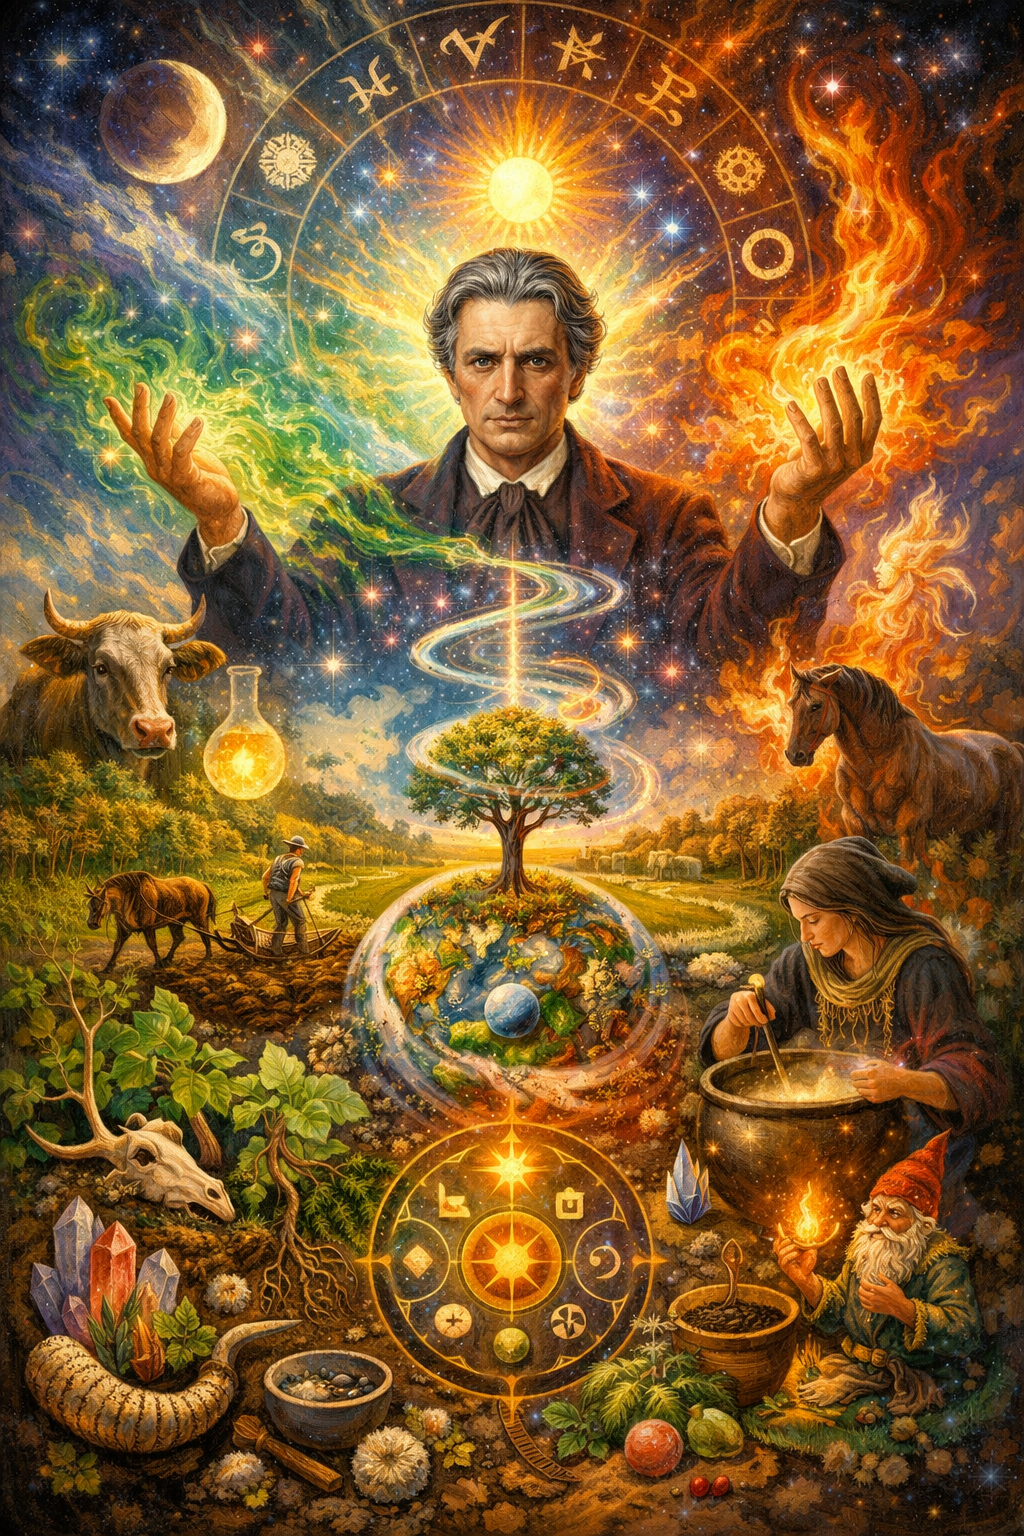
Rudolf Steiner and Biodynamic Intuition Competing ideas at the edge of early agricultural science As agricultural chemistry and soil science were becoming more formalized in the early 20th century, not all serious thinkers moved in the same direction. Alongside laboratory chemistry, field trials, and emerging industrial agriculture, there existed competing frameworks—attempts to describe life, soil, and plant health that did not yet have a complete scientific vocabulary, but were deeply rooted in observation. One of the most influential—and most controversial—of these figures was Rudolf Steiner. --- An outsider to formal agricultural chemistry Steiner is often excluded from traditional agricultural histories, particularly those centered on chemistry, yield optimization, or what later became conventional agriculture. This exclusion is understandable. Steiner was not a soil chemist. He did not work within the emerging frameworks of nutrient analysis, base saturation, or pH. His language was philosophical, symbolic, and at times difficult to reconcile with reductionist science. And yet, dismissing him entirely misses something important. --- Competing ideas, not opposing intent Steiner’s agricultural lectures—later forming the foundation of biodynamic agriculture—were offered at a time when: * chemistry could measure nutrients but not relationships * biology was observed but poorly explained * soil life was known to matter, but not how or why Steiner was attempting to describe patterns he could see, using the intellectual tools available to him. His intent was not anti-science. It was pre-scientific in the literal sense: *before the tools existed to translate intuition into measurement*. --- Biodynamics as early systems thinking At its core, biodynamic agriculture emphasized: * the farm as a self-regulating system * soil vitality as foundational to plant health * the interdependence of soil, plant, animal, and environment These ideas now sound familiar. Modern systems biology, agroecology, and soil food web science echo many of the same principles—though expressed with data, microscopy, and molecular tools rather than metaphor. Steiner lacked a shared scientific language. But he was not lacking perception. --- Where the language fell short Many of Steiner’s concepts were expressed through: * cosmic rhythms * energetic forces * symbolic preparations To modern ears, this language can obscure rather than clarify. But it is important to remember the context. Microbial ecology did not yet exist. Enzymes were poorly understood. DNA was undiscovered. Steiner was trying to articulate biological complexity without a biological vocabulary. --- Intuition ahead of instrumentation From a modern perspective, it is reasonable to say that Steiner was intuitively tracking phenomena that science would later explain. Soil life. Biological mediation. The importance of structure and vitality beyond chemistry alone. Had Steiner lived in an era of genomic sequencing, soil respiration assays, and microbial profiling, his work would likely have looked very different. One can reasonably imagine him as a scientist delighted by tools—testing, measuring, refining rather than relying on metaphor. --- Why Steiner belongs in this series This series is not a ledger of who was right or wrong. It is a record of how understanding evolved. Steiner represents a parallel path—one that did not dominate policy, industry, or formal science, but persisted because it addressed something chemistry alone could not yet explain. His work stands as evidence that: * there were competing ideas about soil health * reductionism was not universally accepted * intuition often precedes explanation --- Bridging intuition and evidence Modern soil science increasingly validates principles Steiner emphasized: * systems matter * life mediates chemistry * soil vitality cannot be reduced to inputs alone What has changed is not the direction of inquiry—but the tools. Today, those tools allow us to translate intuition into data, and philosophy into testable frameworks. Steiner’s contribution, then, is not a blueprint. It is a reminder. That science does not move forward in a single line. That insight often appears before language. And that progress is sometimes recognizing *what someone was trying to say*, even when they could not yet say it clearly. --- Setting the record straight Including Steiner here is not an endorsement of every method or metaphor associated with biodynamics—but it is a salute to a man who spoke about soil the way a psychedelic steampunk wordsmith might: vividly, intuitively, and far ahead of the instrumentation of his time. It is an acknowledgment that agriculture has always contained multiple ways of knowing. Some paths gained instruments. Others preserved intuition. The work ahead is not choosing between them—but learning how to integrate what each was reaching toward. Next, we will continue forward into how modern science finally acquired the tools to explain the biological mediation that thinkers like Steiner could sense—but not yet measure.

Regenerative Agriculture

Albrecht's Soil Balance Insight

William Albrecht and the Concept of Balance Where chemistry and biology finally meet If Liebig gave agriculture its first chemical language, and Hensel reminded us of its mineral foundations, William Albrecht provided the hinge. Albrecht’s work marks the moment when agricultural chemistry stopped asking only *what is present* and began asking *how those things relate*. This shift—from inputs to relationships—is where chemistry and biology finally begin to speak the same language. --- A new kind of question By the early to mid-20th century, agriculture had accumulated data. Soil tests measured nutrients. Fertilizers corrected deficiencies. Yields increased. And yet, problems persisted. Soils compacted. Roots remained shallow. Plants showed deficiencies even when nutrients tested “adequate.” Livestock health varied dramatically from one farm to another. Albrecht asked a question others were not yet asking: > *What if the problem is not how much—but how balanced?* --- Base saturation: chemistry with structure Albrecht’s most influential contribution was his work on base saturation. Rather than focusing solely on total nutrient levels, he examined how key cations occupied soil exchange sites—specifically: * calcium * magnesium * potassium * sodium He observed that soils functioned best not when these elements were simply present, but when they existed in functional proportions. This was a critical departure. Soil was no longer a container. It was a system of relationships. --- Calcium: structure before nutrition One of Albrecht’s most important insights was reframing calcium. Calcium was not merely a nutrient for plants. It was a structural element for soil. Adequate calcium: * promotes aggregation * improves porosity * enhances root penetration * supports water and air movement Without it, even nutrient-rich soils could become dense, anaerobic, and biologically constrained. This explained a puzzle many farmers and gardeners recognized instinctively: > Why do plants struggle in soils that test “fertile”? Structure was the missing link. --- Explaining what NPK could not Albrecht’s framework revealed why NPK alone often fails. Nitrogen can stimulate growth. Phosphorus can support roots. Potassium can improve stress tolerance. But none of these can compensate for: * poor aggregation * imbalanced cation ratios * restricted root systems When calcium is insufficient—or overwhelmed by other cations—nutrients may be present but inaccessible. This is nutrient lockout. Albrecht did not reject chemistry. He refined it. --- From soil chemistry to living health Perhaps most distinctive was how far Albrecht extended his thinking. He drew direct connections between: * soil mineral balance * plant nutrient composition * livestock health * and ultimately, human health This was not philosophy. It was observation. Animals grazing mineral-balanced soils showed: * improved fertility * stronger immunity * better overall vitality Plants grown in balanced soils resisted disease more effectively. Soil chemistry, Albrecht argued, sets the trajectory for the entire food system. --- Why Albrecht matters to gardeners Gardeners see Albrecht’s principles play out every season. Compacted beds resist roots. Repeated fertilization fails to correct chronic problems. Plants show deficiencies that fertilizers don’t fix. Albrecht explains why: It’s not just what you add. It’s what the soil can *do* with it. Balance determines function. --- Relationships over totals Albrecht’s work shifted agriculture toward a deeper truth: Elements do not act alone. Calcium interacts with magnesium. Potassium competes for exchange sites. Sodium influences dispersion. Ratios shape behavior. Presence alone is not enough. This insight sets the stage for everything that follows. --- Setting up CHNOPS in context When we return to CHNOPS—carbon, hydrogen, oxygen, nitrogen, phosphorus, and sulfur—we will do so differently because of Albrecht. These elements operate within a mineral framework. Their availability depends on structure. Their behavior depends on balance. Albrecht reminds us that chemistry becomes biology when relationships are honored. He did not close the conversation. He opened it. Next, we will begin to look at how these principles expanded further—into biological mediation, cofactors, and the full complexity of living soil systems.
Soil & Microbiology

Sørensen's pH Scale and Agriculture

Søren Sørensen and the pH Scale Measuring the hidden chemistry that governs life As agricultural science moved deeper into chemistry, one persistent problem remained: Soil reactions mattered—but they were difficult to describe with precision. Farmers knew some soils were “sweet.” Others were “sour.” Certain crops thrived in one field and failed in another, even when nutrients appeared similar. What was missing was a common language for acidity and alkalinity. That language arrived in 1909 through the work of Søren Sørensen. --- Why acidity mattered Long before the pH scale existed, growers understood its effects. They observed that: * legumes struggled in sour (acidic) soils, while crops favoring sweet (alkaline) conditions performed better * lime improved structure and crop performance * nutrients behaved differently from field to field But these observations lacked precision. Without a way to quantify soil reaction, recommendations remained general and inconsistent. Chemistry needed a ruler. --- The birth of the pH scale Sørensen, working in biochemical research, introduced the pH scale as a way to measure the concentration of hydrogen ions in solution. The scale: * ranges from acidic to alkaline * is logarithmic rather than linear * reflects exponential change with each whole unit Here’s the simplified breakdown: * More hydrogen ions → lower pH → acidic * Fewer hydrogen ions → higher pH → alkaline (basic) pH Value — What it Means * 0–6: Acidic (lots of hydrogen ions) * 7: Neutral (balanced) * 8–14: Alkaline (fewer hydrogen ions) This exponential point is critical. A shift of one pH unit represents a tenfold change in acidity. Suddenly, subtle differences could be expressed clearly—and compared reliably. --- From laboratory to soil Although developed for biochemical applications, the pH scale quickly proved invaluable to agriculture. Soil reaction was no longer subjective. It could be measured, tracked, and adjusted. This transformed soil management. pH emerged as a master variable because it influences bulk processes that early 20th‑century scientists could observe and measure: * Nitrification — the conversion of ammonium to nitrate slows sharply in acidic soils * Organic matter decomposition — acidity alters decay rates and nutrient release * Root function — acidic conditions increase root injury and restrict elongation * Calcium availability — low pH reduces calcium presence on exchange sites * Toxicity — acidity increases the solubility of elements like aluminum and manganese, which can damage roots * Chemical reactions at the soil interface — governing whether nutrients remain available or become locked away In many cases, nutrients were present—but unavailable due to pH constraints. --- Why pH governs nutrient access Each nutrient operates within a preferred pH range. Outside that range: * phosphorus can bind tightly to other elements * micronutrients may become insoluble or toxic * microbial processes slow or shift This explains a common frustration: > *Why does a soil test show nutrients that plants cannot use?* pH determines whether chemistry is allowed to function. --- The garden lesson: chemistry before correction Gardeners often rush to add nutrients when plants struggle. Sørensen’s contribution reminds us to pause. If pH is out of range: * fertilizers may be wasted * amendments may underperform * biological activity may stall Correcting pH does not feed plants directly. It creates the conditions for feeding to work. --- pH as a bridge concept The pH scale quietly unites chemistry and biology. It is a chemical measurement. But its consequences are biological. Roots sense pH. Microbes respond to it. Minerals behave differently because of it. Sørensen did not study soil specifically. Yet his work gave agriculture one of its most powerful interpretive tools. --- Why Sørensen belongs among the pioneers Sørensen did not tell farmers what to add. He gave them a way to understand why additions succeed or fail. The pH scale allowed agriculture to: * diagnose before prescribing * compare soils meaningfully * refine mineral and biological management It also prepared the ground—quite literally—for deeper insights into balance, cofactors, and biological mediation. --- Setting the stage forward With pH, agriculture gained an exponential lens. Small changes mattered. Thresholds became visible. This concept will return when we revisit CHNOPS, cofactors, and biological exponents. Because in living systems, scale is never linear. Next, we continue forward—toward how pH, minerals, and biology intersect to govern the chemistry of life in soil.
Soil & Microbiology

Julius Hensel's Mineral Agriculture

Julius Hensel and the Return to Minerals Why long-term fertility begins beneath biology As agricultural chemistry advanced through the 19th century, the focus increasingly narrowed toward what could be measured quickly and corrected efficiently. Nutrients were identified, deficiencies named, and inputs applied. But not everyone agreed that this was the right direction. Long before biology re-entered the agricultural conversation in a formal way, Julius Hensel raised a different concern: that agriculture was losing sight of its mineral foundation. --- A different question Where Liebig asked what plants removed from the soil, Hensel asked something more foundational: > *What is the soil made of, and how does that shape life over time?* Hensel was not opposed to chemistry. He was wary of short-term correction replacing long-term nourishment. He observed that fields receiving repeated applications of soluble fertilizers often showed: * initial yield increases * followed by declining structure * reduced resilience * and growing dependence on inputs To Hensel, this suggested not a lack of nutrients alone—but a loss of mineral integrity. --- Rock dust and remineralization Hensel’s most well-known contribution was his advocacy for finely ground rock—what we now refer to as rock dust or remineralization. His reasoning was simple and rooted in geology: Soils originate from rock. Plants evolved in mineral-rich environments. Weathering supplies a broad spectrum of elements over time. When agriculture removes harvest after harvest without replacing those minerals, fertility declines—not immediately, but inevitably. Rock dust was not a fertilizer in the conventional sense. It was a restorative input, intended to rebuild what extraction had removed. --- Fertility as a long-term condition Hensel distinguished between feeding plants and building soil. Soluble fertilizers could stimulate growth. Minerals shaped structure, buffering, and endurance. One was immediate. The other cumulative. Hensel argued that sustainable fertility required: * a broad mineral spectrum * slow availability * time for integration This was not an argument against productivity. It was an argument against exhaustion disguised as success. --- Early resistance to synthetic fertilizers As industrial fertilizers gained traction, Hensel became an outspoken critic. His resistance was not ideological. It was observational. He saw that soluble inputs: * bypassed soil structure * encouraged shallow rooting * and failed to replace the full range of minerals removed by harvests He worried that agriculture was trading resilience for speed. History suggests he was not wrong. --- The garden lesson: organic is not the same as balanced Modern gardeners often assume that adding organic matter guarantees soil health. It does not. Compost improves biology. Mulch protects structure. Organic inputs feed microbes. But none of these automatically replace depleted minerals. A soil can be rich in organic matter and still lack: * calcium for aggregation * trace elements for enzyme function * mineral diversity for long-term stability Without minerals, biology has nothing to work with. --- Why depleted soils stay depleted Hensel’s warning still applies. If minerals are removed faster than they are replaced, soils decline—even when they appear biologically active. Plants may grow. Yields may hold. But resilience erodes. This is why some gardens: * require increasing inputs each year * show inconsistent responses to compost * struggle despite good care The foundation is missing. --- Why Hensel matters now Hensel’s work sits between two eras. Before biology was well understood. Before chemistry became dominant. He reminds us that minerals are not optional. They are the stage on which biology performs. His ideas did not win their moment. But they did not disappear. They waited. As soil science continues to reconnect chemistry, biology, and structure, Hensel’s insistence on mineral completeness feels less like resistance—and more like foresight. Next, we will move into the work of those who began to formalize balance itself—linking minerals, structure, and living systems into a more complete picture of soil health.
Regenerative Agriculture

Liebig's Agricultural Chemistry

Justus von Liebig and the Birth of Agricultural Chemistry When plant nutrition moved from tradition to measurement By the time chemistry entered agriculture in a formal way, farming was already ancient, sophisticated, and productive. Fields were cultivated, rotations practiced, manures applied, and yields observed with care. What chemistry offered was not replacement—but explanation. And few figures embody that transition more clearly than Justus von Liebig. --- A problem worth measuring In the early 19th century, Europe was facing pressures that farming traditions alone could no longer easily answer. Populations were growing. Land was being cropped repeatedly. Yields were declining in ways that could not always be corrected by rotation or manure alone. Farmers knew *something* was being removed from the soil. Chemistry offered a way to ask a sharper question: > *What, exactly, is being taken—and what must be returned?* Liebig approached agriculture not as a farmer, but as a chemist trained to analyze matter, reactions, and limits. --- The Law of the Minimum Liebig’s most enduring contribution is what became known as the Law of the Minimum. Simply stated: > Plant growth is limited not by the total amount of resources available, but by the scarcest essential factor. This was a profound shift in thinking. Until then, fertility was often treated as a general quality—good soil or poor soil. Liebig reframed it as specific and measurable. If nitrogen was abundant but phosphorus was scarce, growth stalled. If phosphorus was sufficient but potassium was lacking, yield suffered. Adding more of what was already plentiful could not compensate for what was missing. That insight still holds. --- Identifying essential mineral nutrients Liebig’s work helped formalize the idea that plants require specific mineral elements to grow. Rather than drawing their substance solely from humus or vague “vital forces,” plants were shown to take material from: * soil minerals * air * water This clarification moved agriculture decisively away from folklore and toward chemistry. It allowed nutrients to be: * identified * quantified * deliberately supplied For the first time, deficiencies could be addressed with intention rather than guesswork. --- What this meant for farmers The practical appeal was immediate. If poor growth could be traced to a missing element, that element could be added. If yields declined, chemistry promised a corrective. This logic laid the groundwork for: * fertilizer development * soil testing * standardized recommendations It also introduced a new confidence: > If we can measure it, we can manage it. In many cases, that confidence was justified. --- The garden lesson: why “more” doesn’t work Every gardener eventually encounters Liebig’s law, whether they know his name or not. You can add compost year after year and still see poor growth. You can fertilize generously and still watch plants struggle. Why? Because abundance does not override absence. A soil can be rich in organic matter and still lack calcium. It can test high in nitrogen and still be short on phosphorus. The limiting factor sets the ceiling. This is why adding *more of everything* often fails—and sometimes makes things worse. --- A necessary narrowing Liebig’s framework was powerful, but it was also selective. By focusing on nutrients as isolated inputs, early agricultural chemistry emphasized: * yield * correction * efficiency What it did not yet fully address were the living systems that mediate how those nutrients behave. Microbes were poorly understood. Soil structure was difficult to quantify. Relationships between elements were only partially visible. This was not oversight. It was the boundary of available tools. --- Respecting the contribution, recognizing the limits Liebig did not diminish agriculture. He clarified it. His work gave farmers and scientists a language to describe fertility in concrete terms. It transformed vague observations into actionable knowledge. At the same time, it narrowed the lens. Yield became the primary metric. Biology receded into the background. That narrowing would shape agriculture for generations—both its successes and its shortcomings. --- Why Liebig belongs here We begin with Liebig not because he explained everything—but because he explained something essential. He showed that growth has limits. That limits can be identified. And that ignoring the scarcest factor guarantees disappointment. As the tools of science improved, those limits would prove to be more relational and biological than Liebig could have known. But without this first chemical framework, the later corrections would not have been possible. Next, we will look at how this chemical clarity expanded—and where it began to strain under the complexity of living soil.
Soil & Microbiology

Shift to Chemical Agriculture

Terrain Theory, Germ Theory, and the Rise of Chemical Agriculture Why chemistry took the lead—and biology waited its turn Before we name pioneers, laws, or formulas, there is one more conceptual shift we need to understand. Not because it is simple—but because it quietly shaped everything that followed. This is the moment when chemistry rose to prominence, not because biology was wrong, but because chemistry was *measurable*, *controllable*, and *repeatable* with the tools of the time. To understand modern agriculture, we have to understand why this happened. --- Two ways of seeing life In the 19th century, science was wrestling with a fundamental question: > *What causes health, disease, growth, and decay?* Two broad frameworks emerged. One focused on external agents. The other focused on internal conditions. These became known—much later and far more rigidly than they were originally debated—as germ theory and terrain theory. At the time, they were not enemies. They were competing lenses. --- Germ theory: clarity through cause Germ theory is most often associated with Louis Pasteur, whose work demonstrated that specific microorganisms could be linked to specific outcomes. This was revolutionary. For the first time, invisible causes could be: * isolated * identified * reproduced * interrupted In medicine, this saved lives. In fermentation, it transformed food preservation. And in agriculture, it offered something incredibly powerful: > A clear culprit. If something went wrong, something specific could be blamed—and potentially eliminated. That clarity mattered. --- Terrain theory: context before cause Running alongside this work was another framework, often associated with Antoine Béchamp. Terrain theory proposed something quieter, but broader: That microorganisms do not act in isolation. That outcomes depend on the *condition of the environment* they inhabit. That the same organism can behave differently depending on the terrain. In other words: > Context matters as much as cause. In soil terms, this would later translate into a familiar idea: Healthy soil does not fear microbes. It recruits them. --- Why chemistry took precedence So why did germ theory—and with it, chemical control—take the lead? Not because terrain theory lacked insight. But because chemistry had tools biology did not yet possess. By the late 1800s and early 1900s: * elements could be isolated * reactions could be measured * inputs could be standardized * outcomes could be replicated Microbiology, by contrast, was complex, variable, and difficult to control. Living systems refused to behave the same way twice. Chemistry offered something governments, industries, and growing populations desperately needed: > Predictability at scale. --- Agriculture follows the measurable As agriculture modernized, chemistry fit the moment. Nutrients could be named. Deficiencies could be corrected. Fertilizers could be manufactured. The focus shifted toward: * feeding the plant directly * suppressing organisms associated with loss * simplifying complex systems into manageable parts This was not negligence. It was pragmatism. The tools worked—especially in the short term. --- What was set aside, not rejected What chemistry could not yet do was explain relationships. It could measure nitrogen. But not how nitrogen behaved differently in living soils. It could identify pathogens. But not why some fields resisted them without intervention. Biology was not disproven. It was postponed. And for a time, that postponement made sense. --- Why this matters before we meet the pioneers The scientists who shaped agricultural chemistry were not ignoring life. They were working within the limits of what could be seen, weighed, and tested. Understanding this prevents two common mistakes: * romanticizing the past * dismissing modern science It also prepares us for what comes next. Because as tools improved—microscopy, soil testing, microbial ecology, molecular biology, DNA analysis, and related genetic technologies—the questions changed. And science began to circle back toward terrain. Not as philosophy. But as evidence. --- The quiet convergence Today, we know something both frameworks were pointing toward: Microbes matter. Minerals matter. Context matters. Chemistry tells us *what is present*. Biology tells us *how it behaves*. Modern soil science lives at their intersection. Before we name the pioneers who formalized agricultural chemistry, we needed to understand why chemistry stepped forward first. It wasn’t dominance. It was timing. And that timing shaped agriculture for generations. Next, we meet the people who gave chemistry its agricultural language—while unknowingly setting the stage for biology’s return.
Soil & Microbiology

Ancient Wisdom in Modern Farming

Before CHNOPS Had a Name Historical and ancient agricultural intelligence, living soils, and the knowledge modern agriculture forgot Long before chemistry had symbols, before elements were isolated and named, before soil was reduced to inputs and outputs, people were growing food in ways that built life instead of consuming it. Not accidentally. Not primitively. And certainly not ignorantly. Historical and ancient agricultural systems across the world were — and in many places still are — intentionally designed biological technologies. They were place‑based, observational, relational, and regenerative by necessity. And unlike modern agriculture, they did not separate soil, plant, animal, and human health into different silos. They understood what modern science is only now circling back toward: > Life creates fertility. Fertility sustains life. --- The myth of “pre‑scientific” agriculture Modern agricultural narratives often start with a quiet assumption: that early farming was crude, inefficient, or merely intuitive — and that *real* understanding arrived with laboratories, fertilizers, and textbooks. That storyline is not just incomplete. It’s wrong. Historical and ancient farmers managed: * nutrient cycling without mined fertilizers * pest pressure without chemical warfare * soil structure without compaction * carbon without calling it carbon They did this through pattern recognition over generations, not grant cycles. Through feedback loops, not prescriptions. Through biology first, chemistry embedded within it. The elements were always there. They just weren’t separated from life. --- Terra Preta: proof written into the soil itself Nowhere is this clearer than in the black soils of the Amazon. For decades, Terra Preta was treated as an archaeological curiosity — a “mystery soil” that shouldn’t exist in one of the most nutrient‑poor regions on Earth. The dominant explanation was accidental enrichment or one‑off cultural practices. That explanation doesn’t hold. Terra Preta soils are: * intentionally created * biologically self‑sustaining * centuries to millennia old * still fertile today They are rich not because of a single amendment, but because of a system: * stable carbon forms (what we now call biochar) * continual organic inputs * microbial and fungal abundance * mineral retention instead of leaching And here’s the part modern agriculture still struggles with: > Terra Preta doesn’t just *hold* nutrients — it hosts life. That microbial density doesn’t fade. It propagates. Which is why Terra Preta can be used to inoculate and rebuild dead soils even today, far beyond the Amazon. That isn’t ancient luck. That’s applied biological chemistry — without the reductionism. --- Ancient practices weren’t missing chemistry — they were integrated with it This is where the narrative often goes wrong. Historical and ancient agriculture wasn’t “pre‑chemical.” It was post‑separation. There was no line between: * soil chemistry and soil biology * plant nutrition and ecosystem health * food production and long‑term stability Elements like carbon, nitrogen, phosphorus, calcium, sulfur — what we now shorthand as CHNOPS — were always in play. They just weren’t isolated from the systems that made them functional. Instead of asking: > “What does this plant need?” The question was: > “What does this land need to remain alive?” That difference changes everything. --- Why this matters now Modern agriculture is excellent at extraction. It is far less competent at regeneration. We can measure parts per million while missing collapse. We can correct deficiencies while accelerating imbalance. We can feed plants while starving soil. Historical systems remind us that fertility is not a substance — it’s a relationship. That doesn’t mean we reject chemistry. It means chemistry must return to its proper place: as a *tool*, not the framework. --- Where this series is actually going This is why this blog series does not start with fertilizer laws, laboratory breakthroughs, or industrial frameworks. Those came later — often as partial rediscoveries of truths that were already being lived. Before we talk about: * ratios * cofactors * mineral balance * biological exponents of CHNOPS We have to acknowledge this: > Modern agricultural chemistry did not invent soil health. > It attempted to explain it — and then oversimplified it. The work ahead is not about nostalgia. It’s about reintegration. Historical and ancient agricultural knowledge is not a footnote to agricultural chemistry. It is the baseline reality that chemistry must answer to. And from here, we move forward — carefully, honestly, and without repeating the same mistakes under new names.
Regenerative Agriculture

Understanding Soil Chemistry for Plant Growth

CHNOPS in Balance If you’ve made it this far, you already know something most gardeners never hear: Plants don’t grow because of products. They grow because systems work. CHNOPS is not a checklist. It’s a relationship. Carbon builds structure. Water carries chemistry. Nitrogen pushes growth. Phosphorus manages energy. Sulfur refines quality. When those elements are present but poorly coordinated, plants struggle — even in fertilized soil. --- Nutrient Lockout, Explained Simply Nutrient lockout sounds complicated, but it’s not. Lockout happens when nutrients are present in the soil but unavailable to the plant. This can occur because: * Soil pH is out of range * Oxygen is missing * Biology is inactive * One nutrient overwhelms another Think of soil nutrients like tools in a toolbox. If the lid is closed, it doesn’t matter how many tools are inside. Adding more fertilizer to locked-out soil often makes problems worse, not better. --- pH: The Traffic Cop of Soil Chemistry Soil pH does not feed plants. It controls access. pH determines: * Which nutrients dissolve * Which bind tightly to soil particles * Which microbes thrive or decline In most gardens, a pH between 6.0 and 7.0 keeps traffic flowing. Outside that range: * Phosphorus gets stuck * Calcium and magnesium dominate or disappear * Micronutrients either vanish or become toxic pH doesn’t create nutrients. It tells them where they’re allowed to go. --- Reading Plant Symptoms Without Panic Yellow leaves do not automatically mean nitrogen deficiency. Purple stems are not always phosphorus shortages. Burned leaf edges aren’t always fertilizer problems. Plants show symptoms when systems are stressed, not just when elements are missing. Before reaching for amendments, ask: * Is the soil compacted? * Is it staying wet too long? * Has carbon been replenished? * Has biology been disturbed? Symptoms are messages, not emergencies. --- Balance Beats Perfection Healthy soils are not static. They change with: * Weather * Crops * Management Balance does not mean everything is optimal at all times. It means the system can recover. Carbon buffers mistakes. Biology adapts. Roots explore. --- Final Takeaway If you remember one thing from this entire series, let it be this: Gardening is not about feeding plants. It’s about managing relationships between elements, water, biology, and time. Once you understand CHNOPS, fertilizer labels lose their power — and your soil starts telling you what it needs. That’s not guesswork. That’s literacy.
Soil & Microbiology

Evolution of NPK and Plant Nutrition

From the Law of the Minimum to NPK Thinking How a powerful idea became a simplified prescription Liebig’s Law of the Minimum was never meant to be a formula. It was an observation. A way of explaining why plants fail to thrive even when *most* conditions appear favorable. Growth, Liebig argued, is controlled by the scarcest essential factor—not by the total abundance of resources. In its original form, this idea was careful, contextual, and diagnostic. What happened next was not inevitable—but it was understandable. --- When insight meets scale As agriculture moved into the industrial era, the pressures facing farmers and societies intensified. Food production had to increase. Recommendations had to be standardized. Solutions had to work across regions, climates, and soil types. Liebig’s insight offered a foothold. If plant growth is limited by deficiencies, then identifying and correcting those deficiencies should increase yield. That logic was sound. But scale changes how ideas are applied. --- From diagnosis to prescription The Law of the Minimum began as a way to *identify what was missing*. Over time, it shifted toward a model of *what should be added*. Early soil testing and crop response trials repeatedly highlighted three elements that most often limited yield: * Nitrogen * Phosphorus * Potassium These nutrients were: * required in relatively large quantities * responsive to direct application * measurable with emerging chemical tools They became the focus not because they were the only nutrients that mattered—but because they were the most visible bottlenecks. Thus, NPK was born. --- Why NPK made sense It is important to be clear here: NPK thinking was not careless. Nitrogen drives vegetative growth. Phosphorus supports roots, energy transfer, and reproduction. Potassium influences water regulation, stress tolerance, and yield quality. Correcting deficiencies in these nutrients often produced dramatic, immediate results. Fields greened up. Yields increased. Famines were averted. From the perspective of the time, this was success. --- What was simplified away As NPK became central, other elements quietly moved to the margins. Calcium, magnesium, sulfur, and trace minerals were assumed to be present—or treated as secondary concerns. More importantly, relationships were de-emphasized. Soils were treated as containers. Nutrients as interchangeable inputs. Plants as direct recipients. The Law of the Minimum became less about *which factor is limiting* and more about *which input should be applied*. That distinction matters. --- The garden lesson: when NPK isn’t enough Gardeners encounter this limit quickly. A soil test may show adequate NPK. Fertilizer may be applied faithfully. And still, plants struggle. Leaves yellow. Roots remain shallow. Disease pressure increases. What’s missing is not always a macronutrient. It may be: * calcium affecting soil structure and root access * magnesium disrupting nutrient balance * micronutrients limiting enzyme function * biological activity mediating availability The minimum is still there—it’s just not on the label. --- Yield versus resilience NPK thinking excels at driving yield under controlled conditions. What it does less well is explain: * long-term soil degradation * increasing dependence on inputs * declining crop resilience * rising pest and disease pressure These outcomes are not failures of chemistry. They are consequences of narrow application. The Law of the Minimum was never meant to be a ceiling. It was a warning. --- Respecting the logic, revisiting the frame To critique NPK thinking responsibly, we have to separate: * the validity of Liebig’s insight * from how it was later simplified The insight remains true. Growth is limited by the scarcest factor. The mistake comes when we assume: * that the scarcest factor is always N, P, or K * that adding nutrients guarantees access * that biology can be ignored without consequence --- Setting the stage for balance As tools improved, cracks in the NPK framework became harder to ignore. Soils with “adequate fertility” still failed. Crops responded inconsistently. Health outcomes diverged. These observations didn’t negate Liebig. They extended him. They asked a new question: > *What determines whether a nutrient actually functions?* Answering that question required stepping beyond inputs and into relationships—between elements, organisms, and structure. That is where the next thinkers enter the story. Next, we will look at how agricultural chemistry began to expand again—toward balance, ratios, and the reintroduction of biology into the chemical conversation.
Soil & Microbiology

Evolution of Agricultural Science

From Living Systems to Early Chemistry How observation, necessity, and curiosity shaped the first scientific steps in agriculture The story of agriculture does not move in straight lines. It bends, loops, forgets, rediscovers, and reframes itself as tools change and questions evolve. To understand how we moved from historical and ancient living systems into early Western agricultural chemistry, we have to resist the temptation to turn this into a story of replacement. This is not a tale of old ways being “corrected” by modern science. Nor is it a story of wisdom lost and then heroically recovered. It is a story of people working with the best tools they had, asking better questions as those tools improved. --- Observation was the first laboratory Long before written chemistry, agriculture advanced through observation: * which soils held moisture * which crops failed after repeated planting * which residues improved the next season’s growth * which rotations restored vigor These observations were not casual. They were systematic, cumulative, and transmitted across generations. They formed the basis of farming systems that worked because they were constantly corrected by reality. But observation has limits. You can see *that* something works without knowing *why* it works. And as populations grew, cities formed, and food systems scaled beyond local feedback loops, those limits began to matter. --- Scale, scarcity, and the pressure to explain As agriculture expanded, so did its challenges. Larger populations meant: * repeated cropping of the same land * nutrient depletion that could no longer be solved by movement alone * food shortages that demanded explanation, not just tradition At the same time, societies were changing. Written language, record-keeping, and early mathematics allowed people to track yields, inputs, and outcomes more precisely than ever before. This didn’t erase historical practices—it exposed their mechanisms to scrutiny. The question slowly shifted from: > “What keeps land productive?” to: > “What is land made of, and what do plants take from it?” That shift was not dismissive. It was curious. --- The long road toward chemical thinking What we now call chemistry did not emerge suddenly, nor did it arrive fully formed. Early thinkers were not trying to reduce life to numbers. They were trying to name what they could finally isolate. Progress unfolded in steps: * minerals were distinguished from organic matter * combustion and decay were recognized as transformations, not disappearances * air, water, earth, and fire gave way to more precise substances * weight, mass, and balance became measurable These were revolutionary tools. For the first time, it became possible to trace cause and effect beyond surface appearance. Nutrient loss could be inferred. Inputs could be standardized. Experiments could be repeated and compared. This was not arrogance. It was advancement. --- What early science gained — and what it temporarily set aside Early agricultural chemistry brought clarity where there had been mystery: * plants were shown to take material from soil, air, and water * growth was no longer attributed to vague “vital forces” alone * deficiencies could be identified and corrected deliberately But clarity often comes with narrowing. To study parts, systems had to be simplified. Living complexity was paused so that mechanisms could be seen. Biology was not denied—it was temporarily bracketed. This was a necessary step. You cannot measure everything at once. --- Why this transition deserves respect It is easy, in hindsight, to critique what early science missed. But doing so without acknowledging what it accomplished would be dishonest. The people who began isolating elements, weighing soils, and testing amendments were not dismantling agriculture. They were responding to real problems with the tools available to them. Their work laid the groundwork for everything that followed: * soil testing * nutrient analysis * plant physiology * the eventual integration of biology and chemistry Science did not emerge in opposition to historical systems. It emerged because people wanted to understand them more deeply. --- Setting the stage for what comes next This bridge matters because the rest of this series lives in the tension it creates. Modern soil science exists because historical systems worked. Historical systems are being revisited because modern tools can now explain *why* they worked. The turn back toward biological richness, mineral balance, and living soils is not regression. It is refinement. Before we talk about laws, ratios, or named pioneers, we needed to pause here — at the moment when observation began turning into explanation. From this point forward, the story moves into the era where chemistry gains a voice of its own. Not to replace what came before — but to learn how to listen to it.
Soil & Microbiology

Understanding Soil-Plant Relationships

CHNOPS in Balance If you’ve made it this far, you already know something most gardeners never hear: Plants don’t grow because of products. They grow because systems work. CHNOPS is not a checklist. It’s a relationship. Carbon builds structure. Water carries chemistry. Nitrogen pushes growth. Phosphorus manages energy. Sulfur refines quality. When those elements are present but poorly coordinated, plants struggle — even in fertilized soil. --- Nutrient Lockout, Explained Simply Nutrient lockout sounds complicated, but it’s not. Lockout happens when nutrients are present in the soil but unavailable to the plant. This can occur because: * Soil pH is out of range * Oxygen is missing * Biology is inactive * One nutrient overwhelms another * Soil chemistry shifts under low-oxygen conditions (redox) Think of soil nutrients like tools in a toolbox. If the lid is closed, it doesn’t matter how many tools are inside. Adding more fertilizer to locked-out soil often makes problems worse, not better. --- pH: The Traffic Cop of Soil Chemistry Soil pH does not feed plants. It controls access. pH determines: * Which nutrients dissolve * Which bind tightly to soil particles * Which microbes thrive or decline In most gardens, a pH between 6.0 and 7.0 keeps traffic flowing. Outside that range: * Phosphorus gets stuck * Calcium and magnesium dominate or disappear * Micronutrients either vanish or become toxic pH doesn’t create nutrients. It tells them where they’re allowed to go. --- Reading Plant Symptoms Without Panic Yellow leaves do not automatically mean nitrogen deficiency. Purple stems are not always phosphorus shortages. Burned leaf edges aren’t always fertilizer problems. Plants show symptoms when systems are stressed, not just when elements are missing. Before reaching for amendments, ask: * Is the soil compacted? * Is it staying wet too long? * Has carbon been replenished? * Has biology been disturbed? * Do roots have oxygen to support microbial exchange (rhizophagy)? Symptoms are messages, not emergencies. --- Balance Beats Perfection Healthy soils are not static. They change with: * Weather * Crops * Management Balance does not mean everything is optimal at all times. It means the system can recover. Carbon buffers mistakes. Biology adapts. Roots explore. When oxygen is present, roots and microbes exchange nutrients directly through processes like rhizophagy, and soil chemistry stays in an energy-moving state rather than stalling under reduced (low-oxygen) conditions. This quiet coordination is what keeps CHNOPS working as a system. --- Final Takeaway If you remember one thing from this entire series, let it be this: Gardening is not about feeding plants. It’s about managing relationships between elements, water, biology, and time. Once you understand CHNOPS, fertilizer labels lose their power — and your soil starts telling you what it needs. That’s not guesswork. That’s literacy.
Soil & Microbiology

The Role of Phosphorus in Plants

Phosphorus: Roots, Flowers, and Energy Phosphorus is quiet. It doesn’t make plants explode with green growth like nitrogen. It doesn’t change soil texture like carbon. You can’t see it working — but without it, very little works at all. If nitrogen is growth pressure, phosphorus is energy management. --- ATP: The Plant “Battery” Every living cell runs on energy. In plants, that energy currency is ATP — adenosine triphosphate. ATP is the molecule that: * Stores energy captured from sunlight * Moves energy where it’s needed * Powers root growth, flowering, and seed formation No ATP, no work. Phosphorus is the key component that allows ATP to store and release energy. Without phosphorus, photosynthesis still happens — but the energy can’t be packaged or used efficiently. This is why phosphorus shows up most clearly in: * Root development * Flower initiation * Seed and fruit formation Phosphorus doesn’t make plants bigger. It makes them functional. --- Why Phosphorus Doesn’t Move Easily in Soil Unlike nitrogen, phosphorus is stubborn. Once it enters the soil, it quickly reacts with: * Calcium in alkaline soils * Iron and aluminum in acidic soils When that happens, phosphorus becomes chemically bound and immobile. It doesn’t wash through the soil profile. It doesn’t travel far from where it’s placed. These reactions are influenced by what chemists call redox — whether the soil environment is rich in oxygen or starved of it. In well-aerated soils, phosphorus tends to stay tightly bound. In compacted or waterlogged soils where oxygen is limited, those bonds can temporarily loosen, changing phosphorus availability without adding anything new. This has two important consequences: 1. Roots must grow *to* phosphorus 2. Placement and soil condition matter more than quantity Broadcasting phosphorus across the soil surface often feeds microbes and chemistry — not roots. Healthy root systems, mycorrhizal fungi, and good soil structure matter more than heavy application. --- Bone Meal Myths and Soil Testing Realities Bone meal has a long reputation as a flowering fertilizer. Here’s the reality: * Bone meal releases phosphorus very slowly * It only works well in acidic soils * In many gardens, phosphorus is already abundant but unavailable Adding more phosphorus to soil that already has enough does not improve yields. In fact, excess phosphorus: * Interferes with micronutrient uptake * Suppresses beneficial fungal partnerships * Accumulates for years with no benefit This is why phosphorus is the nutrient most likely to be overapplied and least likely to fix a problem. It helps to remember: Solid phosphorus builds soil reserves — and often becomes locked. Water-soluble phosphorus can serve immediate plant needs. Neither replaces the need for roots, biology, and balance. A basic soil test tells you more about phosphorus than any product label ever will. --- Phosphorus Works Best With Roots and Biology Because phosphorus doesn’t move, plants rely on: * Fine root hairs * Mycorrhizal fungi * Stable soil structure Carbon builds the habitat. Water moves chemistry. Nitrogen pushes growth. Phosphorus makes sure the energy goes where it’s needed. When roots, microbes, and soil structure are working together, plants can access phosphorus already present in the soil. In some situations, small amounts of water-soluble phosphorus can support short-term energy demands — but only when the underlying system is healthy. --- Takeaway for the Garden If you remember one thing from this episode, let it be this: Phosphorus is not about more. It’s about access. In the next post we’ll cover Sulfur — the overlooked element behind flavor, protein, and the difference between plants that grow and plants that thrive.
Soil & Microbiology

Nitrogen's Role in Plant Growth

Nitrogen: Growth, Greens, and Mistakes Nitrogen is the nutrient everyone thinks they understand — and the one most often misunderstood. If carbon is the structure of life and water carries chemistry and breath, nitrogen is growth pressure. It pushes plants forward. It tells them to make leaves, stretch stems, and expand quickly. That power is useful. It is also easy to misuse. --- Why Nitrogen Makes Plants Leafy Nitrogen is a core component of: * Chlorophyll (the green pigment in leaves) * Amino acids (the building blocks of proteins) * Enzymes that drive plant metabolism When nitrogen is abundant, plants prioritize leaf production. Leaves capture sunlight. More leaves mean more photosynthesis. More photosynthesis means more energy. This is why nitrogen makes plants green fast. But fast growth is not always strong growth. Plants grown with excess nitrogen often have: * Soft, watery tissues * Rapid vertical growth with weak stems * Increased pest and disease pressure Nitrogen does not build structure. Carbon does. Nitrogen accelerates what carbon supports.  Plants do not primarily absorb nitrogen as an isolated chemical event. They absorb it through biological mediation. 1. Microbes decide when, how fast, and in what form nitrogen becomes available 2. Nitrogen without microbial activity is either: * Lost (leached, volatilized), or * Overwhelming (growth without structure) This is why the same amount of nitrogen behaves differently in, Nitrogen isn’t missing — the interpreters are. --- Sources of Nitrogen: Manure, Legumes, Urine, and Cover Crops Nitrogen does not arrive in soil the same way from every source. Manure supplies nitrogen already processed through an animal. It is fast-acting but can be uneven and easily lost if not protected by carbon. Legumes partner with bacteria that capture nitrogen from the air and store it in root nodules. This nitrogen becomes available slowly, as roots die back and decompose. Urine is one of the most nitrogen-rich inputs available on a homestead. It is immediately available and extremely easy to overapply. Without carbon, it burns. Cover crops manage nitrogen rather than dumping it. They capture excess nitrogen, store it in plant tissue, and release it back into the soil when terminated. Fish Amino Acids (FAA) provide nitrogen in a biologically gentle, immediately usable form. FAA is made by fermenting fish waste with sugar, breaking proteins down into amino acids. Because amino acids are already partially processed, plants and microbes can use FAA quickly — without the growth shock common with synthetic nitrogen. FAA works best: * At low doses * During active growth * In soils with living biology Used heavily or without carbon, FAA can still push excessive leafy growth. Used sparingly, it feeds both plants *and* microbes. In every case, nitrogen behaves best when paired with carbon. --- Why Too Much Nitrogen Hurts Fruiting Fruit, flowers, and seeds are not growth priorities. They are reproductive investments. When nitrogen is abundant, plants receive a clear signal: *Keep growing. Don’t stop. Don’t reproduce yet.* This leads to: * Lush foliage with few flowers * Delayed or reduced fruit set * Large plants that look healthy but underperform Excess nitrogen also interferes with: * Potassium uptake (needed for fruit quality) * Calcium movement (important for cell strength) The result is often beautiful plants with disappointing harvests. This is a critical but rarely stated truth: > Nitrogen does not become protein by itself. To convert nitrogen into functional amino acids and proteins, plants require cofactors. 1. Sulfur → for cysteine & methionine 2. Magnesium → enzyme activation 3. Iron & manganese → electron transfer 4. Molybdenum → nitrate reduction 5. Calcium → cell structure during rapid growth When Nitrogen accumulates as nitrates, growth looks lush but tissues are weak, plants become pest magnets and “High nitrogen” fields produce low-protein crops Nitrogen Alters Plant Hormone Balance This is where things get really interesting. Nitrogen directly influences plant hormones, especially: Auxins (growth & elongation) * Nitrogen increases auxin production * Drives vertical, leafy growth * Explains “leggy” plants under excess N Cytokinins (cell division & leaf expansion) * Elevated with nitrogen availability * Promote shoot growth over root growth Gibberellins (rapid expansion) * Triggered by abundant nitrogen * Lead to fast but weak tissue development Ethylene & Abscisic Acid (stress & reproduction) * Suppressed when nitrogen is abundant * Flowering and fruiting are delayed So when you say: > *“Too much nitrogen hurts fruiting”* What you’re really saying is: > Nitrogen keeps the plant hormonally juvenile. It tells the plant: *“Resources are abundant. Keep growing. Don’t reproduce yet.”* --- Takeaway for the Garden Nitrogen does not act alone, and it does not act directly. Every bit of nitrogen a plant uses is filtered through carbon, minerals, microbes, and hormones. Carbon builds the structure that holds nitrogen in place. Biology controls when and how it becomes available. Minerals determine whether it becomes real protein or remains excess nitrate. Hormones decide what that growth turns into — leaves, roots, or fruit. When nitrogen is abundant but the rest of the system is out of balance, plants grow fast, stay weak, and delay reproduction. Nitrogen makes plants grow. Carbon decides whether that growth lasts. Balance decides whether it fruits. In the next post, we’ll move to Phosphorus — the quiet element behind roots, flowers, and the energy that makes all growth possible.
Soil & Microbiology

Understanding Plant Water Needs

Hydrogen & Oxygen: Water Is More Than H₂O When we talk about watering the garden, we usually reduce it to a simple question: *Did I water enough?* But plants are not asking for water alone. They are asking for hydrogen and oxygen, delivered in very specific ways, at very specific times. Water is not just moisture. It is chemistry, movement, and breath. --- How Roots Actually Absorb Water Roots do not drink the way a straw drinks. They absorb water through a process driven by osmosis, root pressure, transpiration, and a lesser-known but critical biological process called rhizophagy. Tiny root hairs create an enormous surface area. Water moves from the soil into the root when: * The soil has available moisture * Dissolved nutrients are present * Oxygen is available in the pore spaces Hydrogen from water becomes part of sugars, proteins, and fats. Oxygen supports respiration — roots must *breathe* to function. --- Rhizophagy: When Roots and Microbes Trade Rhizophagy is the process by which plants cycle microbes through their root tips to extract nutrients — including nitrogen, micronutrients, and water-associated ions. Here’s the simple version: * Roots release sugars to attract microbes * Microbes enter root tip cells * The plant strips nutrients from them using oxygen and reactive compounds * Microbes are expelled back into the soil to repeat the cycle This process only works when oxygen is present. In well-aerated soil, rhizophagy helps plants access water and nutrients that would otherwise remain unavailable. In saturated or compacted soil, the process breaks down. This is another reason water alone is not enough. If water is present but oxygen is missing, absorption slows or stops. Roots don’t drown from too much water. They suffocate from lack of oxygen. --- Overwatering vs. Oxygen Starvation Overwatering is rarely about volume alone. It’s about time and space. Healthy soil contains: * Solid particles (minerals and organic matter) * Water-filled pores * Air-filled pores When soil stays saturated: * Air-filled pores collapse * Oxygen is displaced * Beneficial microbes die back * Roots switch from respiration to survival mode Symptoms often blamed on disease or nutrient deficiency — yellowing leaves, stunted growth, wilting — are frequently oxygen problems, not water problems. Wet soil without oxygen becomes hostile soil. --- Soil Aeration and Drainage Good drainage is not about dry soil. It’s about balanced pore space. Carbon-rich soil creates structure that allows: * Excess water to move away * Fresh oxygen to move in * Roots to explore freely Practices that improve hydrogen and oxygen balance include: * Adding compost to build aggregation * Using mulch instead of bare soil * Avoiding compaction from foot traffic or heavy equipment * Growing deep-rooted plants and cover crops Water should move *through* soil, not sit *on* it. --- Why Hydrogen and Oxygen Matter Together Plants use hydrogen to build carbohydrates. They use oxygen to release energy from those carbohydrates. One without the other causes stress. Too dry, and chemistry stops. Too wet, and respiration stops. Healthy soil manages both. --- Takeaway for the Garden If you remember one thing from this episode, let it be this: Watering is not about keeping soil wet. It’s about keeping soil alive. In the next post, we’ll move to Nitrogen — why green growth can be misleading, and why too much nitrogen often creates weaker plants instead of stronger ones.
Soil & Microbiology

Carbon's Role in Soil Health

Carbon: The Backbone of Soil Life When people hear the word carbon, they usually think of climate change, smoke, or something abstract and distant. In the garden, carbon is none of those things. Carbon is structure. Carbon is food. Carbon is the framework that holds life together. If CHNOPS is the alphabet of life, carbon is the sentence structure — without it, nothing meaningful can be built. Carbon Is More Than "Organic Matter" “Organic matter” is one of the most overused and least explained phrases in gardening. When we say organic matter, what we really mean is carbon-based material in various stages of decay: Dead leaves Wood chips Roots Compost Manure Microbial bodies Carbon is the backbone of every sugar, fiber, protein, and fat in your soil. Microbes don’t eat nitrogen — they eat carbon, and they use nitrogen to process it. Think of carbon as the fuel, not the fertilizer. Without carbon: Soil collapses into dust or concrete Water runs off instead of soaking in Nutrients wash away or lock up Roots struggle to breathe Healthy soil isn’t “rich” because it’s dark — it’s dark because it’s carbon-loaded. Compost, Mulch, and Soil Structure When you add compost or mulch, you’re not just adding nutrients. You’re adding architecture. Carbon helps soil particles bind into aggregates — tiny clumps that create: Air pockets for roots and microbes Pathways for water infiltration Stability against erosion This is why: Mulched beds stay moist longer Compost-amended soil is easier to work Roots grow deeper and wider Fresh mulch feeds fungi first. Compost feeds bacteria first. Both matter. Fungi stretch carbon into long chains that glue soil together. Bacteria chew carbon into smaller, faster-acting forms. Together, they create a living sponge beneath your feet. Carbon vs. Nitrogen: The C:N Balance Here’s where many gardeners get into trouble. Microbes need carbon and nitrogen at the same time. When carbon is high and nitrogen is low, microbes borrow nitrogen from the soil to do their work — temporarily making it unavailable to plants. This is called nitrogen immobilization, and it’s not a mistake. It’s a process. A simple way to think about it: High-carbon materials (straw, wood chips, leaves) = slow, structural, long-term soil building Low-carbon / high-nitrogen materials (manure, fresh grass, kitchen scraps) = fast, green, short-term activity The magic happens when they’re balanced. That balance is called the carbon-to-nitrogen ratio (C:N). You don’t need to calculate it — you just need to recognize it. If plants look pale after heavy mulching, the soil isn’t broken. It’s busy. Carbon always comes first. Nitrogen follows. Why Carbon Comes Before Fertilizer Plants don’t grow in dirt — they grow in soil food webs powered by carbon. You can add nitrogen, phosphorus, and potassium all day long, but without carbon: Microbes can’t cycle nutrients Roots can’t access what’s there Soil can’t hold what you add Carbon is the bank. Nutrients are the currency. Build the bank first. Takeaway for the Garden If you remember only one thing from this post, let it be this: You are not feeding plants. You are feeding the system that feeds plants. And that system runs on carbon. Happy Gardening!
Soil & Microbiology

CHNOPS: Building Blocks of Life

An Introduction to CHNOPS: The Chemistry That Connects All Life We're going to take a completely different path into gardening and agriculture. If you've spent any time around a farm store, garden center, or industry conversation, you already know how it usually starts: NPK. Nitrogen. Phosphorus. Potassium. Synthetic or natural. Liquid or granular. Ratios and recommendations. We're not starting there. Instead, we're going to start with how life itself is built — because plants, animals, soil, fungi, and humans all share the same fundamental truths. Meet CHNOPS This series begins with an acronym my daughter loved as a child when she first fell in love with chemistry — and still loves today: (SCHNOPS) C–H–N–O–P–S Carbon Hydrogen Nitrogen Oxygen Phosphorus Sulfur These six elements form the foundation of nearly every living thing you will ever grow, eat, raise, or care for. Why CHNOPS Matters When you think about gardening or farming, these are usually the last things you think about. And that's exactly what we're going to change. Because whether it's green and rooted, walking on two legs, four legs, flying on wings, or pushing up a mushroom cap — life is built from the same six pieces. The soil doesn't escape that truth. Neither do we. What You'll Learn in This Series In this series, we're not going to start by asking "What fertilizer should I buy?" We're going to ask a better question: What is life made of, and how does the garden assemble it? Once you understand that, fertilizers stop being mysterious products and start becoming building materials. Soil problems stop being frustrating and start becoming diagnosable. Gardening stops being guesswork and becomes a conversation with biology. We're going to learn something new together — something deeper than labels and ratios — and we're going to build our understanding from the ground up. I hope you'll join me.
Soil & Microbiology

Advanced Soil Building Techniques for Maximum Fertility

PremiumBuilding truly fertile soil goes beyond basic composting and mulching. While those foundations are essential, there are advanced techniques that can dramatically accelerate soil improvement and create the kind of rich, living soil that produces exceptional crops year after year. In this guide, we'll explore the science-backed methods I've used to transform compacted clay into rich, loamy soil in just two growing seasons. These aren't theoretical concepts—these are the exact techniques that have allowed me to grow tomatoes that taste like summer itself and greens that practically glow with vitality. The Soil Food Web Approach Understanding the soil food web is the key to unlocking your soil's potential. It's not just about adding nutrients—it's about creating a living ecosystem that continuously cycles nutrients and builds soil structure. Bacterial vs. Fungal Dominance Different crops thrive in different soil ecosystems. Annual vegetables prefer bacterial-dominated soil, while perennial trees and shrubs thrive in fungally-dominated environments. Here's how to shift the balance: For Bacterial Dominance (Vegetables): - Apply fresh green compost (grass clippings, fresh manure) - Use bacterial inoculants - Maintain neutral to slightly alkaline pH (6.5-7.0) - Till shallowly or use no-till methods - Keep soil consistently moist For Fungal Dominance (Perennials): - Apply wood chips and aged woody compost - Use mycorrhizal fungal inoculants - Maintain slightly acidic pH (5.5-6.5) - Never till—it destroys fungal networks - Allow soil to dry between waterings The Korean Natural Farming Approach Korean Natural Farming (KNF) offers powerful soil-building techniques that work with nature's intelligence: Indigenous Microorganisms (IMO) Collection: 1. Collect native forest soil from undisturbed areas 2. Mix with equal parts cooked white rice 3. Cover with breathable cloth in a wooden box 4. Let sit for 5-7 days until white mold forms 5. Mix with brown sugar (1:1 ratio) to stabilize 6. Apply to compost or directly to soil beds This technique captures and multiplies the beneficial microorganisms perfectly adapted to your local climate and soil conditions. Advanced Composting Techniques Hot Composting for Pathogen Control Traditional cold composting takes 6-12 months. Hot composting, when done correctly, produces finished compost in just 18 days: The 18-Day Hot Compost Method: Days 1-3: Build pile with optimal carbon:nitrogen ratio (30:1) - Layer browns (dried leaves, straw, wood chips) - Layer greens (grass clippings, kitchen scraps, manure) - Maintain 50-60% moisture (squeeze test: few drops) - Build to minimum 3x3x3 feet for thermal mass Days 4-6: Monitor temperature (should reach 130-160°F) - Turn pile when temperature begins to drop - Re-moisten if needed - Add air pockets while turning Days 7-18: Turn every 2-3 days - Temperature will gradually decrease - Maintain moisture - Pile will shrink by 50-60% - Finished compost smells earthy, not rotten Compost Tea for Immediate Microbial Boost Actively aerated compost tea (AACT) delivers billions of beneficial microorganisms directly to plant roots: Equipment Needed: - 5-gallon bucket - Aquarium air pump (minimum 2 outlets) - Air stones - Unsulfured molasses - Finished compost - Non-chlorinated water Brewing Process: 1. Fill bucket with non-chlorinated water (let tap water sit 24 hours) 2. Add 2-3 cups finished compost in mesh bag 3. Add 1-2 tablespoons unsulfured molasses (microbe food) 4. Aerate continuously for 24-36 hours 5. Apply immediately (microbes die after 4 hours without aeration) Application: - Dilute 1:10 for soil drench - Use undiluted for foliar spray - Apply early morning or evening - Use within 4 hours of finishing brew Cover Crop Cocktails Single-species cover crops are good. Multi-species cocktails are transformational. The 7-Species Soil Builder Mix This mix addresses multiple soil needs simultaneously: Deep Rooting Layer (breaks compaction): - Daikon radish (taproots penetrate 6+ feet) - Forage turnips (mine nutrients from subsoil) Nitrogen Fixation Layer: - Crimson clover (fixes 100+ lbs N/acre) - Hairy vetch (cold-hardy, fixes 150+ lbs N/acre) Biomass Layer (organic matter): - Oats (fast-growing, easy to terminate) - Annual ryegrass (fibrous roots build structure) Diversity Layer (attracts beneficials): - Buckwheat (quick-growing, attracts pollinators) Timing: - Plant in late summer/early fall - Allow to grow through winter (or until flowering) - Terminate 2-4 weeks before planting - Use crimper-roller or mow and leave as mulch Grazing Cover Crops If you have chickens, integrate them into your soil-building: 1. Plant cover crop cocktail 2. Let grow to maturity (seed heads forming) 3. Move chickens into area with electric netting 4. Allow grazing for 1-3 days 5. Move chickens to next section 6. Chicken manure + trampled residue = gold for soil Biochar: The 1,000-Year Soil Amendment Biochar is charcoal created through pyrolysis—burning organic matter in low-oxygen conditions. It persists in soil for centuries, providing permanent soil structure and microbial habitat. Making Biochar at Home Cone Kiln Method: 1. Build small fire in metal barrel with holes drilled in sides 2. Add dry hardwood pieces (oak, maple, fruit trees) 3. Allow to burn hot until flames turn blue 4. Cover with metal lid to cut off oxygen 5. Let cool completely (24 hours) 6. Result: Lightweight, porous charcoal Charging Biochar Before Application: Raw biochar can temporarily tie up nutrients. Charge it first: 1. Soak in compost tea for 24 hours OR 2. Mix with compost (1:1 ratio) and let sit for 2 weeks OR 3. Add to chicken bedding for 4 weeks before application Application Rate: - 5-10% by volume in garden beds - Mix into top 6 inches of soil - One-time application (lasts indefinitely) Benefits: - Increases water retention by 18-20% - Provides permanent habitat for microorganisms - Sequesters carbon for centuries - Reduces nutrient leaching Mineral Balancing for Optimal Nutrition Plants need more than NPK. A proper mineral balance produces healthier plants and more nutritious food. The Albrecht Method Dr. William Albrecht pioneered the concept of base cation saturation ratios: Ideal Ratios: - Calcium: 60-70% of cation exchange capacity - Magnesium: 10-20% - Potassium: 2-5% - Sodium: <3% How to Rebalance: 1. Get professional soil test (Albrecht method) 2. Identify which minerals are deficient or excessive 3. Apply specific amendments: - High calcium: Gypsum or lime - High magnesium: Dolomitic lime - High potassium: Langbeinite or greensand - Too acidic: Agricultural lime - Too alkaline: Sulfur Trace Minerals Matter Don't forget the micronutrients: Boron: Critical for calcium uptake - Apply 20 Mule Team Borax (1 tablespoon per 100 sq ft annually) Molybdenum: Essential for nitrogen fixation - Apply sodium molybdate or kelp meal Copper, Zinc, Manganese: Often deficient in alkaline soils - Apply chelated minerals or rock dust Year-Round Soil Building Calendar Spring (March-May): - Apply compost tea every 2 weeks - Mulch beds with 2-4 inches wood chips - Plant nitrogen-fixing cover crops between rows Summer (June-August): - Continue compost tea applications - Add fresh compost to beds - Maintain mulch depth Fall (September-November): - Plant cover crop cocktails - Apply mineral amendments based on soil test - Make and apply biochar Winter (December-February): - Build compost piles - Plan next season's rotations - Study soil biology (you're already doing it!) Integration: Putting It All Together The most powerful approach combines multiple techniques: Year 1: Foundation - Soil test and mineral balancing - Add biochar (one-time) - Plant cover crop cocktail - Begin hot composting Year 2: Intensification - Weekly compost tea during growing season - Continue cover cropping in rotation - Add annual compost applications - Integrate chickens if possible Year 3+: Maintenance - Soil retesting (every 2-3 years) - Ongoing compost and cover crop rotations - Reduced amendments needed as soil improves The Results When you implement these advanced soil-building techniques, you'll notice: Within 6 months: - Improved soil structure (easier to work) - Better water infiltration - Earthworm populations increasing Within 1 year: - Visibly darker soil color (organic matter) - Plants grow faster and stronger - Reduced pest and disease pressure Within 2-3 years: - Soil that forms perfect balls when squeezed - Minimal fertilizer inputs needed - Crops that taste noticeably better - Soil that smells rich and earthy Your Turn These techniques might seem overwhelming at first, but start with one or two that excite you most. Soil building is a journey, not a destination. I'd love to hear about your experiences with these methods. Share your successes (and challenges!) in the comments below. --- Want more in-depth soil content? Premium members get access to: - Video tutorials for each technique - Printable cheat sheets and calendars - Private community for questions and support - Monthly live Q&A sessions [Upgrade to Premium Membership →]
Soil & Microbiology

Dandelion Power

Unlocking Dandelion Power: Nature's Soil Superhero Have you ever been out in your garden, enjoying a sunny day, when your eyes land on those pesky yellow flowers sprouting among your prized plants? You might think, “Ugh, not another dandelion!” But here’s a fun twist: those little yellow blooms are not just weeds. They’re actually superheroes for your soil! Let's dive into how dandelions can transform your garden from a compacted mess into a thriving ecosystem. Dandelions: The Unsung Heroes of Soil Health When I first started gardening, I had an uncanny ability to kill plants. I thought I was doing everything right, but my soil was compacted, and my plants struggled. Then I noticed dandelions popping up in the toughest spots. I decided to leave them be and see what would happen. To my surprise, as those dandelions grew, the soil became much easier to work with, and my other plants started to thrive. Here are a few reasons why you might want to embrace these "weeds": 1. Deep Taproots – The Soil Breakers Dandelions have impressive taproots that can dig deep into the ground—sometimes up to 3 feet long, but commonly around 6 to 18 inches. This ability helps break up compacted soil, allowing air, water, and nutrients to reach the roots of other plants. Think of it this way: if your garden soil is like a crowded city, dandelions act as construction crews, creating new roads and pathways. 2. Nutrient Mobilizers – Feeding the Soil These yellow beauties are also fantastic at bringing nutrients to the surface. Dandelions pull minerals like calcium and potassium from deep within the soil and deposit them closer to the surface when their leaves decompose. This means that when you’re ready to plant your vegetables or flowers, those nutrients are right there, waiting to be absorbed. 3. Attracting Beneficial Bacteria – Building Soil Life Dandelions also support beneficial soil bacteria that help break down organic matter and enhance soil health. These microorganisms are essential for a thriving garden ecosystem. When dandelions grow, they create a habitat for these tiny helpers, making your soil healthier and more productive. 4. Dandelions and Pollinator Support – Friends of the Garden Another reason to embrace dandelions is their role in supporting pollinators. Those vibrant yellow blooms are one of the first sources of nectar and pollen available in spring, attracting bees, butterflies, and other beneficial insects. By allowing dandelions to grow, you're providing essential food for these crucial pollinators, helping to sustain their populations. 5. Dandelions as Ground Cover – Protecting Your Soil Dandelions can also serve as a natural ground cover. Their broad leaves spread out, providing shade to the soil underneath and minimizing evaporation. This can be particularly beneficial during hot summer months when soil moisture can quickly diminish. By allowing dandelions to thrive, you're helping to keep your soil cooler and retain moisture. Dandelions as Medicine: A Heart-Healthy Ally Dandelions aren’t just great for the garden; they also have impressive medicinal properties that can support heart health and even interfere with harmful viruses. Research suggests that compounds found in dandelion leaves can inhibit the interaction between the SARS-CoV-2 spike protein and our body's ACE2 receptor. This is important because it helps prevent the virus from entering our cells, making dandelions a unique ally in times of health crises. Additionally, dandelions are rich in antioxidants and bioactive compounds that can help reduce inflammation and support overall cardiovascular health. Their high levels of potassium may assist in maintaining healthy blood pressure, while dandelion root has been traditionally used to promote liver health, which is essential for effective blood circulation. Cooking with Dandelions: Delicious and Nutritious! Now that you’re convinced of dandelions’ benefits in the garden and their medicinal properties, why not take it a step further and explore some tasty ways to use them in your kitchen? Dandelions are not just good for the soil; they’re also packed with nutrients and can be used in various recipes! 1. Dandelion Salad One of the simplest ways to enjoy dandelions is in a fresh salad. Gather young dandelion leaves (the younger, the better, as they’re less bitter) and toss them with your favorite salad ingredients. Add some cherry tomatoes, sliced cucumbers, and a light vinaigrette for a refreshing dish. The leaves add a unique, slightly peppery flavor that can elevate any salad! 2. Dandelion Tea If you're looking for a soothing beverage, try brewing dandelion tea. Simply steep fresh dandelion leaves or flowers in boiling water for about 10 minutes. You can enjoy it plain or sweeten it with honey. This herbal tea is not only delicious but also has detoxifying properties, making it a great addition to your wellness routine. 3. Dandelion Wine For the adventurous, consider making dandelion wine! It's a fun project that requires dandelion flowers, sugar, lemon, and water. After gathering a good amount of flowers, let them ferment with the other ingredients for a few weeks. The result is a unique, homemade wine that celebrates the beauty of dandelions in a whole new way! The Takeaway: Embrace the Dandelion! Next time you spot a dandelion in your garden, consider the benefits they bring. Instead of pulling them out, think about how they might be helping your soil and your health. You could even let a few grow and observe how they change the dynamics of your garden. Want to upcycle your garden space? Embrace dandelions as your allies in creating a healthier, more productive environment. If you’re still skeptical, try planting some dandelions intentionally and see how they perform. You might just find yourself welcoming those cheerful yellow flowers into your garden family! Happy gardening, friends! Remember, nature has a way of surprising us, and sometimes the best solutions come from the most unexpected places. Who knew dandelions were such powerful allies? 🌼
Soil & Microbiology

How to Apply KNF Inputs

And What To Do If You Apply Them Wrong! I’ll be the first to admit it — even when you know your KNF inputs well, sometimes you’re rushing to get ahead of the rain (like I was this evening!) and you make a little mistake. Tonight, I went out to apply a soil drench of JMS (JADAM Microbial Solution)... and accidentally sprayed the whole plant instead of just the soil. Whoops! That got me thinking — this is a perfect topic for a quick blog post, because these kinds of little mix-ups happen to everyone. And the good news? KNF is very forgiving if you know how to handle it. So here’s a simple guide to: * The different types of KNF applications * How they should be used properly * What to do if you get it wrong (like I did tonight!) * * * The Main Types of KNF Applications Soil Drench Purpose: Feed the soil microbes and improve soil life and fertility. How to apply: * Water around the base of the plant, near the roots. * Try not to splash it up onto the leaves. Common inputs: JMS, IMO, FPJ + LAB * * * Foliar Spray Purpose: Feed the plant directly through the leaves, deter pests, strengthen immunity. How to apply: * Use a fine mist, covering both top and bottom of leaves. * Do this early morning or evening — not during full sun. Common inputs: FPJ, LAB, OHN * * * Seed Soak Purpose: Inoculate seeds with beneficial microbes before planting. How to apply: * Brief soak in diluted solution before planting. Common inputs: FPJ, LAB, OHN * * * Compost or Pile Treatment Purpose: Introduce microbes to compost to help it break down faster and better. How to apply: * Light spray to moisten pile — don’t drench it. Common inputs: JMS, LAB, OHN, IMO * * * Animal Bedding Treatment Purpose: Reduce odor, control pathogens, and balance microbes in animal bedding. How to apply: * Mist lightly onto bedding — again, not soaking it. Common inputs: LAB, OHN, FPJ * * * What To Do If You Misapply? Tonight’s example: * I accidentally sprayed JMS on the whole plant instead of just the soil. Is this a disaster? Not at all! If this happens: * If the leaves are very wet and you have time, you can rinse gently with plain water to remove excess JMS. * If rinsing isn’t practical, don’t worry — most of the time the plant will be fine. Just observe for any spots or residue. * * * Other common “oops” moments: Too strong FPJ foliar spray: * May cause leaf burn → flush with water if needed. Too strong OHN: * Can stress the plant → dilute properly next time. Overdoing LAB: * Rarely a big problem, but balance is key — less is more. * * * Best Practices & Tips Always match the input to the plant’s growth stage: * Vegetative stage: FPJ + LAB * Flowering/fruiting: FPJ + LAB + OHN * Soil health: JMS, IMO * Keep an application log — it helps track what worked and what didn’t. Double-check your dilution ratios before spraying. Remember: Stronger is not better — KNF works with gentle, consistent support. * * * In Closing: KNF Is Resilient Even long-time practitioners sometimes grab the wrong sprayer or apply the wrong input — and that’s okay! Plants are remarkably resilient. As long as you observe and adjust, these little mistakes become learning moments, not disasters. A one-time mistake, like spraying JMS on the leaves, might not cause lasting harm. But repeated misapplications — like using vegetative FPJ during fruiting — can lead to yield loss, disease susceptibility, or even crop failure under stress conditions. So tonight, my plants got a little extra JMS shower... and tomorrow I’ll go back to my usual schedule — with a smile, because every mistake is part of the journey.
Korean Natural Farming (KNF)

LAB Troubleshooting and Batch Tweaks

PremiumHow to Refine Your Lactic Acid Bacteria Process in Korean Natural Farming So, you’ve made your first batch of Lactic Acid Bacteria (LAB). Maybe it went great, or maybe you ran into a few issues. Don’t worry — that’s all part of the learning process. Now we’re focused on troubleshooting common problems and adjusting the LAB method to work with your unique climate, materials, and homestead goals. * * * Common Issues and How to Fix Them 1. It didn’t separate properly. * _Cause:_ Temperature may have been too low, or your milk was ultra-pasteurized. * _Fix:_ Use raw or low-temp pasteurized milk and keep the fermenting jar in a warm (but not hot) spot. 2. It smells rotten, not sour. * _Cause:_ Contamination or anaerobic conditions. * _Fix:_ Make sure the container is loosely covered to allow gas exchange. Try again with clean tools. 3. Mold on top. * _Cause:_ Often happens with exposure to air. * _Fix:_ A little white mold can be scraped off; colored mold (green/black) means you should start over. 4. Too fast or too slow. * _Cause:_ Fermentation is temperature sensitive. * _Fix:_ Track your room temps. Ideal range is 68–86°F (20–30°C). Cooler = slower; warmer = faster. * * * Batch Adjustments for Your Climate * Hot and humid: Use smaller batches and refrigerate sooner. * Cool and dry: Let your rice water sit a little longer before adding to milk. * Wild temperature swings: Try fermenting in a cooler or insulated box. * * * Scaling LAB for Homestead Use When you’re ready to use LAB more regularly — for livestock, compost, or field sprays — it’s helpful to make a larger batch and shelf-stabilize it: * Stabilizing with Molasses or Brown Sugar: After straining your LAB serum, mix 1:1 with molasses to create a shelf-stable version. Store in a cool, dark place. * Storage Tips: Unstabilized LAB lasts 3–6 months in the fridge. Stabilized with molasses or brown sugar, it can last a year or more. * * * Observational Tips: Knowing When LAB is Working * In Animals: Shinier coats, reduced smell in pens, better digestion. * In Soil/Compost: Quicker breakdown, earthy smell, less ammonia odor. * In Sprays: Reduced mildew, better leaf shine, stronger plant vigor. Take notes and compare before/after observations. This is the start of your KNF data log. * * * Quick Notes on Dilution * Livestock Water: 1 part LAB : 1,000 parts water (about 1 tsp per gallon) * Foliar Spray: 1:500 or 1:1,000 (try a test patch first) * Soil Drench or Compost: 1:500 or 1:1,000 works well * * * Next Up: Level 3 – Integrating LAB with Other KNF Inputs In Level 3, we’ll dive into combining LAB with FPJ, OHN, and IMO for greater synergy — especially when caring for chickens, soil, and compost piles.
Regenerative Agriculture

LAB in Action

Building a System with LAB and Other KNF Inputs Now that you’ve made LAB and tested it around the farm, it’s time to integrate it into a larger Korean Natural Farming system. Level 3 is where things start to get exciting — and synergistic. LAB plays well with others, especially Fermented Plant Juice (FPJ), Oriental Herbal Nutrient (OHN), and Indigenous Microorganisms (IMO). When used together, these KNF inputs amplify one another’s strengths. * * * Why Combine LAB with Other KNF Inputs? Each input in KNF has a purpose: * LAB breaks down nutrients, regulates bacteria, and supports gut and soil health. * FPJ provides fresh plant hormones and nutrients. * OHN brings plant-based immune boosters and fungal resistance. * IMO reintroduces local microbial life into your system. When you combine them properly, you’re not just feeding your soil or animals — you’re rebuilding a living, resilient ecosystem. * * * Example Integrations 1. Spray for Soil Revitalization: * LAB (1:1000) * FPJ (1:500) * OHN (1:1000) * IMO 3 or 4 (applied as a pre-soak or solid layer) * Apply during early morning or late afternoon for best microbial activity. 2. Livestock Water Mix (Chickens, Pigs, Cattle): * LAB (1 tsp/gallon) * FPJ (optional 1 tsp/gallon for energy) * OHN (few drops per gallon for immunity) * Frequency: 1–2x per week in clean water 3. Compost Acceleration Blend: * LAB (1:1000) * FPJ (1:500) * OHN (1:1000) * Spray or pour while turning pile; follow with IMO if available. * * * Field Notes: Timing and Synergy * LAB thrives early in microbial succession. Use it first, or early in composting. * FPJ is plant-aligned. Use during vegetative or flowering stages. * OHN works well in transition seasons and disease-prone times. * IMO is best added once soils have begun to warm and moist conditions return. Keep a log of what you apply, when, and what results you observe. You’ll start to notice patterns that help you refine timing and ratios for your specific ecosystem. * * * Pro Tip: LAB as a Primer Try spraying LAB 24–48 hours before applying IMO or FPJ. This can “prime” the environment by reducing pathogens and preparing the space for beneficial organisms and nutrients to take hold. * * * Next Up: Level 4 – Scaling LAB Systems and Conducting Field Trials In Level 4, we’ll move into data-driven applications, comparing batches, setting up small trials, and planning for larger field implementation. You’ll learn how to use LAB not just as an ingredient — but as part of a measurable, repeatable system.
Korean Natural Farming (KNF)

LAB Mastery

Trials, Data Logs & Scaling for Whole-System Use Implementing LAB Strategically Across the Farm At Level 4, we move beyond small batches and basic applications. This is where LAB becomes a strategic, data-driven part of your KNF system — integrated across soil, plants, animals, and even water systems. We’ll explore how to conduct your own field trials, maintain fermentation quality, and plan for year-round use. This level is especially useful for farmers, consultants, researchers, and serious homesteaders who want to document, compare, and scale their inputs with confidence. * * * Designing a LAB Trial for Your Farm Field trials don’t have to be complex. Start with a question: * Does LAB reduce disease pressure on tomato plants? * Does adding LAB to chicken water improve feed conversion? * Will soil drenches with LAB improve compost breakdown? Trial Design Basics: 1. Control vs Treatment: Use one area or group without LAB and one with it. 2. Consistency: Apply the same water, feed, and care to both. 3. Observation Windows: Weekly notes on color, growth, health, smell, etc. 4. Data Logging: Use notebooks, spreadsheets, or digital apps. * * * Setting Up a LAB Production System For ongoing use, set up a dedicated fermentation area: * Fermentation Calendar: Stagger your rice water starts to always have fresh LAB in the pipeline. * Shelf-stabilized Backup: Keep a molasses-stabilized batch on hand. * Label Everything: Date, batch notes, temperature ranges, raw materials used. * * * Fermentation Variables to Track * Type of milk (raw, pasteurized, organic, goat, etc.) * Temperature range during fermentation * Smell and separation time * Storage method and longevity This info helps refine your method and compare batch effectiveness over time. * * * Scaling LAB for Field, Livestock, and Infrastructure * Field: Use a backpack sprayer or 25–50 gallon tank with a dilution of 1:1000. * Livestock: Mix daily into troughs, or set up dosing in water lines. * Compost/Manure Pits: Spray or drench during turning or addition of fresh materials. * Ponds/Water Troughs: Small amounts of LAB can reduce algae and biofilm. * * * Pro-Level Strategy: Integrating with Seasonal Cycles * Spring: Combine with IMO and FPJ to prep beds and boost microbial activity. * Summer: Add to foliar sprays to reduce mildew and heat stress. * Fall: Drench in compost piles, manure bins, and post-harvest cover crops. * Winter: Stabilize and store batches, maintain indoor fermentation with temperature control. * * * Final Notes: LAB as a Keystone Input By now, you’ve likely seen how LAB serves as a bridge across systems. It connects animals to soil, ferments to plant health, and microbes to fieldwork. In KNF, it’s more than a recipe — it’s a tool for stewardship, resilience, and regeneration. * * * What’s Next? LAB + Data in Community Trials Want to go further? Consider designing community-scale experiments or joining KNF research networks. Share your results and contribute to open-source learning.
Korean Natural Farming (KNF)

Using LAB with Ruminant Livestock

PremiumSupporting Ruman Health Lactic Acid Bacteria (LAB) isn’t just for chickens and soil—it’s a powerful, natural tool for supporting the health and performance of ruminants like cattle, goats, and sheep. Whether you're running a pasture-based operation or managing a barn system, LAB is worth having in your toolkit. * * * What Does LAB Do for Ruminants? LAB supports the microbial balance inside the rumen, the fermentation chamber where ruminants digest fiber. When used consistently, LAB: * Promotes stable rumen microflora * Enhances feed conversion and nutrient uptake * Reduces bloating, scours, and acidosis risk * Supports immune function and stress resilience * Decreases odor in bedding and manure * * * How to Use LAB with Ruminants Application Method Drinking Water Add LAB at a 1:1000 dilution (1 cup per 250 gallons) Fermented Feed Mix 1–2% LAB into silage, grain, or chopped forage Top-Dress TMR Lightly spray total mixed ration with diluted LAB Environmental Spray Mist bedding/stalls with 1:500 dilution to cut odor Use LAB weekly or daily depending on your herd health goals and system size. Always observe and adjust based on animal response. * * * Making LAB for Livestock Use Follow the same KNF LAB Serum recipe used in gardening and compost systems—just be sure it's: * Fresh or properly stabilized with sugar * Sweet-smelling and not spoiled * Introduced gradually to new animals or systems 👉 Need a recipe? Grab the printable LAB Pure Stock & LAB Serum Recipe Card Set here: https://storeysinthedirt.com/recipe-cards/p/lab-pure-stock-lab-serum-recipes-knf-printable-card-set * * * Tips & Notes * LAB can be added to existing probiotic protocols without disruption * Works well alongside apple cider vinegar, garlic ferments, or FPJ * Boosts the effects of deep litter systems when sprayed weekly * Do not give spoiled LAB or old milk-based curds to ruminants
Korean Natural Farming (KNF)

Advanced KNF Poultry Systems

Introduction Fermentation, Microbiome Management, and Multi-System Integration for Health and Productivity
Korean Natural Farming (KNF)

What the Fungi Teach Us

A Case for Natural Farming in Poultry Systems
Soil & Microbiology

IMO Field Strategies

Part 3: Applying IMO — Field Techniques and Seasonal Strategies _If you missed it, Part 2: Collecting and Training your Local Microbiology (IMO) explores what IMOs 1-4 and how to cultivate your local IMO._ Welcome back to our exploration of Indigenous Microorganisms (IMO) and the powerful natural farming methods pioneered by Korean Natural Farming (KNF). In this segment, we'll delve deeper into practical field techniques and seasonal strategies, specifically focusing on IMO 5 and the creation and use of IMO solution. Mastering these applications will significantly enhance your soil health, plant vitality, and overall farm resilience. Understanding IMO 5 and IMO Solution Before we jump into field application, let’s clarify what we mean by IMO 5 and IMO solution: * IMO 5 is essentially IMO 4 combined with nutrient-rich compost or soil amendments, making it ideal for enhancing soil structure, fertility, and microbial diversity. * IMO solution (sometimes called IMO 6 by practitioners) is a liquid microbial application derived from IMO preparations. It's specifically used as a microbial foliar spray or soil drench to deliver microbes directly where they're most needed. Preparing and Applying IMO 5 IMO 5 is your go-to soil amendment, particularly valuable in building soil structure: 1. Preparation: Mix your IMO 4 with rich compost at a ratio of 1:10 (IMO 4 to compost). Allow this mixture to ferment for about one week, ensuring it's kept moist and aerated. 2. Application: Spread IMO 5 onto your fields, gardens, or pastures before planting or during seasonal transitions. Seasonal Strategies: * Spring: Apply before planting to boost microbial activity and seedling growth. * Summer: Light applications help maintain moisture retention and nutrient cycling. * Fall: Heavy applications can accelerate decomposition and enrich soil for the next season. Crafting and Utilizing IMO Solution IMO solution brings microbes quickly and effectively to your plants: 1. Preparation: Add IMO 2 or IMO 4 to "good water," meaning non-chlorinated, natural water sources like rainwater, well water, or spring water. Include a small amount of brown sugar or molasses as a microbial food source. Allow the mixture to ferment for 24–48 hours. 2. Application: Use as a foliar spray or soil drench. Dilute 1:500 (solution: water) for foliar sprays and 1:250 for soil drenches. Seasonal Strategies: * Spring: Frequent foliar sprays support new growth and strengthen plants against pests and diseases. * Summer: Regular soil drenches mitigate stress from heat and drought. * Fall: Application aids plants in preparing for winter dormancy and enriches soil microbiology for the following season. Field Techniques for Success * Monitoring and Adjusting: Keep detailed logs of your applications, weather conditions, and observed plant responses. Adjust your strategies based on these observations. * Integration: Combine IMO applications with other KNF techniques such as LAB, FPJ, and OHN for comprehensive microbial health and resilience. * Observation: Regularly inspect your soil and plant health indicators, like moisture retention, soil structure, root health, and leaf vigor. Conclusion By strategically applying IMO 5 and IMO solution according to seasonal needs, you’re not only improving immediate crop performance but cultivating lasting soil health. Stay tuned for the next segment, where we’ll explore advanced microbial management and troubleshooting. Ready to deepen your practice? Grab our comprehensive Indigenous Microbial Activation Bundle and get started today! Happy farming!
Regenerative Agriculture

Collecting and Training your Local Microbiology

Part 2 IMO stages 1 - 4 _If you missed it, Part 1: Introduction to Indigenous Microorganisms (IMO) explores what IMOs are, why they matter, and how they fit into Korean Natural Farming (KNF) and JADAM systems._ * * * IMO 1: Collection If you've ever wandered through an old forest, you’ve likely noticed how the air feels different—thick with the scent of life, layered with quiet activity. This is the living microbial web in action. Observing nature isn’t just relaxing; it sharpens your eye for where healthy microbes thrive. Look for places that have remained undisturbed for years, even decades. These older forest floors act like microbial time capsules—rich, balanced, and teeming with life. Indigenous Microorganism (IMO) collection is the foundation of working with your local microbial allies. Done well, it sets the tone for everything that follows. How to Identify a Good Collection Site * Smell: A good site has a sweet, earthy smell—never sour, foul, or overly musty. * Visible Life: Look for signs of fungal threads, leaf litter breakdown, insect activity, and dark, rich humus. * Forest Conditions: The ideal location is under undisturbed forest canopy with good airflow, moderate shade, and consistent moisture. Equipment Needed * Wooden or bamboo box * Cooked white rice (cooled) * Breathable cover (natural paper, cotton cloth) * Rubber bands or twine * Protective container or location to shield from direct rain Troubleshooting Mold Issues * White Mold: Ideal. Indicates beneficial mycelium. * Green Mold: May signal contamination or improper moisture levels. Discard if dominant. * Black Mold: Harmful. Often a sign of anaerobic conditions or prolonged wetness. Discard. * * * IMO 2: Stabilization with Brown Sugar or Raw Sugar Once you’ve gathered a vibrant collection of local microbes, the next step is like giving them a cozy, long-term home. We stabilize the culture with sugar—either brown or raw—to lock in the microbial life until we’re ready to wake it up and expand it. Why Brown Sugar? * Acts as a microbial preservative by creating a hyperosmotic environment. * Contains molasses, which offers trace minerals that can help support microbial activity during stabilization. Why Raw Sugar? * Raw sugar can also be used effectively for stabilization. * It has less processing and may retain more original plant minerals, depending on the source. * Some practitioners prefer raw sugar for its closer-to-natural state and less refined quality. Comparison: * Both sugars preserve microorganisms well when used at the 1:1 weight ratio. * Brown sugar is more consistent and widely available. * Raw sugar may offer slightly different microbial support due to variation in mineral content and cane processing. * Choose based on availability, cost, and your local microbes' performance with each type. Ratios * 1:1 by weight (IMO 1 : brown sugar) Storage, Shelf Life, and Appearance * Store in an airtight container in a cool, dark place. * Shelf life is typically 6 months to a year. * Should remain soft and moist with a sweet fermented scent. * * * IMO 3: Expansion on a Carbon Medium Now comes the fun part—training and multiplying your microbial crew! By feeding them a new carbon-rich buffet, you encourage them to grow, adapt, and build strength for the work ahead. Choosing a Carrier * Options: rice bran, wheat mill run (WMR), or cornmeal. * Choose what's readily available and cost-effective. Moisture Content and Inoculation * Aim for 65-70% moisture—moist but not dripping. * Mix IMO 2 thoroughly into the medium. Use gloves or clean tools to maintain sanitation. Fermentation Conditions * Can be done indoors in bins or outdoors under a tarp. * Maintain aerobic conditions. Turn if necessary. * White mold is again the sign of success. * * * IMO 4: Soil Integration Finally, it’s time to bring your thriving microbial community home to your land. This is where the magic really happens: integrating your trained microbes into your soil system to strengthen its natural fertility and resilience. Mixing * Combine IMO 3 with farm soil and local leaf mold (ideally from the same collection site). * Ratio: 1:1:1 (IMO 3 : farm soil : leaf mold) Temperature Management * Fermentation should rise but not exceed 120°F (49°C). * Turn if temperatures spike too high to prevent die-off. Final Application and Storage * Apply directly to fields or store in breathable sacks in a shaded, dry area. * Use within 3–6 months for best results. * * * As you can see, each stage of working with Indigenous Microorganisms is about observation, patience, and partnership with your local ecosystem. From collection through soil integration, you're building a microbial team that knows your land as well as you do. In the next installment, we'll take everything you've built so far and look at how to apply it in the field, fine-tune it for seasonal needs, and introduce the next evolution: IMO 5 and what we'll call the "IMO Solution"—a practical, scalable way to spread your living biology across your farm or garden. Interested in getting started? We've created a KNF IMO 1–4 Recipe Card Bundle with easy-to-follow instructions to support your journey! Next up: Part 3: Applying IMO — Field Techniques and Seasonal Strategies
Soil & Microbiology

Working with the Microbial Web

A Guide to Indigenous Microorganisms and JADAM Part 1: Introduction to Indigenous Microorganisms (IMO) What are IMOs and Why They Matter Let’s start with the basics: Indigenous Microorganisms (IMOs) are the bacteria, fungi, and other helpful microbes that already live in healthy soils, forests, and compost piles. They’re native to your land and climate—not imported from a lab or packaged in a plastic jug. That means they already know how to survive where you live. No guesswork. No adaptation period. These microbes work with your plants, not against them. They unlock nutrients, help defend against pests and diseases, and create an underground support network that keeps everything growing strong. In Korean Natural Farming (KNF), IMOs are a cornerstone. The goal is to partner with what nature is already doing, not bulldoze through it with chemicals. The Role of IMOs in Korean Natural Farming (KNF) KNF has a process for capturing and building up these microbes in a way that makes them easy to apply to your garden, pasture, orchard, or even your chicken coop. The process goes from IMO 1 to IMO 4—starting with collecting them from a patch of undisturbed forest soil and eventually mixing them into your local soil for use. It’s like giving your land a dose of its own immune system, but stronger. These IMOs get paired with other KNF favorites like Fermented Plant Juice (FPJ), Lactic Acid Bacteria (LAB), and Oriental Herbal Nutrients (OHN) to create a full-circle system for healthier plants, animals, and soil. A Quick Note on JADAM While KNF emphasizes fermentation and the careful cultivation of inputs like IMOs and FPJs, JADAM takes a slightly different route. JADAM also relies on indigenous microorganisms but with a simplified, ultra-low-cost approach that’s accessible to almost anyone. Think of it like the cousin who’s just as smart but doesn’t need all the gear—JADAM uses potatoes, sea salt, and water to grow microbial solutions in bulk with minimal effort. Where KNF might ask you to go step-by-step through IMO 1 to 4, JADAM simplifies things with a one-step preparation often called JADAM Microbial Solution (JMS). It’s fast, affordable, and still rooted in the principle of using local life to support your soil. Both systems are rooted in the idea that nature already knows what it’s doing—we just need to listen, observe, and join the conversation happening underground. Comparison: IMOs vs. Lab Cultures and Commercial Inoculants Feature IMOs Lab Cultures Commercial Inoculants Origin Local soil & environment Controlled lab setting Industrial production Diversity High – includes fungi, bacteria, actinomycetes, yeasts Often limited to a few strains Usually limited to a proprietary mix Adaptation Naturally suited to local conditions Needs adaptation period May not thrive in all soils Cost Low (DIY process) Moderate to high High (recurring cost) Sustainability Regenerative Variable Often extractive You can buy a shelf-stable culture or use something grown in a lab, but it’s not going to match the resilience or diversity of what’s already under your feet. IMOs are tailor-made by nature for your exact environment. And once you learn how to work with them, you won’t want to go back. Benefits of Using Local Biology * Resilience: These microbes already live here. They’re not going anywhere. * Diversity: A broad range of organisms keeps everything in balance. * Cost-Effective: Once you learn the basics, you can make your own for free. * Eco-Friendly: No shipping, no plastic, no mystery ingredients. * Improved Plant Health: Better roots, better nutrient uptake, and better defense systems. Using IMOs is like turning up the volume on nature’s own recipe for thriving soil. When we start listening to the microbial web instead of silencing it, we find all the tools we need to grow something real. * * * Coming up in Part 2: _How to Collect IMO 1 and Start Your Microbial Journey_
Korean Natural Farming (KNF)

Harvesting Growth

Selecting the Right Plant Material for Your FPJ In Korean Natural Farming (KNF), timing is everything—and that includes when and what parts of a plant you harvest to make FPJ (Fermented Plant Juice). Think of FPJ as a mirror: it reflects the life force, hormones, and energy of the plants you collect. The closer your FPJ matches the plant’s current needs, the more effective it becomes. * * * Why FPJ Works So Well FPJ is made by fermenting plant material with brown sugar to extract bioavailable nutrients, growth hormones, and enzymes. It becomes a living input—feeding soil microbes and communicating directly with plants. When we harvest the right plant parts at the right time, we create a powerful, stage-specific tool that speaks the same "language" as our crops. * * * When and What to Harvest for FPJ Early morning is the golden window. Dew is still present, and the plant’s metabolic signals are high. Always pick from wild, untreated, or healthy homegrown plants—and match your FPJ material to the stage your crops are in. Vegetative Growth (Young Plants) * What to harvest: New leaf tips, growing vines, grass shoots, mugwort, sweet potato leaves * Why: These parts are full of cytokinins and enzymes that signal growth * When to use: During early leaf and root development, or after transplanting > Pro tip: Fast-growing weeds often make the best FPJs—nature’s own accelerators. Mid Growth (Leaf & Stem Development) * What to harvest: Vines (squash, pumpkin), mature leaves, balanced green tissue * Why: This provides a more nutrient-stable mix for routine feeding * When to use: As a weekly foliar or soil spray to build plant stamina and resistance Flower Initiation * What to harvest: Flower buds, flowering herbs like basil, marjoram, oregano * Why: These signal gibberellin and flowering hormone production * When to use: A few days before flowering begins or at early bloom Fruiting Stage * What to harvest: Immature fruits, fruit-bearing vines, young flowers * Why: Enhances fruit setting and sugar development * When to use: When plants shift energy toward reproduction—great for tomatoes, squash, peppers Recovery or Stress * What to harvest: Deep-rooted medicinal plants or strong herbs (mugwort, dandelion, comfrey) * Why: These carry stress-response compounds and minerals * When to use: After weather stress, pest pressure, or heavy pruning * * * How to Use FPJ * Dilution Rate: 1:500 to 1:1000 (about 1–2 tsp per quart / 2–4 mL per liter) * Application: Foliar spray or soil drench * Frequency: Weekly or biweekly for maintenance, more often during transitions or stress Crop Phase FPJ Material Use Purpose Early Growth Leaf tips, vines Rooting, shoot growth Leaf Stage Vines, squash leaves Resilience, energy balance Flowering Buds, basil flowers Flower signal and hormone boost Fruiting Young fruits, tips Sweetness, fruit fill, stamina Recovery Mugwort, comfrey Stress relief and regrowth * * * A Few Tips * Harvest only what’s thriving—avoid diseased or insect-damaged parts. * Don’t overdo it: FPJ is powerful. Start light and observe. * Label your FPJs by plant type and harvest date for future reference. * Add LAB (Lactic Acid Bacteria) to boost absorption and microbe diversity. * * * Closing Thoughts FPJ is more than a tonic—it’s a way to listen to your plants and respond in kind. When made with intention, FPJ becomes a dynamic input tailored to your farm or garden’s rhythm. With practice, you’ll know what your plants are asking for—and have just the brew to match it. * * * Want to make your own herbal tonic too? Try the OHN (Oriental Herbal Nutrient) recipe card: storeysinthedirt.com/recipe-cards/p/ohn-oriental-herbal-nutrient-recipe-card
Korean Natural Farming (KNF)

Healthy Chickens, Naturally

Using KNF in Your Coop & Tractor If you're looking for a low-cost, high-impact way to care for your flock, Korean Natural Farming (KNF) might just be your new best friend. Whether you keep standard breeds, silkies, or bantams — in tractors or permanent coops — KNF helps you support their health and environment with simple, natural inputs you can make at home. Why KNF for Chickens? KNF uses indigenous microorganisms (IMO), plant ferments, and natural tonics to build healthy soil, boost gut health, and keep your animals thriving. For chickens, that means: * Less odor * Fewer pests * Better nutrient absorption * Stronger immunity And best of all? Most of the ingredients are already in your pantry or backyard. * * * Cleaner Coops, Healthier Birds Deep litter getting musty? Tractors starting to smell a little... too earthy? Spritzing your bedding with a blend of LAB (Lactic Acid Bacteria), FPJ (Fermented Plant Juice), and vinegar keeps everything fresh while inoculating your soil with microbes that support the whole ecosystem. Add a dusting of IMO4 and you’ve got a microbial powerhouse at work — no chemicals needed. * * * Easy Supplements That Work * LAB in the water keeps chicken guts healthy and improves nutrient uptake. * FPJ or FFJ offers trace minerals, micronutrients, and natural sugars. * OHN (Oriental Herbal Nutrient) supports your flock during seasonal stress or sickness. * Brown Rice Vinegar (BRV) balances digestion and pH. You can rotate or combine these in their water or feed, adjusting by season, breed, and weather. * * * ✅ Want to Keep Track Without Losing Your Mind? We've done the work so you don’t have to. Get the printable, editable KNF Chicken Care Protocol Tracker: 📋 For daily, weekly, monthly & seasonal tasks 🍃 Includes notes, frequency, inputs, and checklist columns 🔁 Works for tractors _and_ permanent coops 👉 \[Download the full tracker + recipe cards here.\] Or grab our ready-to-use clipboard pages and hang them in your coop like a pro. Your chickens (and your nose) will thank you. * * * Raising Better Birds, One Microbe at a Time If you're tired of chasing every new product in the feed store, this is your call to go back to basics — but with science on your side. Your flock deserves care that’s natural, effective, and rooted in tradition. Let’s bring that care home, one spray bottle at a time.
Korean Natural Farming (KNF)

LAB Serum vs. Stock

Why Use LAB Serum Over Pure Stock In Korean Natural Farming (KNF), both LAB Pure Stock and LAB Serum serve valuable roles—but knowing when and why to use each can make a big difference in results. Let’s break it down. * * * What’s the Difference? LAB Pure Stock is made by fermenting rice water to isolate lactic acid bacteria (LAB). It’s a foundational microbial input—simple, light, and effective in compost or soil systems. LAB Serum takes that same LAB-rich rice water and supercharges it by feeding it with raw milk. The result is a more potent, enzyme-rich microbial serum that carries added benefits for livestock, soil, and foliar use. * * * Comparison Table Feature LAB Pure Stock LAB Serum Microbial Strength Milder Highly concentrated Stability Needs sugar to store at room temp More stable after milk fermentation Enzyme Content Low High—due to milk digestion Digestive Health Support Mild Excellent for animals Soil & Compost Use ✅ ✅✅ Foliar & Environment Use Occasional Preferred Animal Feed Ferments Not ideal Excellent * * * Why Serum Wins in Most Cases * Milk feeds the bacteria, creating more robust colonies that last longer and work harder. * Enzymes from milk digestion help break down organic matter faster in soil, bedding, and compost. * Serum is gentler on animals than vinegar or essential oil-based inputs, making it great for internal and external livestock support. * * * When to Use Which * Use LAB Serum when treating deep litter, fermenting feed, spraying animal housing, or applying to plants. * Use LAB Pure Stock when you need a quick microbial boost, don’t have milk available, or want to inoculate compost piles. * * * Final Thoughts Both inputs are great, but serum gives you more bang for your buck—especially if you're using LAB as a regular part of your KNF routine. Think of pure stock as the starter, and serum as the super-fueled brew. 👉 Want to try them both? Get the printable recipe card set here: LAB Pure Stock & LAB Serum Recipes – KNF Printable Card Set
Korean Natural Farming (KNF)

LAB and Balanced Health

Can LAB Help with Parasites, Viruses, Bacterial or Fungal Imbalance? Lactic Acid Bacteria (LAB) is a cornerstone of Korean Natural Farming and other regenerative systems for good reason—it’s powerful, adaptable, and safe. But can it really help with parasites, viruses, or microbial imbalances? Let’s break it down. * * * What is LAB? LAB stands for Lactic Acid Bacteria—a group of beneficial microbes that thrive in slightly acidic, low-oxygen environments. They’re naturally found in fermented foods like yogurt, kefir, and kimchi, and they play a major role in digestion, immunity, and decomposition. In KNF, we grow LAB using rice water and milk to create a powerful microbial serum that’s safe for plants, animals, soil, and compost. * * * What LAB Can Help With Bacterial Imbalance — ✅ YES LAB is best known for restoring microbial balance: * Outcompetes harmful bacteria by producing lactic acid * Colonizes surfaces and guts to occupy microbial niches * Reduces ammonia and odor in litter and bedding Whether you’re dealing with gut dysbiosis in animals or imbalance in soil or compost, LAB is your ally. Fungal Imbalance — ✅ YES (Indirect) While LAB doesn’t kill fungi directly, it: * Creates an environment unfavorable to mold, mildew, and yeasts * Competes for resources and space * Helps beneficial fungi thrive by maintaining a balanced microbiome Use it to suppress conditions that promote fungal outbreaks. Viruses — ✅ Indirectly LAB doesn’t destroy viruses—but it strengthens the system they target: * Promotes gut health and mucosal defenses * Enhances immune readiness * Some studies show LAB can interfere with viral attachment and replication in hosts Use LAB regularly to build resilience, especially in animal environments and during seasonal transitions. Parasites — ✅ Mild Support LAB isn’t a dewormer, but it does: * Maintain gut pH levels that are less favorable to parasites * Strengthen the gut lining and digestive enzyme profile * Support other anti-parasitic inputs (e.g. herbs like garlic, wormwood) Use it as a support tool in a broader parasite management strategy. * * * Quick Reference Table Issue LAB Support? Notes Parasites ✅ Mild Helps maintain gut environment—not a cure Virus ✅ Indirect Boosts microbial and immune defenses Bacterial imbalance ✅✅ Strong LAB’s primary benefit Fungal imbalance ✅ Supports balance Lowers pH, competes for microbial territory * * * Final Thoughts LAB isn’t a silver bullet—but it is a powerful ally. When used regularly in your KNF routine, it improves microbial conditions across your entire system. From deep litter and compost to foliar sprays and fermented feed, LAB brings balance and resilience. * * * Want to try it yourself? Check out our LAB Pure Stock & Serum Recipe Card Download for a step-by-step recipe guide.
Korean Natural Farming (KNF)

Meet LAB: Lactic Acid Bacteria in KNF

A Beginner's Guide to Making and Using LAB in Korean Natural Farming LAB Basics If you're just getting started with Korean Natural Farming (KNF), you'll quickly hear about something called LAB — short for Lactic Acid Bacteria. It sounds a bit science-y, but don’t worry. LAB is one of the easiest and most rewarding recipes to try early in your KNF journey. It’s a cornerstone input for livestock and gardens alike. Let's break it down in plain language: what LAB is, why it’s used in KNF, how to make it, and a few beginner tips for applying it around your homestead. * * * What is LAB? Lactic Acid Bacteria (LAB) are beneficial microbes that naturally help break down organic material, suppress harmful pathogens, and improve gut health — whether we're talking about animals or soil life. You’ve probably encountered LAB before without realizing it: they’re what make yogurt tangy and help preserve kimchi and sauerkraut. In KNF, LAB is used as a probiotic input. It's a powerful, low-cost way to improve digestion in animals, clean up smells in coops or pens, and support soil and compost biology. * * * Why Use LAB in KNF? * Livestock Health: When added to water or feed, LAB helps regulate digestion and nutrient uptake. * Smell Control: LAB can reduce odors in animal housing by outcompeting harmful bacteria. * Soil Booster: It kickstarts microbial activity when added to compost, IMO piles, or directly to soil. The beauty of LAB is that it supports a balanced microbial ecosystem, the same way fermented foods support our gut health. * * * How to Make LAB (Beginner-Friendly Version) 1. Start with Rice Water – Rinse rice and collect the starchy rinse water in a clean jar. Let it sit, loosely covered, at room temperature for 2-3 days. 2. Add Milk – Once you see a light film or bubbling (natural microbes at work), strain out the solids and add the rice water to fresh milk (ideally raw, but store-bought is fine). 3. Let it Ferment – Leave this mixture loosely covered in a warm, shady spot. In 3–5 days, curds will rise to the top. The yellow liquid in the middle is your LAB serum. 4. Strain and Store – Gently remove the curds and save the serum. Store it in the fridge or a cool place. Add a small amount of molasses if you want to shelf-stabilize it. * * * Tips for Beginners * Don’t stress over perfection — microbes are resilient. * Label your jars with dates to keep track of fermentation. * Use wide-mouth jars and cheesecloth or a paper towel to keep it simple. * * * Easy Uses for LAB Around the Farm * Chickens: Add a splash to their fresh drinking water, and change it out daily. * Pigs & Cows: Mix into feed or drinking water. * Compost: Add when turning to help with breakdown. * Soil: Dilute and use as a foliar spray or soil drench. * * * Next Up: Level 2 – Troubleshooting and Adjustments In the next post, we’ll cover how to troubleshoot issues, modify your LAB based on what you have, and how to scale it up. But for now — try making your first batch! KNF isn’t about being perfect — it’s about paying attention, experimenting, and working with nature. LAB is a perfect place to begin.
Korean Natural Farming (KNF)

Boosting Soil and Plant Health

Mycology Wash & OHN Application Spring rains bring life back to the garden, but they also introduce challenges—nutrient runoff, soil imbalances, and the potential for disease. To set the season up for success, I use two powerhouse natural applications: a mycology wash to restore beneficial fungi and Oriental Herbal Nutrient (OHN) to strengthen plant immunity. When timed right, they work together to create a thriving, resilient garden ecosystem. * * * Step 1: Mycology Wash – Feeding the Soil Fungi are the backbone of a healthy soil food web, helping plants access nutrients, retain moisture, and fend off disease. A mycology wash reintroduces beneficial fungi and bacteria to the soil, reinforcing microbial networks that may have been depleted over time. Recipe for a Mycology Wash This mix creates a fungal-rich solution to drench the soil and coat plant roots: * Rainwater or dechlorinated water – 5 gallons * Mushroom slurry or spent substrate – 1 to 2 cups * Leaf mold tea – 2 cups (optional, but excellent for diverse microbes) * Molasses – 1 tablespoon (to feed microbes) * KNF Inputs (optional) – A small amount of Indigenous Microorganisms (IMO) or Fermented Plant Juice (FPJ) can supercharge the mix. How to Apply * Best Time: Apply in the early morning or evening when microbes can settle before exposure to harsh sunlight. * Before Rain? If a light rain (¼ inch or less) is coming, apply 12–24 hours before to help microbes establish. If heavy rain is expected, wait until the soil slightly dries after the storm. * Method: Drench garden beds, around plant roots, and even apply as a foliar mist for additional microbial benefits. * * * Step 2: OHN – Strengthening Plant Immunity Once the microbial foundation is set, I turn to Oriental Herbal Nutrient (OHN), a KNF ferment that enhances plant immunity, making them more resistant to diseases and pests. It’s made from fermented garlic, ginger, cinnamon, licorice, and angelica root—herbs known for their antimicrobial and immune-boosting properties. OHN Application Timing with a Mycology Wash * If Disease Risk is High: Apply OHN before a mycology wash (3–5 days apart) to clear harmful pathogens, then reintroduce beneficial microbes. * If Prioritizing Fungal Growth: Apply OHN after a mycology wash, waiting at least 3–5 days to avoid disrupting fungal colonization. * Before Heavy Rain: OHN can act as a protective barrier against disease. Apply before the storm, then follow up with a mycology wash once conditions dry. Dilution & Application * Dilution Ratio: 1 part OHN to 500–1000 parts water (1:500–1:1000). * Foliar Spray: Apply in the evening or early morning to coat leaves. * Soil Drench: Pour around plant bases to strengthen root immunity. * Seed Soak: Use a 1:1000 ratio and soak seeds for 15–30 minutes before planting. * * * Bringing It All Together: A Seasonal Approach 1. Early Spring (Before Planting): * Start with a mycology wash to build soil biology. * Apply OHN 3–5 days later to strengthen plant immunity. 2. During the Growing Season: * Use a mycology wash every few weeks to maintain fungal networks. * Apply OHN weekly or biweekly as a foliar spray for disease prevention. 3. Before & After Rain: * OHN before heavy rain to prevent disease. * Mycology wash after rain to replenish beneficial microbes. By working with nature’s cycles instead of against them, these applications give the garden a head start on the season, ensuring strong, resilient plants that thrive in any conditions. Time to mix up a batch and let the microbes do their work! Here's a Quick Reference Table for your reference
Soil & Microbiology

Spring IMO Scouting

Introduction One of my favorite habits this time of year is keeping an eye out for where the IMO are showing up in my local environment. As I walk through the garden or out in the forest while foraging, I’m always scanning the undergrowth, peeling back layers of leaves, and checking those tucked-away spots where I tend to find healthy mycelium running. It's just part of the rhythm now—walking, observing, making mental notes of where the life is most active. These are the areas I’ll come back to as the weather warms up, ready to set my cedar boxes and start collecting Indigenous Microorganisms (IMO) for my Korean Natural Farming (KNF) practices. It's a simple habit, but it's made all the difference in timing my collections and getting strong, diverse cultures going. Little routines like this—just adding observation into the things you're already doing—really stack up over time. Whether you're walking the same paths every day or just passing through, there are always clues waiting if you're looking. Build those small habits in. They'll serve you well.
Korean Natural Farming (KNF)

Eggshells for the Garden

Introduction If you have as many eggshells as I do, you probably already know this is a great calcium source for your chickens. I keep a cast iron pan in the oven and after breakfast place all my eggshells there for safekeeping. When I have enough to fill the pan, I turn the oven on to the lowest setting for about 15-20 minutes and let bake the shells. After baking I let them cool. Once cooled, I crush them and place in a jar for storage. These crushed shells can then be added to the chicken feed or placed nearby as a calcium source for the birds. You might even add them to your compost pile, for a calcium boost to your soil in the spring. But did you know you can use them as a biostimulant in your garden? Simply fill a jar about 1/10 - 1/15th full with eggshells. Then fill nearly to the top with Apple Cidar Vinegar (ACV with Mother), leaving about 1-inch clearance for bubbles due to fermentation. Cover with a cloth or loose-fitting lid or cover. You do not want to seal this as the solution will expand, and could break the vessel. Mark the jar and date. Store in a temped, dark space and let rest. The fermentation will do the rest. After a few weeks, the solution will be fermented. Decant this solution, by running the liquid through a sieve and or cheesecloth to remove all the sediment. The debris can be used again, 3 to 5 more times. Place the liquid in a container, seal and place in a well ventilated cool dark space. This solution will be full of micro and macrominerals for the garden. It can be used as a foliar spray or drench, on its own or in conjunction with other ferments. Be sure to dilute with good water. According to Nigel Palmer, this solution should be diluted at a rate of 1:500 (One Tbls to 4 gallons good water or 15L ) up to 1:1000. The rule of thumb when natural crafting your homemade ACV extract is less is more. When in doubt, do a small test area. If after 24-48 hours, you have positive results, you can proceed with confidence. Testing a small area is a good idea any time you amend your garden. Happy Gardening!
Korean Natural Farming (KNF)

Manifesting soil for the garden

Introduction Manifesting soil is not quick but I can see the results! Whaaallaa! It only took two years. But did it have to take so long? Not necessarily. I could have brought in compost, however, my concern with bringing in compost is, what is it made of? Is the compost made with Non-GMO or organic by-products? Are the grass or tree cutting full of fertilizers, or pesticides or herbicides? When I think of the food products going to the compost companies, I think of all the chemicals produce may have been exposed to. Beyond the Glysophate or Roundup, synthetic fertilizers or pesticides, what about the preservation sprays on fruits and veggies these days? I’m not a chemist, but the more I learn about these products, the more I question them. Bearing this in mind, I opted for the long road. Two years ago, I purchased some chickens. They were all free-ranging chickens at one time. The first year, I experimented with the deep litter method in the coop. This method is now a key component of my composting system. With over 100 chickens free, they were fertilizing everywhere…it was a bit much. So I put most of the birds into tractors. About twenty birds and the six ducks continue to free-range and add to the deep litter. The first batch of partially decomposed litter was spread over my first test area adjacent to a non treated area of equal size. Within four months the area which was composted was thick with lush happy plants; No signs of nutrient deficiency. The adjacent area was browning do the lack of rain. The plants were smaller and showing signs of distress and malnutrition. When I pulled back the composted plants, I could see black crumbles between the blades and stems. You guessed it, worm castings, the worms had come to eat the composting manure, straw, hay, grass cutting and pine needles. Seeing the results, last September, I mowed the area short. Easy enough on the side not composted, but a real chore on the composted area. Even though we had not received rain in weeks, the field here was wet, like clog the mower, constantly, wet. This gave me confidence. So after, I cut the grass back, I applied my next batch of litter and compost materials to both sides. Added my some rock dust and tarped both sides of the bed. A 50 x 100 area, which will be planted with veggies this year. Below, on the left, you can see what the ground looked like two years ago. This picture was taken recently just outside the tarped bed. On the right, you can see what it looks like under the tarp. I have a long way to go still, but I have confidence that I can now plant a garden with a much higher chance of providing healthy plants and nutrient-dense food to my family. Happy Gardening!
Soil & Microbiology

Wriggly, Slimy, Nature's plow and the Gardeners Best Friend!

Garden Week Sixteen 7/24/2018 Wriggly, Slimy, Nature's plow and the Gardeners Best Friend! Busy Worms! running for cover as I prepare the soil. Whether a compost worm, earthworker worm, or deep soil worm, earthworms are a major player in living soil. Yes, there are different worms for the job. Who knew? "Organic garbage disposal" The compost worm eats rotting food waste, leaves, manure, your basic compost materials, but not dirt. The use of these worms in composting is called vermicomposting. While compost piles can smell pretty rotten, adding a balance of the proper worm(s) will elevate and eliminate that compost smell, leaving you with worm castings, a nutrient packed and natural fertilizer. "Gardener's friend" The earth working worm or nightcrawler also called grunt worms, garden worms or leaf worms, are most commonly found in the garden or lawn and what you probably think of as an earthworm. These worms come to the surface at night to gather food, eating leaves, organic matter and soil. As they travel to the surface and back for food worms create tunnels causing aeration, benefiting root stability and access to water and oxygen. "Deep soil worms" Live deep underground and may never see the light of day. They eat the decay of roots and fungi. Here in Idaho, we have the famous native "Giant Palouse Earthworm", which are white and said to grow several feet long. When frightened this worm spits a lily-scented saliva. Like their shallower relatives, deep soil worms contribute nutrients, aerate the soil, and help prevent soil erosion. Many worms can be purchased online, but you can encourage earthworms to stay or move in! As with plants, earthworms enjoy a balanced pH, balanced moisture and a steady supply of organic matter. To provide earthworms with a healthy environment, try reducing the use of fertilizer and fungicides, limit deep ploughing or rototilling, limit compaction, and limit soggy or water-logged areas in the garden. Should you decide to incorporate earthworms into your garden, you will reap the benefits of better moisture retention, more stable plants, less erosion and therefore nutrient retention, and needless to say, more productive plants. Sounds like a win, win, win! I know in my garden; the friendly earthworm is a much-appreciated garden helper! _Happy Gardening!_
Soil & Microbiology

It’s summertime and the watering is easy! Or is it?

Garden Week Thirteen 7/3/2018 It’s summertime and the watering is easy! Or is it? “My fake plants died because I did not pretend to water them.” – Mitch Hedberg. With the summers heat coming on, it’s more important than ever to water the plants appropriately. Too much water can rot the root, too little can destress the plants. Understanding the soils and its relationship with water can help us to maintain a healthy water balance for the plants and the health of the soil. At the beginning of the season, we determined what type of soil was in the garden. Because we know our soil type, we can determine how much and how often to water. Clay – is a greedy soil, which has lots of room for water, but doesn’t necessarily share water with the plants and restricts airflow. This is because clay soils have lots of pores which are not well connected, making it difficult for the water to be released to plants and limits root access to oxygen. Therefore, heavy watering less often will fill the capillary and allow the water to release over time preventing waterlogged plants and benefiting respiration. Adding sand and organic matter will help to balance water and air flow and nutrients. Loam – requires less water more frequently than clay soils, happily shares water with the plants and allows airflow. Loamy soils are comprised of nearly equal amounts of clay, sand and silt, varying by degree of sand, silt and clay in the soil. Here in SE Idaho we tend to have basic soil or a pH balance above 7 pH. The more organic matter in soil the more acidic the soil. If you are lucky enough to have loamy soil, adding organic matter will help to balance the soil. Sandy – might be compared to a sieve, allowing the water to flow through so quickly plants may not get access to enough water. due to the sieve nature of sandy soil, more frequent, shorter watering’s are advised. Adding clay and organic matter will help to balance water retention, air flow and nutrients access. If you think of soil as a sponge; the sponge which is dry must be briefly wetted to open the capillary, pores or spaces between particles of silt, clay and/or sand. The capillaries are then filled with water. The particles, space or connectedness between the capillary determine the release of the water. As the water releases, the soil becomes ridged and restricts root migration. Knowing your soil and needs of the plants will help in deciding whether to use sprinklers, drip lines, or flood irrigation. _Happy Gardening!_
Soil & Microbiology

Soil Test & Prep

Garden Week Two 4/2/2018: Test & Prep – Organized: Review books and test directions prior to starting. Keeping these items handy will make quick reference easy. Soil Test & Prep There are little bits of color springing from the dirt here and there. This is a sure sign it is time to start prepping the garden. Yesterday, we raked off the winter mulch to relieve the pressure on the daffodils, tulips, and hyacinths. Then cleared the remnants of vegetable debris from last year’s vegetable garden and inspected the strawberry beds. This is the perfect time to make amendments to the soil. Before putting on fertilizers, manures, compost, or other soil amendments, it is a good idea to test the soil. “Soil biology is the engine of your garden. Learn to harness its full potential by understanding how it works.” – Jean-Martin Fortier Most garden sections at your favorite store will have rapid soil tests. These will cost anywhere from $7 - $15. Rapid soil tests work great for the most basic information and ease of use. If you would like more detailed information you may decide to go with a garden soil testing kit. These kits can get a bit more spendy, going for as little as $20 to as much as $100 per kit. In these kits will get what you pay for…more information and the ability to test more dirt samples, many more samples in some kits. While these soil test kits will give you information, if you are experiencing difficulties with your plants, you may consider sending your soil to a laboratory. Laboratory testing, while more expensive, can test your soil for many purposes. Should you decide to go this route, speak with a consultant at your chosen laboratory. Here in Southeast Idaho, I have observed several types of soil. As a new gardener to the Snake River Area, I am learning that we have a variety of soil types not too far apart from each other. Understanding your soil’s organic, sand and clay content is just as important as understanding your Ph, macro and micronutrient values. A simple at home test can give you an idea of your soil’s structure. 1. Take about 1 cup soil from various location throughout the garden, mix well. 2. Place in a clear container (I used a large mason jar), about half full. Mark dirt level. 3. Fill container about ¾ full of water. Shae vigorously 2-3 minutes. 4. Let soil setting for 30 seconds, mark top of the soil “sand line”. Wait 3 minutes and mark again “silt line.” 5. Estimate the difference between each line and the original dry soil line, accounting for the sand line. Everything above the silt line is clay. ~ Steps found in “Building Soil” by Elizabeth Murphy. Check out this book for lots of great information. No matter how you decide to test your soil, you will be better informed on the condition of your garden’s foundation and what amendments may or may not be needed. _Happy Gardening!_ Words of wisdom: A few rules of thumb to consider whether soil testing is in your future or not.  These simple bits on knowledge shared by most gardeners hold true no matter where you garden or what soil you start with. Rotate planting of heavy feeders like tomatoes, peppers, and potatoes from the _Solanaceae_ family to the same location no more than every four years. While corn is not of the same family, it is a very heavy feeder which should be treated with the same rule. Companion planting can be an effective method of mitigating nutrient loss, adding valuable organic material to the soil and help with pest control.  A lovely and popular companion trio would be The Three Sisters: usually consisting of Corn, Peas and a squash or pumpkin.  The corn acts a trellis to the peas.  The peas add valuable organic material for the corn.  The squash acts a ground cover pushing out weeds and shading the ground against the summer sun. Some plants like wet feet.  Many do not.  Before planting observe the garden in the rain.  This will give you an idea of where water may settle or drain more quickly.  Use this information to either repair or alter the garden prior to planting, or aid in planning decisions.
Soil & Microbiology