Storey's in the Dirt

Regenerative Farming & Food Sovereignty

Featured Posts
← Back to all series

Garden

Seasonal garden wisdom from seed to harvest. Follow along through the growing year with hands-on tips for vegetables, flowers, and soil health. These posts capture the joys and challenges of working with plants in real time.

33 posts

📍 Start Here

Begin your learning journey with these curated series

Tomato Growing Guide

3 Posts
All 3 Posts FREE
Updated Jul 3, 2025

Start: How to Select the Right Tomato Varieties for Your Garden

Start →

2018 Garden Guide

25 Posts
All 25 Posts FREE
Updated Oct 23, 2018

Start: Garden Fever

Start →

Explore Related Topics

Dig deeper into specific areas within Garden

All Posts in Series

Transplanting Tomatoes and Early Season Care

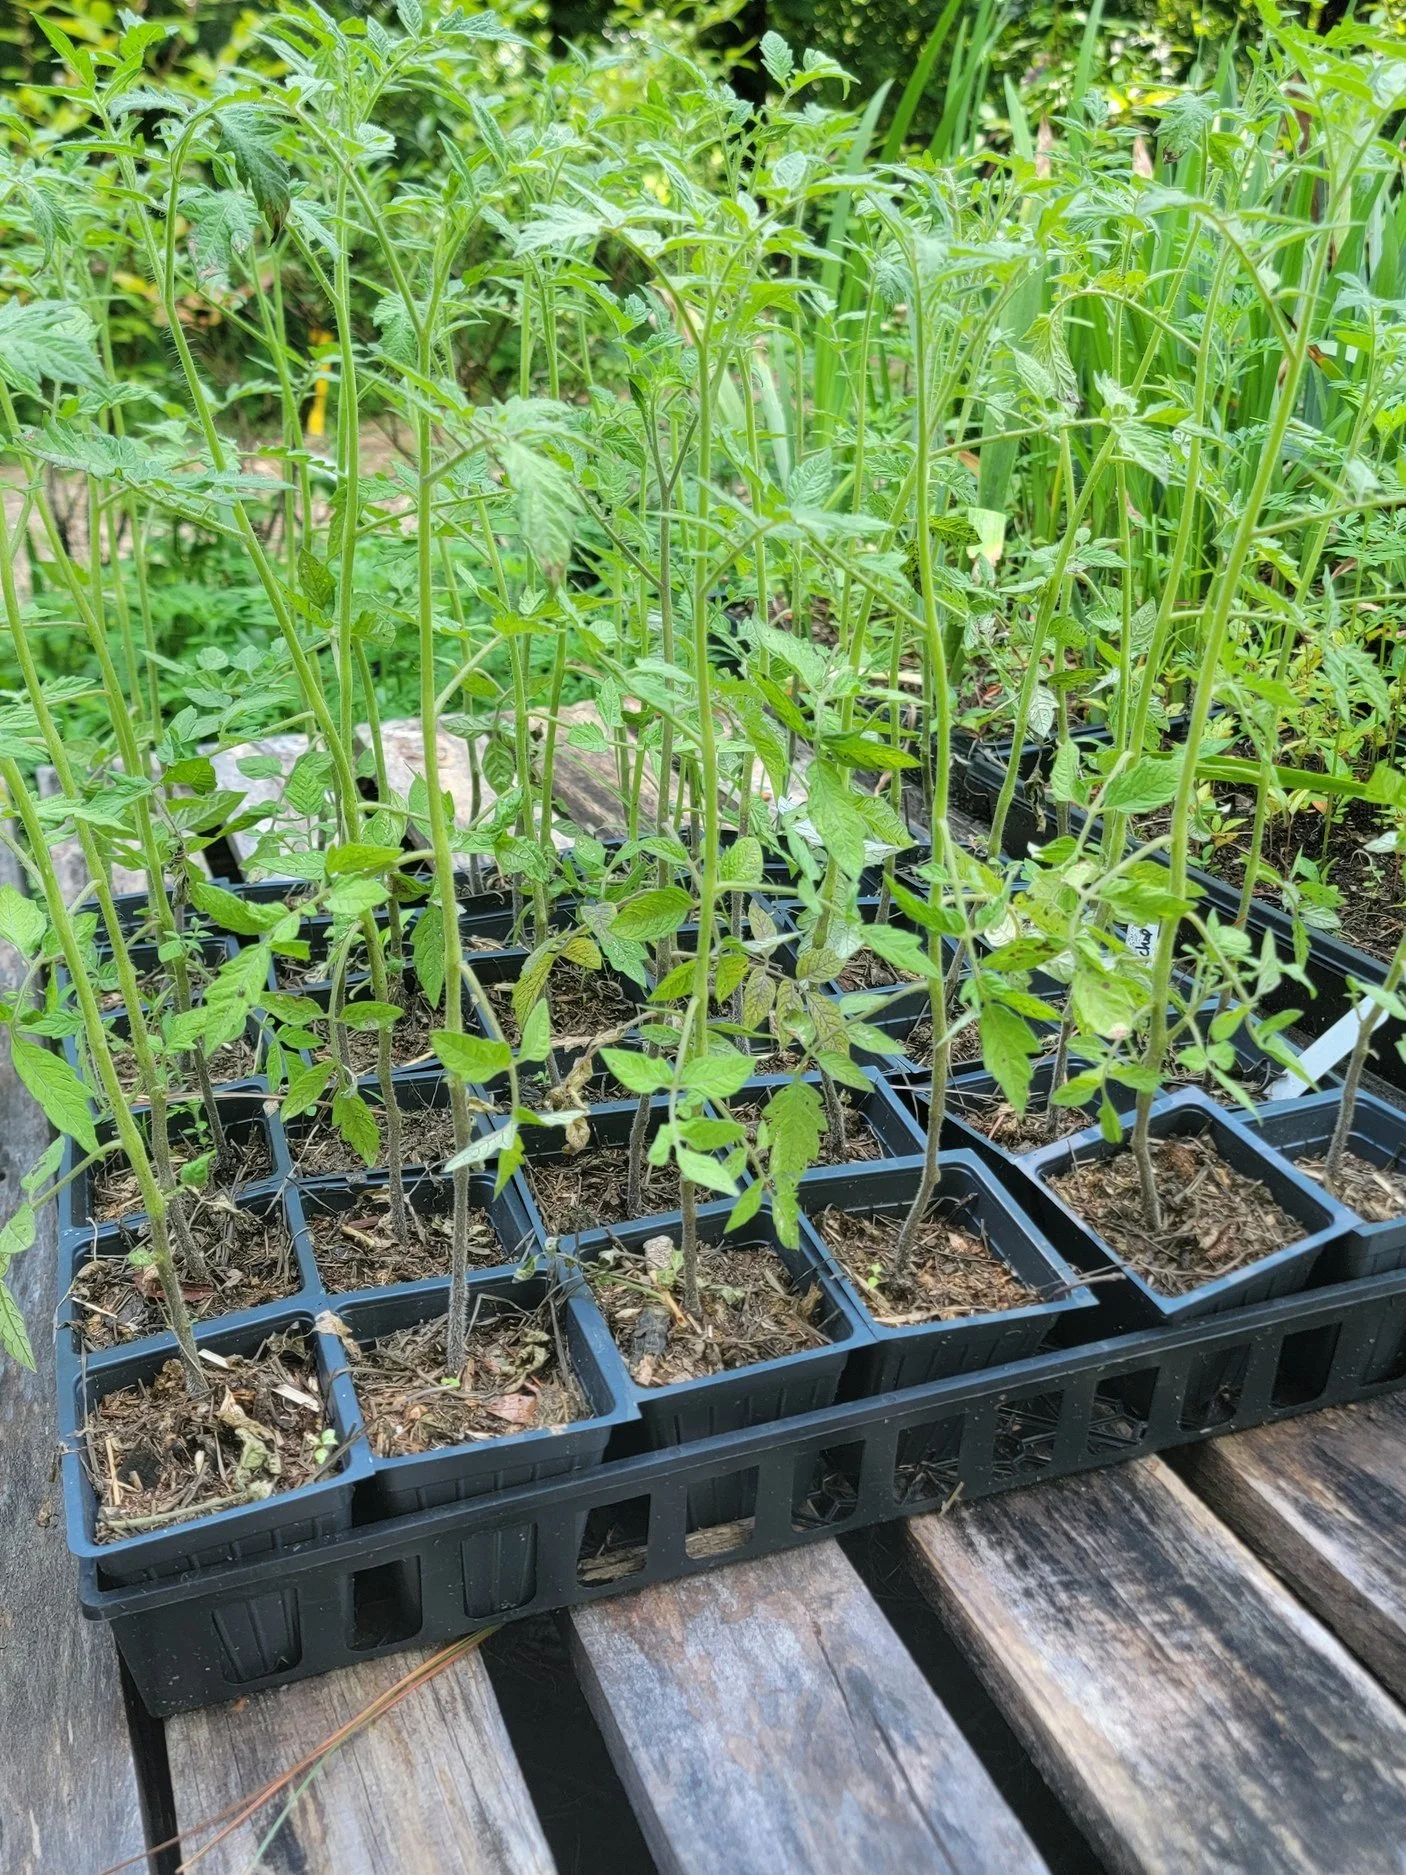
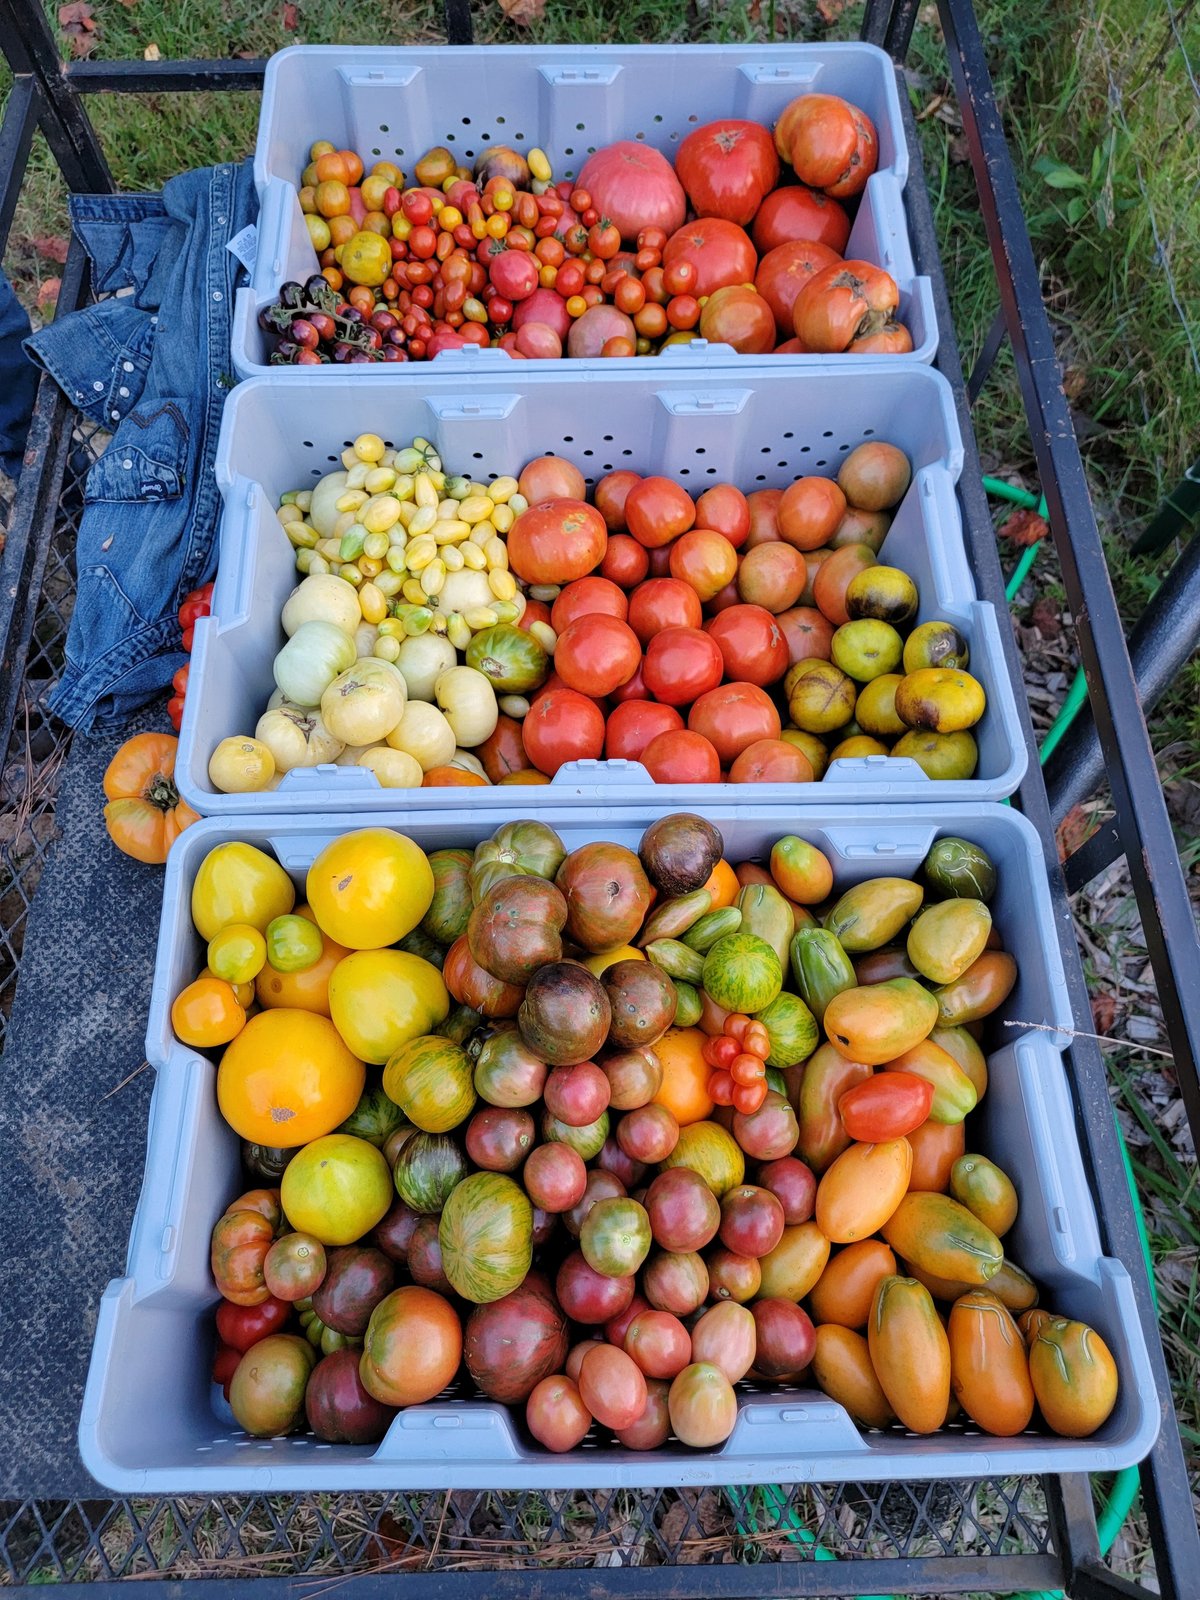
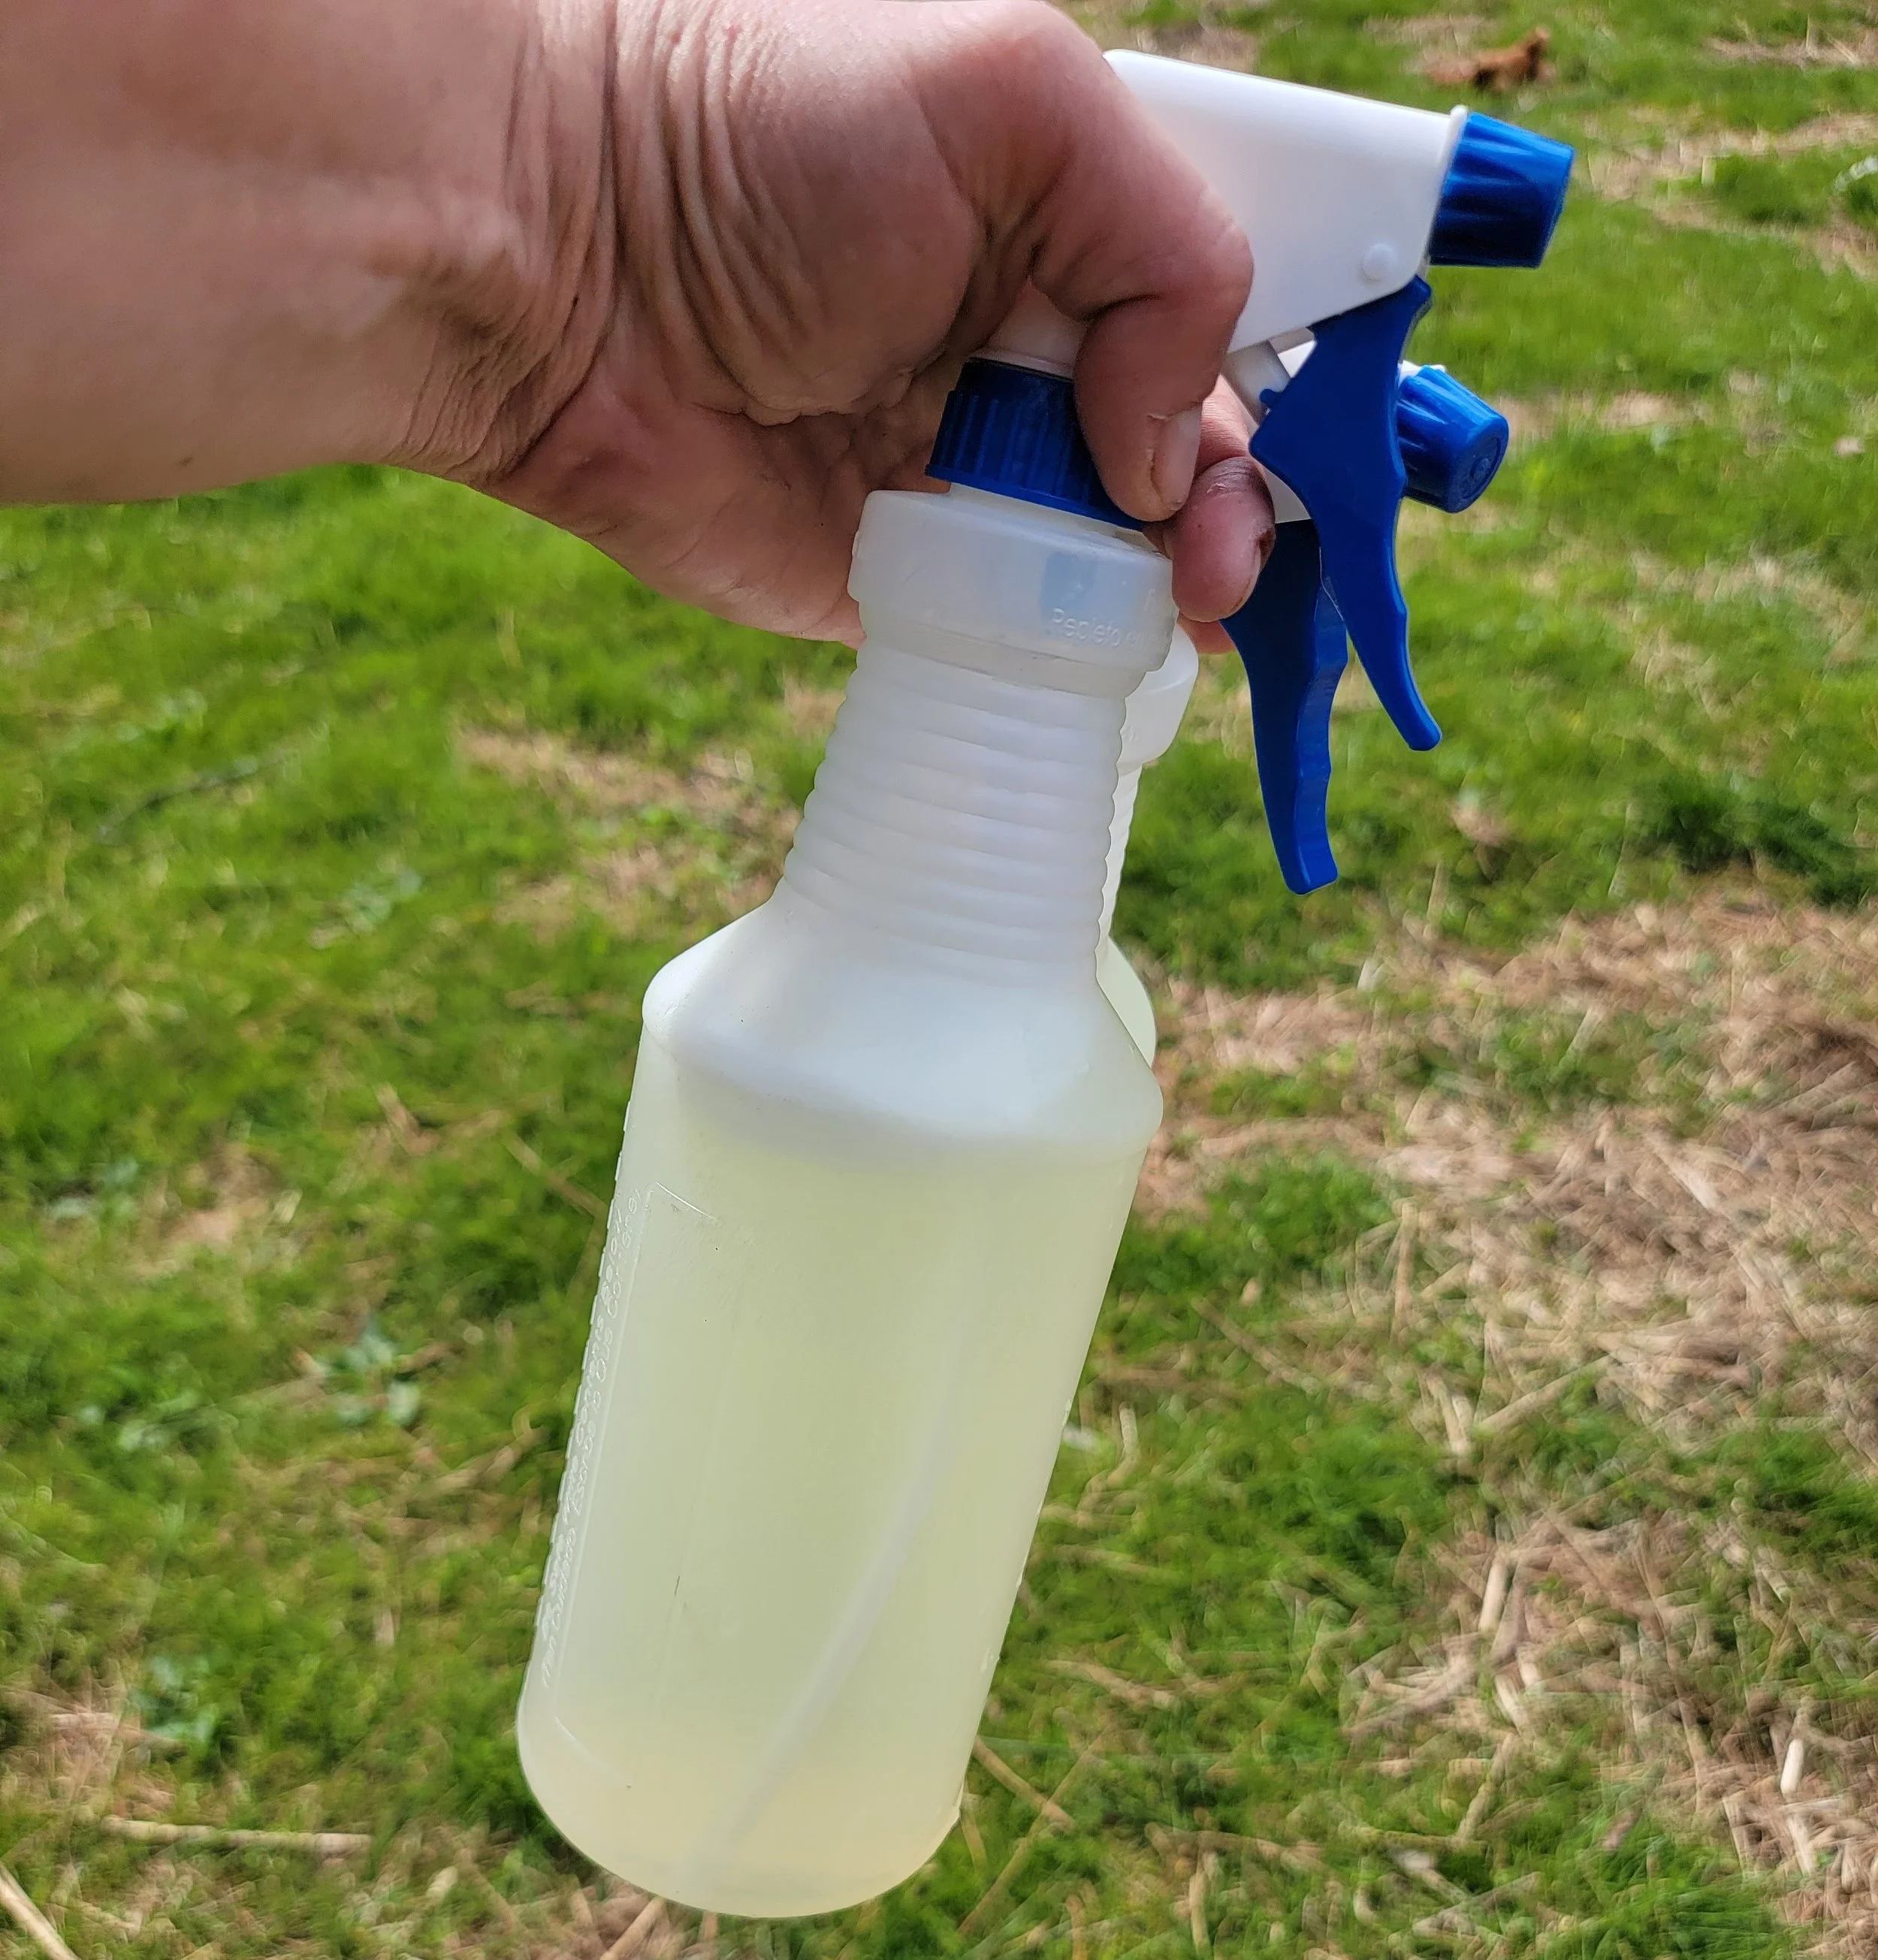
Tomatoes | Part 3 You’ve babied your seedlings and watched them grow strong — now it’s time to send them out into the big wide world of your garden beds. Transplanting is a critical stage. Get it right, and you’ll set your tomatoes up for a season of healthy growth and abundant fruit. Timing Is Everything Wait until nighttime temperatures are consistently above 50°F and the soil is warm. Cool soil can stunt young tomatoes or lead to disease. In USDA Zone 7a, this usually means planting out sometime in April or early May. Prepare the Soil Tomatoes love loose, fertile, well-drained soil with a pH of 6.0 to 6.8. Amend your soil with compost or aged manure a few weeks before planting. If you're KNF inclined, consider pre-treating your soil with JMS or LAB. On my farm, I’ve found that tomatoes especially thrive when planted after pigs — specifically, Kunekune pigs. Unlike traditional pigs, Kunekune do not root aggressively. I mulch future garden areas deeply with wood chips, pig manure, and myco washes, and allow the Kunekune to graze and gently root. They stir just enough to integrate the mulch layer — no more than I could do myself with the toe of my boot. The result is beautifully textured, biologically active soil, ready for tomatoes once the pigs move on. If you're KNF inclined, consider pre-treating your soil with JMS or LAB. Deep Planting Technique Unlike most vegetables, tomatoes can be planted deep. Remove the lower leaves and bury the plant so that only the top 4–6 inches stick out above the soil. Roots will develop along the buried stem, giving the plant a stronger foundation. Not only does this deep planting method provide stability, but it also gives the plant greater access to biologically available nutrients deeper in the soil. Spacing & Layout Give each plant room to breathe: * Indeterminate varieties: 24–36 inches apart * Determinate varieties: 18–24 inches apart Row spacing should be about 3–4 feet to allow airflow and easy access. This spacing is ideal if you're growing determinate tomatoes or indeterminate varieties without heavy pruning. However, if you’re sucker pruning heavily and using string or single-vine trellising methods, you can reduce plant spacing by half — maximizing yield per square foot while maintaining airflow and accessibility through vertical training. Initial Support Install cages, stakes, or trellises at transplant time. Trying to stake later often damages roots and risks breaking branches. Train indeterminate varieties as they grow. I’m currently in year four of using cattle panel hoops for trellising — and I love them. The arched design lets me reach everything easily from either side while giving the plants plenty of vertical space to grow. They’re durable, reusable, and provide excellent airflow and support, especially for sucker-pruned or single-stem systems.. Trying to stake later often damages roots and risks breaking branches. Train indeterminate varieties as they grow. Water Wisely Give each plant a deep watering at transplant, and then let the top inch of soil dry out before watering again. Water early in the day to prevent fungal issues. A mulch layer helps retain moisture and reduce splash-up onto leaves. First Feedings About a week after transplanting, begin weekly applications of fermented plant juice (FPJ), LAB, or compost tea to help the plants adjust and thrive. Be mindful not to overfeed during this adjustment period. Watch for Transplant Shock It’s normal for plants to look a little droopy for a day or two. Avoid fertilizing immediately after transplant and make sure your plants have some wind protection in those first few days. In Part 4, we’ll talk about maintaining your plants through the season — from pruning to pest control and keeping those vines productive all summer long. _Happy Gardening!_

Tomatoes

How to Start Tomato Seeds for Strong, Healthy Plants

Tomatoes | Part 2 Starting tomatoes from seed is one of the most satisfying steps in the growing process. With a little planning and the right conditions, you can raise robust, vibrant plants that thrive in your garden or containers. Here's how to do it right from the start. Know Your Timing Tomatoes are typically started indoors 6–8 weeks before your last expected frost. In USDA Zone 7a (like mine), that means sowing seeds indoors in early to mid-February. Check your local frost dates to get it right. Last year, I started mine in early February and had seedlings ready to pot up just as the weather began to settle. If you’ve never timed your seed-starting before, jot down this year’s start date in a notebook or garden journal — it’ll come in handy next season. Choose the Right Setup I’ve used about every kind of setup. The main thing is working with the space you have available and making sure you can maintain stable moisture, airflow, heat, and light. Whether it’s a greenhouse, a shelf rack lined with plastic sheeting or a vapor barrier, or even a converted baker’s proofing chamber — what matters most is creating the right environment for germination and healthy seedling growth. * Containers: Use seed trays, soil blocks, or recycled containers with good drainage. * Seed starting mix: Use a sterile, lightweight mix — not garden soil. * Humidity dome or cover: Helps maintain moisture during germination. * Heat source: A heat mat set to 75–85°F improves germination rates. * Light: After sprouting, seedlings need 12–16 hours of bright light daily (use grow lights if needed). If you’re using a windowsill, rotate trays daily to keep the plants from leaning toward the light. Sowing the Seeds * Moisten the mix before sowing. The rule of thumb is simple: stick your finger, stick, or any proportional wooden tool into the soil. If it comes out clean, the soil is too dry. If it has some soil bits clinging to it, it's just right — moist and ready. If it comes out clumpy or muddy, it's too wet and needs time to dry a bit. * Plant seeds about ⅛" deep. A good rule of thumb is to plant seeds at a depth roughly two to three times their diameter — smaller seeds need less coverage, while larger seeds go a bit deeper. * Keep the soil evenly moist but not soggy. * Most tomato seeds germinate within 5–10 days. I usually see the first sprout in about 7 days — always a little thrill. After Germination * Remove the humidity dome. * Move seedlings under lights or into a bright window. * Begin brushing or lightly fanning seedlings daily to simulate wind and strengthen stems. * Water from the bottom when possible to avoid damping-off disease. Use a fan on low nearby or run your hand gently across the tops of the seedlings each day. It may sound silly, but it makes a difference. Potting Up Once seedlings have two sets of true leaves: * Transplant into larger pots to encourage root growth. * Bury stems deeply to the first set of leaves — tomatoes grow roots along buried stems. * Optional: begin diluted FPJ or LAB applications for early resilience. I’ve found that starting light FPJ once a week during this phase helps prepare them for the stress of transplanting later on. Hardening Off Before planting outdoors: I keep a shelf on wheels to make this step easier. It lets me move plants in and out of the greenhouse or position them in shade as the day warms up, helping take the stress off the plants during the adjustment phase. * Gradually expose seedlings to outdoor conditions over 7–10 days. * Start with a shaded spot for a few hours, increasing exposure daily. Don’t skip this step — seedlings that go straight from indoors to the garden often suffer from sunburn or wind shock. Pro Tips * Label everything — it’s easy to mix up varieties. * Keep a grow log or notebook. * Don’t rush transplanting — wait for warm soil and settled weather. And don’t be discouraged if a few starts don’t make it — it happens to all of us. Starting from seed is part science, part faith, and a whole lot of observation. In Part 3, we’ll talk about transplanting tomatoes into the garden and how to set them up for a productive season! _Happy Gardening!_
Tomatoes

How to Select the Right Tomato Varieties for Your Garden

Tomatoes | Part 1 When you grow your own tomatoes, variety matters. The right tomato for your garden depends on your climate, soil, growing space, and culinary goals. This guide will help you choose wisely so you can enjoy bountiful harvests and delicious meals. Heirloom vs. Hybrid vs. Open-Pollinated Heirloom: These are old, stable varieties passed down through generations. They offer rich, complex flavors and unique colors and shapes. However, they can be more prone to disease. Hybrid: These are cross-bred for traits like disease resistance, uniformity, and productivity. Great choice for reliable yields, but may lack the nuanced flavors of heirlooms. Open-Pollinated: These breed true from seed and allow for seed saving. Many heirlooms are open-pollinated, but not all open-pollinated varieties are heirloom. Determinate vs. Indeterminate Determinate: These grow to a set height and produce most of their fruit over a few weeks. Ideal for container gardening or for growers who want a concentrated harvest for canning. Indeterminate: These continue growing and producing fruit all season. Best for gardeners who want a continuous fresh supply of tomatoes. Match Varieties to Climate and Soil * Hot climates: Look for heat-tolerant varieties such as 'Heatmaster' or 'Phoenix.' * Short seasons: Choose early producers like 'Stupice' or 'Siberian.' * Humid regions: Opt for disease-resistant varieties to combat fungal issues. Test your soil and amend it as needed. Tomatoes thrive in well-drained, fertile soil with a pH of 6.0-6.8. Flavor and Intended Use * Fresh eating: 'Brandywine,' 'Cherokee Purple,' 'Sun Gold' * Canning and sauces: 'Roma,' 'San Marzano,' 'Amish Paste' * Drying: 'Principe Borghese,' 'Juliet' On my own farm this season, I’m growing a mix of beloved slicers, heirlooms, and experimental lines — including _Pink Brandywine_, _Kellogg’s Breakfast_, _Dragon’s Eye_, _Porkchop_ (my most popular variety), and _Barry’s Crazy Cherry_. I also run small breeding projects each year to stabilize certain varieties, like a _Pink Heart Extra Large_ and _Cherry Bundles_. I always recommend that growers plant a few tried-and-true tomatoes alongside at least one new-to-you variety — it keeps the garden exciting and builds knowledge over time. A Few More Tips * Grow a mix! This gives you a variety of flavors and harvest times. * Save seeds from your favorites. * Keep a garden journal to track what performs well each season. In Part 2, we’ll cover how to start tomato seeds for strong, healthy plants. Stay tuned and happy gardening! \[ { "type": "highlight", "id": "1be1bef4-c19c-4aef-8c4f-ac21b7f8d7b5", "shape": "underlineCurve", "isFront": false, "isAnimationEnabled": false, "animation": "draw", "duration": 0.5, "direction": "right", "color": { "type": "THEME\_COLOR" }, "thickness": { "unit": "em", "value": 0.1 }, "linecap": "square" } \] 2025 GROWING SEASON 🍅 What’s Growing on My Farm This Year _Here’s my current tomato lineup — a mix of favorites, flavor tests, and breeding projects:_ Classic / Market Favorites * Pink Brandywine * Pink Beefsteak * Yellow Beefsteak * Beefsteak Specialty / Heirloom / Flavor Showcase * Kellogg’s Breakfast * Dad’s Sunset * Genosova * Porkchop * Dragon’s Eye Experimental Lines (future production) * Mottle Boar * Pink Heart Extra Large * Perfect Heart Cherry / Small Fruit Tomatoes * Black Cherry * German Lunch Box * Barry’s Crazy Cherry * Cherry Bundles (cluster-fruiting test) \[caption id="" align="alignnone" width="3000"\]! Summer time and livings easy :) Summer time and livings easy :) \[/caption\]
Tomatoes

On My Homestead Hand-Pulled, Seed-Saved

My Approach to Pasture Weeds If you’ve ever walked an old pasture or a field edge here in Tennessee, chances are you’ve seen tall feathery green stems waving in the breeze — that’s Dog Fennel (_Eupatorium capillifolium_). It looks soft and inviting, almost like dill or fennel — but don’t let that fool you. On a farm like mine, Dog Fennel is one of the plants I actively manage because it offers no benefit to my livestock, my soils, or my pasture systems. Worse — it’s not even useful as a medicinal plant or a bee forage here on my land. It takes up space where I’d rather have plants that actively _contribute_ to the health of the land and animals. Goldenrod (_Solidago_ spp.) is another plant that thrives in this area. While beautiful and valuable for pollinators in certain contexts, I have several aggressive varieties on my land. Without careful management, Goldenrod would consume large sections of pasture and crowd out the plant diversity I work to maintain. * * * How I Manage It Because I do not use chemicals on my farm — I focus on Korean Natural Farming, Indigenous Microorganisms, rotational grazing, and other soil-friendly systems — I use hand removal. Yes, it takes some time. But it works. When I walk my fields, I’m looking for two main plants that I actively manage: * Dog Fennel (_Eupatorium capillifolium_) * Goldenrod (_Solidago_ spp.) Both of these plants can dominate areas of the pasture, but neither provides the year-round forage or soil-building benefits I’m looking for in a regenerative system. I pull both plants by hand, especially before they go to seed. Over several seasons, I’ve found this is the most effective way to reduce their presence while protecting my beneficial pasture plants. * * * What I Plant Instead I don’t just remove Dog Fennel and Goldenrod — I work to fill the space they leave behind with plants that offer value: * Plantain (_Plantago_ spp.) — Deep roots, excellent forage, medicinal, soil builder * Violets (_Viola_ spp.) — Spreading ground cover, pollinator-friendly * Short pasture grasses — Soil-holding, grazing-friendly * Clover (_Trifolium_ spp.) — Nitrogen fixer, great forage, outcompetes weeds Over time, as these preferred plants mature and thrive, I also harvest seed from them — especially clover, plantain, and native grasses — and spread that seed to new areas of the farm. This slow, intentional expansion helps build a more resilient pasture system, one that naturally resists invasive plants and supports soil health and livestock nutrition across the whole farm. * * * My Goal My goal is simple: A living pasture that feeds my animals, supports my soil, and keeps invasive weeds at bay — naturally. By walking the fields, pulling Dog Fennel and Goldenrod, and planting intentional companions, I’m seeing healthier soil, more diverse plant life, and fewer problems with invasive plants each year. As part of this long-term approach, I also harvest seed from my most successful ground covers — especially clover, plantain, violets, and grasses — and spread that seed into areas that are ready to transition. Over time, this helps me build a self-sustaining ground cover system that can hold its own across more and more of the farm. It’s a slow, steady process — but one that matches the rhythm of the land. And each season, I see more progress. * * * If you’d like to learn more about how I manage pasture plants naturally, or about Korean Natural Farming techniques that support these systems, stay tuned — I’ll be sharing more in upcoming posts. Do you manage pasture weeds naturally? I’d love to hear what works on your land — share your stories in the comments below! Stories in the Dirt is where I keep track of what’s working — and what the land is teaching me, year by year.
Soil & Microbiology

How Plants Decide Where to Grow Roots

A Look Inside the Secret Life of Cells When you think of a plant, do you imagine it as a farmer? Tending its land, managing workers, and deciding when and where to grow new crops? Believe it or not, that’s a great way to picture what happens underground. Just like a rancher rotating pastures or a farmer managing fields, plants carefully decide when to grow new lateral roots to harvest water and nutrients. Let’s take a look at how they do it. The Ranch Foreman: ARF7 One of the plant’s key workers is a protein called ARF7 (Auxin Response Factor 7). Think of ARF7 as the foreman of the root ranch. Its job is to walk the fence lines (the primary root), scout for the best spots, and decide where to set up new gathering zones—those are the lateral roots. But even the best foreman needs to know when to call it a day. If ARF7 keeps scouting without pause, it can overwhelm the system, leading to poor choices and wasted resources. The Compost Crew: Autophagy To keep things in balance, the plant uses a clean-up and recycling team called autophagy (which means “self-eating”). This crew doesn’t waste anything. When ARF7 has done its rounds, a special helper named NBR1—short for Neighbor of BRCA1—steps in. Think of NBR1 as the compost manager. Its job is to tag worn-out ARF7, gather it up, and send it off to be recycled into fresh resources. This keeps the ranch running smoothly. Why the Clean-Up Matters If the compost crew slacks off, old ARF7 piles up. The ranch foreman never clocks out. The result? The plant stops growing lateral roots in the right places, hurting its ability to gather water and nutrients. Just like an overworked ranch, things get messy fast. For Gardeners and Growers When we support healthy soil and natural signals like auxin (a plant hormone that helps guide root growth), we’re giving the plant everything it needs to farm its own root system effectively. So next time you see a plant sending out fresh little roots, picture a busy root farmer managing the underground ranch—organizing, recycling, and always working to keep things growing in balance.
Plant Health

Naturally Repel Ants

Indoors and Out with Cedarwood Oil Ants are resourceful little invaders, and once they find a way into your home or garden, it can feel like a never-ending battle. But there’s good news for those who want to skip the harsh chemicals: cedarwood oil is a natural, effective way to repel and even kill ants—without putting pets, kids, or your garden at risk. Why Cedarwood Oil Works Cedarwood oil disrupts ants’ pheromone trails, which they use to navigate and communicate. Without those trails, they lose their sense of direction and stop marching in neat little lines across your counter. The oil also affects their exoskeletons, making it a potent, plant-based pest deterrent. * * * How to Use Cedarwood Oil Indoors Ant Repellent Spray Ingredients: * 10–15 drops cedarwood essential oil * 1 cup water * 1 tablespoon white vinegar or witch hazel (optional) Instructions: * Mix ingredients in a spray bottle. * Shake well before each use. * Spray along baseboards, entryways, windowsills, or anywhere you’ve seen ants. * Reapply every few days or after cleaning. Cotton Ball Method * Add a few drops of cedarwood oil to cotton balls. * Place them in drawers, behind appliances, inside cabinets, or anywhere ants tend to gather. * Refresh weekly or when the scent fades. * * * How to Use Cedarwood Oil Outdoors Perimeter Spray * In a larger spray container, mix 20–30 drops of cedarwood oil per gallon of water. * Spray around the foundation of your home, doorways, windows, porches, and garden beds. * Reapply after heavy rain or every 1–2 weeks during ant season. Mulch & Garden Beds Some cedarwood products are sold as mulch or chips. Placing these in garden beds or around the base of structures can create a scent barrier ants don’t want to cross. Just make sure it’s untreated cedar if you’re using it around food-producing plants. * * * Tips for Success * Consistency is key. Reapply regularly, especially in peak ant season. * Clean up crumbs and spills quickly—cedarwood oil works best when ants aren’t being rewarded with food. * If you find an ant hill near your home, you can pour a cedarwood oil solution directly into it to disrupt the colony. * * * Final Thoughts Cedarwood oil is a gentle yet powerful tool in your natural pest control toolkit. Whether you’re fighting an indoor invasion or keeping your garden ant-free, it’s a safer option that smells great and gets the job done. Plus, you're skipping the toxic residue left behind by commercial sprays. Have you tried cedarwood oil for pests before? Let us know how it worked for you in the comments—or share your favorite essential oil mix!
Seasonal Gardening

Planting by the Signs

Using False Winters to Time Your Tennessee Garden In Tennessee, spring doesn’t arrive all at once. It tiptoes in, interrupted by cold snaps and unpredictable weather shifts that have been observed and named by farmers and gardeners for generations. These cold spells—known as False Winters—are more than folklore. They’re natural cues that can help you plan your planting schedule, especially when deciding when it’s safe to sow tender crops or get a jump on cool-season favorites. So how do you garden with False Winters in mind? Let’s break it down. * * * Daffodil Winter 📍 _Late February to early March_ 🌱 _Best for:_ * Lettuce * Spinach * Kale * Arugula * Mustard greens Tip: When the daffodils bloom, you can start planting your cold-hardy greens. These crops can take a light frost and often grow best when started early. * * * Redbud Winter 📍 _Late March_ 🌱 _Add:_ * Peas * Radishes * Carrots * Turnips * Beets * Cabbage and broccoli transplants Tip: Redbuds signal the next layer of cool-season crops. You might get a cold snap, but these plants can handle it. If temps drop too low, a frost cloth or row cover will give enough protection. * * * Dogwood Winter 📍 _Early to mid-April_ 🌱 _Start preparing for:_ * Corn (toward end of Dogwood Winter) * Squash and zucchini (indoors or covered outdoors) * Potatoes * Onions Tip: Dogwood Winter is usually the last hard frost in many parts of Tennessee. Once it passes, you can begin planting more, but still watch the nighttime temperatures closely. * * * Locust Winter 📍 _Mid to late April_ 🌱 _Direct seed or transplant:_ * Tomatoes (with protection) * Beans * Cucumbers * Summer herbs like basil Tip: If you're feeling bold, you can start planting tomatoes and cucumbers now—just be ready to cover them if a surprise chill rolls in. * * * Blackberry Winter 📍 _Early May_ 🌱 _Go full in on:_ * Tomatoes * Peppers * Melons * Okra * Squash Tip: Blackberry blossoms mean warmer weather is settling in. After this cold snap, most warm-season crops are safe to plant in the ground without protection. * * * Whippoorwill & Cotton Britches Winter 📍 _Mid to late May, sometimes early June_ 🌱 _Final check-in:_ * Sweet potatoes * Corn (second round) * Late cucumbers for summer pickling * Flowers and heat-loving herbs Tip: These last cool breezes remind us that while summer is close, it’s still smart to stagger your plantings for better yield and fewer weather surprises. * * * Why it works Gardening by the False Winters means paying attention to what nature is telling you. Plants, birds, insects, and even frogs are seasonal clocks—often more accurate than your 10-day weather forecast. Whether you’re growing a backyard plot or a full homestead garden, aligning with these natural rhythms can increase success, reduce transplant shock, and help you avoid wasting seed or effort.
Vegetable Gardening

Three Frog Blooms and the False Winters of Tennessee

Reading the Seasons Through Old-Time Wisdom If you’ve lived in Tennessee for more than a season, you’ve likely learned one thing the hard way: don’t trust the first warm day. The sun will shine, daffodils will bloom, frogs will sing—and then, just like that, winter snaps back. But to folks who pay attention to the land, this back-and-forth weather is nothing new. It's part of a natural rhythm, marked by old sayings and seasonal signs passed down through generations. One of the most beloved is: > “You’ll hear three frog blooms before winter’s over.” What’s a “frog bloom”? It’s not a bloom at all—it’s the sound of frogs calling after a warm spell. When temperatures rise early, frogs wake up and start singing, thinking it’s time for spring. But that warmth is often short-lived, and winter silences them again. The saying reminds us: Don’t be fooled until you’ve heard frogs sing three different times. Only then is spring likely to stay. The False Winters of Tennessee Alongside the frog blooms, Tennessee has a whole lineup of “False Winters” that roll through just when you think the cold is behind you. These short cold snaps are named after what's blooming—or what folks are wearing—when they hit. Here are the most well-known: * Daffodil Winter * Timing: Late February to early March * Signs: Daffodils bloom too early, and winter reminds them who's boss. * Note: This is usually the first sign of false spring. * Redbud Winter * Timing: Late March * Signs: Redbud trees bloom, then a frost or cold snap follows. * Why it matters: A traditional marker that winter still has some fight left. * Dogwood Winter * Timing: Early to mid-April * Signs: Dogwoods bloom just in time for another round of chilly weather. * Note: Often aligned with the last hard frost for many areas. * Locust Winter * Timing: Mid to late April * Signs: Black locust trees flower, followed by a cool snap. * Note: Not always mentioned, but observed in many parts of the South. * Blackberry Winter * Timing: Early May * Signs: Blackberry brambles bloom right before a sudden chill. * Why it matters: Usually one of the final frosty setbacks before summer. * Whippoorwill Winter (or Linsey-Woolsey Britches Winter) * Timing: Mid to late May * Signs: Whippoorwills start calling, and folks are still reaching for their heavier “linsey-woolsey” clothes at night. * Note: The old-timers knew summer hadn’t fully settled in yet. * Cotton Britches Winter * Timing: Late May to early June * Signs: Light cotton clothes come out—just in time for one last surprising cool-down. * Why it matters: This is the final breath of spring before true summer heat. Why it still matters These patterns aren’t just charming folklore—they’re rooted in generations of observation. Before Doppler radar and weather apps, people paid close attention to frogs, flowers, and bird calls. These signals helped guide when to plant, when to prepare for cold, and when to wait. Even today, farmers, gardeners, and folks who live close to the land still use these natural cues. Because no matter how advanced the forecast gets, nature still tells the truest time. So next time you hear the frogs croak, count it. You’ve still got a few more false starts before spring is here for good.
Seasonal Gardening

growing Potatoes

An Easy Soil Mix, Spacing, and Growing Tips There’s nothing quite like homegrown potatoes. Whether you’re after buttery Yukon Golds, deep purple fingerlings, or classic Russets, growing them in 10-gallon grow bags is a simple and rewarding way to produce fresh spuds without needing a big garden plot. But if you want high yields (and who doesn’t?), it all starts with the right soil mix, proper spacing, and understanding which varieties actually respond to hilling. An Easy Soil Mix for Potatoes in Grow Bags\\ Potatoes thrive in light, well-draining soil with good aeration and plenty of organic matter. If you’re using peat moss as the base, you’ll want to balance moisture retention with drainage. Here’s a mix that gives potatoes exactly what they need: 10-Gallon Potato Soil Mix Recipe * 4 gallons peat moss (for aeration and moisture retention) * 3 gallons compost (for nutrients and microbial life) * 1.5 gallons perlite or pumice (to keep the soil loose and drain excess water) * 1 gallon vermiculite (for balanced moisture retention) * 0.5 gallon native garden soil (for microbial diversity) Amendments for a Bumper Potato Crop * ½ cup bone meal – Boosts phosphorus for strong roots and tubers * ¼ cup kelp meal – Provides trace minerals for plant health * ¼ cup wood ash (optional) – Adds potassium, which improves tuber growth * ¼ cup gypsum – Prevents hollow heart and rot * ¼ cup azomite or rock dust – Adds essential micronutrients Before planting, moisten the mix slightly so it holds together without being soggy. Keep the pH between 5.5 and 6.5 for best results. How Many Potatoes Should You Plant? Spacing is key—overcrowding leads to small tubers, and too few plants means wasted space. Here's a quick guide: Potato Size Short Season (70-90 Days) Medium Season (90-110 Days) Long Season (110-135 Days) Small (Fingerlings, New Potatoes) 3-4 seed potatoes 3 seed potatoes 2-3 seed potatoes Medium (Yukon Gold, Kennebec) 2-3 seed potatoes 2 seed potatoes 1-2 seed potatoes Large (Russet, German Butterball) 1-2 seed potatoes 1-2 seed potatoes 1 seed potato The key is 4-6 inches of space between each seed potato. Small varieties can handle more per bag, but large potatoes need extra room to size up properly. Should You Keep Adding Soil as the Plant Grows? This is where things get interesting. Hilling (adding soil around the stems as the plant grows) is a common practice, but it only works for certain potato varieties. * ✅ Indeterminate Potatoes (keep producing new layers of tubers as you add soil) * _Russet Burbank, German Butterball, Carola, Purple Peruvian, All Blue_ * Best practice: Add 2-4 inches of soil when plants reach 6-8 inches tall, repeating 2-3 times. * ❌ Determinate Potatoes (only form one layer of tubers, no benefit from multiple hillings) * _Red Pontiac, Red Norland, Kennebec, Yukon Gold (partially determinate), Adirondack Blue_ * Best practice: Hill once, adding 2-3 inches of soil when plants are 6 inches tall. No need to keep adding more. If you’re growing determinate potatoes, piling soil past the first hilling won’t help and can actually stress the plant. But if you’re growing indeterminate potatoes, hilling boosts yield by encouraging more tubers along the buried stem. * * * Maintaining Potatoes Using Korean Natural Farming (KNF) If you want to grow healthier potatoes with fewer inputs, Korean Natural Farming (KNF) is a great way to boost growth, protect against disease, and enhance soil life. Here’s how you can apply KNF principles to your potato grow bags: Fermented Plant Juice (FPJ) for Growth * Use FPJ made from vigorously growing plants like comfrey, stinging nettle, or sweet potato vines. * How to apply: * Dilute 1:1000 (about 1 tsp per gallon of water) and spray onto potato foliage once a week. * This provides growth hormones and minerals that encourage strong stems and tubers. Fermented Fruit Juice (FFJ) for Tuber Formation * Use FFJ from bananas or squash to promote carbohydrate storage in the tubers. * How to apply: * Start applying at flowering stage, diluted 1:1000 in water, once every 7–10 days. Indigenous Microorganisms (IMO) for Soil Health * Introducing IMO improves soil structure and boosts microbial diversity. * How to apply: * Mix IMO-3 or IMO-4 lightly into the grow bag soil before planting. * You can also use a diluted IMO spray (1:1000 in water) every 2 weeks to maintain soil health. Calcium Phosphate (CaP) for Strong Tubers * Prevents hollow heart and rot in potatoes. * How to apply: * Apply CaP spray at 1:1000 dilution when tubers begin to set (around flowering). LAB (Lactic Acid Bacteria) for Disease Prevention * Prevents soft rot and strengthens plant immunity. * How to apply: * Spray LAB solution at 1:1000 dilution once every 2 weeks. Using KNF, you improve potato resilience, reduce the need for fertilizers, and encourage natural, healthy growth. * * * What Temperatures Do Potatoes Need? Potatoes are a cool-season crop, but they have their limits: * Minimum soil temp for sprouting: 45°F (7°C) * Optimal growth range: 60–70°F (15–21°C) * Heat stress begins: Above 80°F (27°C) (tubers stop forming) * Cold damage: Below 29°F (-1.5°C) (frost kills foliage) If frost is coming, cover plants with row covers or mulch to protect them. In hot climates, provide shade during the hottest part of the day to prevent stress. Final Thoughts Whether you’re growing in a garden or stacking up grow bags, potatoes are one of the most rewarding crops to grow. Just match your variety to the right hilling technique, space them properly, and give them the nutrient-rich, well-draining soil they need. Do it right, and you’ll be harvesting pounds of homegrown potatoes with minimal effort.
Vegetable Gardening

Spring Planting Guide

How to Start a Community Garden or Local Food Network Spring is here, and with it comes the perfect opportunity to bring people together around fresh food and shared spaces. Whether you're dreaming of a thriving community garden or a local food network that connects neighbors with farmers, starting small and growing together can have a big impact. Here’s how you can make it happen, step by step. Step 1: Dream Big, Start Small What would a community garden or food network look like in your area? Is it about creating a space for neighbors to grow food, teaching kids where their meals come from, or ensuring that fresh produce is accessible to everyone? Start by chatting with friends, neighbors, and local organizations—see who’s interested and what ideas spark excitement. The best projects grow from shared enthusiasm. Step 2: Find a Space That Works It doesn’t take a massive plot of land to get started. An unused lot, a schoolyard, a patch of church property, or even a series of backyard gardens can all work. If you have your eye on a space, check on ownership and zoning rules. Some cities have land-use programs that support community gardens, and local landowners might be open to partnerships. Step 3: Make a Plan, Keep It Simple Sally Once you have a space, sketch out a rough plan. Raised beds or in-ground rows? Communal plots or individual spaces? Pollinator plants or composting? No need to overcomplicate it—just think about what’s manageable and enjoyable for your group. Reach out to local farm stores or extension services for potential donations or discounts on seeds, soil, and tools. Step 4: Gather Support (and Maybe Some Funds) Community gardens and local food networks don’t need big budgets, but a little funding can go a long way. Crowdfunding, small grants, or even a simple membership model can help cover costs. Some local businesses or restaurants might be interested in sponsoring or trading for fresh produce. If you're thinking bigger, cooperative purchasing agreements with farmers could help connect more people with fresh food. Step 5: Set Up Roles and Keep It Fun A little structure helps keep things running smoothly. Who's handling watering schedules? Who’s in charge of outreach or organizing events? Keep guidelines simple and flexible—this should be a joy, not a chore. Whether you decide on an informal group, a co-op, or a nonprofit, the key is making sure everyone feels involved and valued. Step 6: Get Your Hands in the Dirt Time to plant! Gather volunteers for a workday to set up beds, turn the soil, and start growing. Early spring is great for crops like lettuce, peas, radishes, and kale. If you're in a warmer climate, you might be ready for tomatoes, peppers, and squash. The best part? Seeing everything come to life. Step 7: Keep the Momentum Going A successful community garden or food network thrives on participation. Plan casual meetups, workdays, and workshops—composting, preserving, or cooking classes can all bring people together. If you're building a food network, keep expanding connections between growers and eaters. Small steps lead to lasting change. Step 8: Celebrate the Harvest Food has a way of bringing people together. Host a harvest dinner, a plant swap, or a seasonal market to share the bounty. Whether it’s a simple picnic or a neighborhood-wide feast, this is the time to enjoy the results of your hard work and keep the community spirit alive. At its heart, starting a community garden or food network is about more than just growing food—it’s about growing relationships, resilience, and a deeper connection to what we eat. So why not start this spring? Let’s dig in and see what we can build together. Have you started a community garden? Share your experiences in the comments!
Vegetable Gardening

Dance Partners in the Garden

The Art of Companion Planting Companion planting is one of the simplest and most effective ways to boost your garden’s health and productivity. Whether you’re growing vegetables, herbs, or flowers, understanding why certain plants thrive together can unlock a deeper connection with your garden. Rather than just following lists of companion plants, learning _why_ these relationships work will empower you to experiment and tailor your planting strategy to your own growing conditions. What Is Companion Planting? Companion planting is the practice of strategically growing different plants together to enhance growth, deter pests, improve soil health, and increase yields. This method has been used for centuries in traditional agriculture, including Indigenous farming techniques like the Three Sisters method, where corn, beans, and squash support each other’s growth in a symbiotic relationship. Why Do Some Plants Make Good Companions? The science behind companion planting is fascinating. It often boils down to these key interactions: * Pest Control: Some plants repel insects that might otherwise damage neighboring crops. For example, marigolds release compounds that deter nematodes, while basil helps keep aphids and mosquitoes away from tomatoes. * Nutrient Sharing: Certain plants have different nutrient needs, reducing competition. Others, like legumes, fix nitrogen in the soil, making it available to nearby plants that require high nitrogen levels. * Shade and Support: Tall plants can provide necessary shade for those that prefer cooler soil temperatures, while climbing plants benefit from natural trellises created by sturdy neighbors. * Pollination and Biodiversity: Flowers that attract pollinators can increase fruit production in nearby plants, and a diverse garden creates a more resilient ecosystem. Common Companion Planting Pairings (And Why They Work) * Tomatoes & Basil: Basil repels insects that love to snack on tomatoes, such as aphids and hornworms, and may even improve tomato flavor. * Carrots & Onions: The strong scent of onions deters carrot flies, while carrots help aerate the soil for onion bulbs. * Corn, Beans & Squash (Three Sisters): Corn provides support for climbing beans, beans add nitrogen to the soil, and squash acts as a living mulch, shading the ground and reducing weeds. * Lettuce & Radishes: Radishes mature quickly, loosening the soil for slower-growing lettuce, while their leafy tops provide light shade that helps lettuce stay crisp longer. How to Start Experimenting With Companion Planting Rather than memorizing endless lists, start by observing how different plants interact in your garden. Ask yourself: * What pests are common in your area, and which plants naturally repel them? * Which crops have similar or complementary soil and sunlight needs? * Can you use vertical space to pair plants efficiently? By understanding the _why_ behind companion planting, you can design a garden that’s not only productive but also healthier and more sustainable. Do you have favorite companion planting combinations? Share them in the comments below!
Vegetable Gardening

Plants are Telling us What the Soil Needs

Observing plants to determine nutrient deficiency.
Soil & Microbiology

Spring Violet Foraging and Making Violet Honey

Spring is the season of renewal, and one of the first delightful treasures to emerge is the humble yet beautiful violet (Viola spp.). These delicate purple blossoms are not only a feast for the eyes but also a nutritious and flavorful addition to your seasonal foraging. One of the simplest and most rewarding ways to preserve their floral essence is by making violet-infused honey—a sweet, herbal treat perfect for teas, desserts, or soothing a sore throat. Identifying and Foraging Wild Violets Wild violets grow abundantly in shady woodlands, meadows, and even backyard lawns. The most common species include Viola sororia (common blue violet) and Viola odorata (sweet violet). Here’s how to identify them: * Leaves: Heart-shaped with scalloped edges. * Flowers: Five petals, typically purple but occasionally white or yellow, with darker purple veins. * Growth Habit: Low-growing, often forming clusters in moist, rich soil. * Scent: Sweet violets have a distinctive floral fragrance, while common violets may be milder in aroma. Always forage from clean areas away from pesticides, roadsides, or pet-trafficked zones. Pick only the blossoms, leaving the plant intact to ensure continued growth and pollinator support. Health Benefits of Violets Violets are not just beautiful—they are also packed with medicinal properties: * Rich in Vitamins A & C: Supports immune health and skin vitality. * Anti-inflammatory: Traditionally used for respiratory relief and soothing sore throats. * Mildly Relaxing: Helps ease anxiety and restlessness when used in teas or infusions. How to Make Violet-Infused Honey This simple recipe captures the essence of violets in a smooth, floral honey. Ingredients: * 1 cup fresh violet blossoms (lightly packed) * 1 cup raw honey (preferably local) Instructions: 1\. Harvest & Rinse: Collect fresh violet flowers, removing any stems and leaves. Gently rinse in cool water and pat dry. 2\. Prepare the Jar: Place the flowers into a clean, dry glass jar. 3\. Add Honey: Slowly pour the raw honey over the violets, using a spoon or chopstick to ensure the blossoms are fully submerged and no air pockets remain. 4\. Infuse: Seal the jar and place it in a warm, sunny spot for 1–2 weeks. Shake gently every few days. 5\. Strain (Optional): If desired, strain out the flowers after infusion, or leave them for added visual appeal and texture. 6\. Store & Enjoy: Keep in a cool, dark place. Use within 6 months for the best flavor. Ways to Enjoy Violet Honey * Drizzle over biscuits, yogurt, or pancakes * Stir into herbal teas for a soothing floral touch * Use as a natural sweetener in salad dressings * Add to homemade skin masks or lip balms for a gentle, nourishing effect Foraging violets and making your own infused honey is a beautiful way to celebrate the abundance of spring. Whether you're using it for culinary delights or natural wellness, this simple recipe connects you to nature in a sweet and meaningful way. Happy foraging! Tip: Pair this recipe with other spring foraging finds like dandelion or red clover for even more floral-infused goodness!
Foraging

Garden’s Hidden Treasure – Storing Tubers.

Garden Week Twenty-Six 10/23/2018 Garden’s Hidden Treasure – Storing Tubers. Recently, I was visiting with a friend and local musician, Duane McIver. We were talking about the article and how I had recently learned that peonies need to be thinned every 3-5 years. Wouldn’t you know it, he had some peonies which hadn’t been thinned for many years. Thanks to Duane for letting me thin the peonies and get these great photos! Several weeks ago, we learned about Bulbs, Corms, Tubers or Rhizomes. If you recall, we learned that peonies are among the Tuber Perennials. The tubers are usually short and thick storage stems comprised of starch-storing tissue with a leathery skin and eyes or growth nodes. In the fall the Peony stems are cut back to a length of 3-4 inches. It is ok if this was weeks ago. When digging up the Peony tubers, watch for the Heart and follow out the stem to find the length of the tuber. Start 6-12 inches from the main stem area and work your way in. Once the ground is removed, you can life the heart, tubers and roots. Before setting up your work station, the Peony tubers should be sprayed free of dirt and debri and left to dry 12-24 hours. One the tubers have had time to stiffen, this will limit accidental breakage. Before working on the tubers, it’s important to clean and sanitize your tools. This will prevent the spread of disease and fungus. Make sure your favorite working location it prepped. This may include a prepared a garbage bag for debris, and a clean dry location for the plants once cleaned. Remove any remaining dirt, and inspect for soft or rotted spots, porous, diseased or dead parts and remove. Don’t be afraid to cut or scrape these areas away. Make sure you throw these away. Do not keep or compost any Rhizomes which are diseased. A good Rhizomes for storage will have, roots as well as stem. Not every Rhizome will flower next year. Keep the largest of these for next year’s flowers. If you keep the smaller of these, next year you may consider planting them where they can continue to grow for the following year Once they are all clean, place on a rack or table, in a warm location with good air circulation, where they can dry for a couple of days. They will form a thick layer, kind of like leather. This will allow the plants to store without rotting over the winter and is known as curing. Once dry, store in a box, or paper bag, by creating layers with straw, sand, newspaper, wood chips, or preferred medium. Be sure to label each container with the species and color so you don’t lose anything. Periodically, check on the rhizomes. Remove any which become soft, so that fungus does not spread. Enjoy building your Iris Rhizome Treasure Chest! _Happy Gardening!_ ![](/images/posts/Wash-the-dirt-from-the-Peony-tubers-and-let-rest-in-a-cool-dry-location-for-12-24-hours..jpg) ![](/images/posts/Tuber-run-off-this-main-Peony-Heart..jpg) ![](/images/posts/A-well-divided-Peony-heart..jpg) ![](/images/posts/A-divided-peony-heart.jpg)
Vegetable Gardening

Garden’s Hidden Treasure – Storing Rhizomes.

Garden Week Twenty-Five 10/2/2018 Garden’s Hidden Treasure – Storing Rhizomes. Last time we learned about Bulbs, Corms, Tubers or Rhizomes. Today I want to talk about storing Iris Rhizomes for the winter. If you recall, Rhizomes are underground stems, which grow horizontally are capable of producing root and shoot structure of a new plant. Unlike tubers, Rhizomes store proteins as well as starches. Many invasive and aggressive plants have rhizomes allowing them to propagate asexually rather than just with seed. Last week, I worked with Jessie Gerard of Mother Earth’s Natural Design, a local Landscape specialist. She had an Iris Garden Bed, which she plans to redesign. We worked together to gently remove the rhizomes from the ground so that the roots were not damaged. I collected them into buckets and took them home to work with later. (Where I could be warm.) Thanks for all the Iris rhizomes, Jessie! As with any project, it’s important to clean and sanitize your tools. This will prevent the spread of disease and fungus. Prepare a comfortable working location. Because I am preparing a large volume of plants for storage, I set up at my kitchen table. First, I laid newspaper over the table, prepared a garbage bag for debris, and a clean dry location for the plants once cleaned. My garden scissors and knife are cleaned and sanitized. I am ready to get to work. At this time, it is OK to cut back the last of the foliage. You can leave about 3 inches of the fan intact, they will dry. Remove any remaining dirt, and inspect for soft or rotted spots, porous, diseased or dead parts and remove. Don’t be afraid to cut or scrape these areas away. Make sure you throw these away. Do not keep or compost any Rhizomes which are diseased. A good Rhizomes for storage will have, roots as well as stem. Not every Rhizome will flower next year. Keep the largest of these for next year’s flowers. If you keep the smaller of these, next year you may consider planting them where they can continue to grow for the following year Once they are all clean, place on a rack or table, in a warm location with good air circulation, where they can dry for a couple of days. They will form a thick layer, kind of like leather. This will allow the plants to store without rotting over the winter and is known as curing. Once dry, store in a box, or paper bag, by creating layers with straw, sand, newspaper, wood chips, or preferred medium. Be sure to label each container with the species and color so you don’t lose anything. Periodically, check on the rhizomes. Remove any which become soft, so that fungus does not spread. Enjoy building your Iris Rhizome Treasure Chest! _Happy Gardening!_ ![](/images/posts/Getting-organized-will-make-the-job-easier..jpg) ![](/images/posts/Bearded-Iris-found-in-the-yard-this-summer..jpg) ![](/images/posts/Time-to-thin-the-Iris-Bed.jpg) ![](/images/posts/Rhizome-Soft-and-rotted-Throwing-this-one-away..jpg) ![](/images/posts/It-is-OK-to-cut-it-open-and-look-at-the-rhizome.-Do-not-keep-diseased-plants..jpg)
Vegetable Gardening

Garden's Hidden Treasure

Garden Week Twenty-Four 10/2/2018 Garden’s Hidden Treasure So, all these years, I have been referring to Tulips, Daffodils, Crocus, Ginger, Horseradish, Garlic and many other plants as bulbs and tubers. Turns out, there is more to the story. Some bulbs are actually Corms. Some Tubers are actually Rhizomes. Now we have Bulbs, Corms, Tubers and Rhizomes, and they all fall under the general classification of Geophyte. The term, Geophyte, appears to have derived from the Greek words for earth and plant and was christened in 1904 by Christen C. Raunbiaer, a Danish botanist. Geophyte is defined as a plants storage organ specifically modified for the storage of energy and water. This fall we are looking at underground storage organs, which will come to life in the spring and early summer. Let’s take a look at these various hidden treasures! BULBS: A modified stem in its resting stage, which usually consists of an underground bud with overlapping fleshy leaves arising from the resting stem. Bulbs can vary from pea sized to 15 lbs. and will have either a thin papery covering, like an onion, or a scaly bulb, which has no protective layer, causing a scale-like appearance. Plants: Tunicate bulbs (papery covering) include: Daffodil, narcissus, tulips, amaryllis, and hyacinth. Non-tunicate bulbs include: Lilies, snake’s head fritillary, chess flower, guinea-hen flower, frog-cup, drooping tulip, and many more. Vegetables: Tunicate bulbs (papery covering) include: The Allium family of onion, garlic, scallion, shallots, leek and chives. CORMS: Unlike a bulb, when a corm is cut in half, there are no rings or striations and they are covered in a fibrous tunic. Also, unlike a bulb, corms can reach sizes in excess of 150-200 lbs. Plants: Crocus, gladiolus, and elephant ears. Vegetables: Chinese water chestnut. TUBERS: Usually short and thick storage stems comprised of starch-storing tissue with a leathery skin and eyes or growth nodes. Plants: Dahlia, caladium cyclamen, peony, delphinium and daylily. Vegetables: Potato, jerusalem artichoke, cassava, yams, and sweet potatoes. RHIZOMES: Underground stems, which grow horizontally are capable of producing root and shoot structure of a new plant. Unlike tubers, Rhizomes store proteins as well as starches. Many invasive and aggressive plants have rhizomes allowing them to propagate asexually rather than with seed. Plants: Bamboo, ground ivy, poplars, calla lily, canna, grass, bearded iris, lily of the valley, water lily. Vegetables: Ginger, turmeric, asparagus, and horseradish. What makes all of the plants similar is their ability to store energy for the winter. As we discussed this spring, the more energy saved by the bulb, and now we know corm, tuber and rhizome, the more color, flowers and fruit we will get in the spring. For all of these plants: leave the green leaves intact as long as possible. With the weather turning the leaves will start to die back. For those plants hardy to your zone, once the foliage is dead, cut it back and leave it. The plant will comeback in the spring. For those plants, not hardy to your zone, they must be removed from the garden and stored in a dry location like the garage or basement for the winter, in sand or sawdust. Every plant has specific temperature and moisture needs, so do your research. If your plants are declining in color or production, it may be time to thin them out. Next week, I’ll look closer at thinning each of these plant types. In the meantime, figure out what needs to come out of the garden and stored for the winter, and what needs to be thinned and stays in the garden. _Happy Gardening!_ ![](/images/posts/Screenshot-2024-04-12-124741.png) ![](/images/posts/White-Narcissus-A-beauty-indeed.jpg) ![](/images/posts/Tulips-start-planning-the-spring-garden.jpg) ![](/images/posts/Snake-Head-s-or-Chess-Flower-I-will-be-looking-for-these-next-year.jpg) ![](/images/posts/Narcissus-A-beauty-indeed.jpg) ![](/images/posts/Gladiolus-Corms.jpg) ![](/images/posts/Chess-flower-I-will-be-looking-for-these-next-year.jpg) ![](/images/posts/jerusalem-artichoke-I-get-requests-for-these-every-week.jpg)
Vegetable Gardening

Sweet Winter Winds

Garden Week Twenty-Three 9/18/2018 Sweet Winter Winds What are you creating with your plumes? Share your recipes and pictures with the Morning News and have your photo featured on the Garden page. As wind the picks up, the smell of winter is in the air. Time to pull out the sweaters, make sure the wood is cut, clean the yard, and put away the summer tools. The harvest is still in full swing, but we can start thinking and planning for the winter and spring garden activities. Yeah, you thought that once the harvest is done, the work is done. Well, there is much we can do to care for the Soil, Plants, and Beneficial’s throughout the fall, winter and early spring. Caring for the soil: The top layer of is the most nutrient and important layer to consider through the winter. Wind, rain, snow all can contribute to a loss of nutrients. As the harvest comes to a close, it is time to consider what has been planted and what will be planted in the beds next year. Remember crops rotations will help to prevent disease and pest troubles each year. For those beds which had heavy feeders like tomatoes, peppers, potatoes, squash, cucumbers, eggplants, onions and anything from the cabbage family, a cover crop like Winter pea or Hairy vetch can help to restore nitrogen and add organic matter to next year’s garden. If you would like more localized advice on what cover crops you should use, check our Grimm Growers Warehouse Corp. here in Blackfoot, ID. They have been very helpful and cost effective. For those beds which had light feeders like carrots, salad greens, beans or peas; you can either clear and turn over the soil or mulch and work in the crop debris. Then cover the beds with an organic mulch, plastic cover or tarp to prevent the top layer of soil from blowing or washing away. Covering with a plastic cover or tarp will have the added benefit of keeping the soil dry and give you earlier spring access to these beds. Garden Cleanup: Annual weeds which have survived and gone to seed should be carefully disposed of. Cover the seed heads with a bag and snip the stem to limit seed dispersal. Always throw these into the garbage or burn them, do not put them in the compost pile. For any beds where disease or pests became a problem, completely remove the plants, roots and all. Dispose of the entire plant in the garbage, never the compost pile. Where possible, it is recommended to burn these items. Because heavy feeders, mentioned above are prone to diseases like blight, wilt, and fungal diseases, it is recommended to only compost the healthy plants debris into live compost piles. If you do not have a live compost pile, completely remove these plants as well and dispose of them in the garbage or burn them. ![](/images/posts/Sage-seeds-and-about-ready-to-save-and-store..jpg) Sage seeds and about ready to save and store. Tools can be cleaned, sharpened and stored for spring use. Hoses and other water features can be drained, cleaned and stored for winter. Overwintering: Many beneficial insects and animals will overwinter right in the garden. We can help them to succeed through the winter months by providing winter shelter, food and water. Birds migrating trough will stop and eat seeds of perennials, cover crops and weeds (should you be so kind). You may also consider leaving seeds available for birds which migrate through SE Idaho. Boards, rocks, cardboard or the like can give shelter to ground beetles, local bees and other bugs. Making water available in the garden, right up until it freezes, will benefit all the critters whether staying or passing through. Cover or protect overwinter plants with mulch, row cover or cold frame to extend to growing season of cabbage, kales, carrots, spinach and so much more! Thin and transplant bulbs, tubers, and corms. This is also the time to start planting pansies, early spring bulbs, hardy perennials and trees. Seeds: Many plants have proven to be good producers, sturdy and healthy. Consider saving a few of the seeds from these plants to use in next year’s garden. Seed storage saving techniques can vary, but in general, these simple steps will suffice. Cut a piece of terry cloth or similar material large enough to loosely cover the seed head allowing room for the pollen to move around and to not damage the seeds. At the stem and inside the cloth place cotton or gauze to catch the seeds. As the plant wither and dries, the seeds will fall loose into the bag. When the stem appears to be nearly dry, cut and either hang or set on an elevated screen to completely dry. For seed storage techniques, check out “The Plant Propagator’s Bible” by Miranda Smith, where she delves into care, storage and disease prevention techniques. I really enjoying this book as she provides many pictures and illustrations along with detailed explanations and directions. I know this seems like a lot, but a little bit of work in the fall can make life easier in the spring! _Happy Gardening!_
Soil & Microbiology

The Garden Hunter

Garden Week Twenty-Two 9/10/2018 The Garden Hunter Found this guy hunting in the garden this weekend. Last week, while repairing the mailbox, I thought a branch had fallen from the tree onto my hat. So, I swiped it to the ground only to find that it was a praying mantis. Wow, I thought, I hadn’t realized praying mantis lived in Idaho. In the past week, I have seen praying mantis in Mooreland, Chubbuck as well as here in Blackfoot. Far too many to be a coincidence. Spending summers as a child with family in Florida, I often saw praying mantis, but I do not recall them here in Idaho. The curious me started asking questions: Are praying mantis native to Idaho? What kind of mantis are these? What do they eat? Are they good for the garden? Why am I seeing them now? Turns out that mantes are not native to Idaho and have been documented migrating north into Idaho since the late 1980’s. According to an interview by Dianna Troyer of the Idaho State Journal, 8/29/1997, with Robert Anderson, an Idaho State University biology professor, who said of the migrating mantis; “Who knows when or how, but through a series of mutations, variant forms of this species have adapted to cold conditions." I think this is really interesting because the praying mantis is typically found in warmer areas, and most often in tropical regions. The species he was referring to, and the we see here in Idaho, is the Stagmomantis Californica. This mantis is typically found in shrubland or desert environments, which is why they are also found from Mexico to Arizona, California, Colorado, New Mexico and Western Texas regions. Like most mantis species, they can adapt to their surroundings, allowing them to change from greens to browns and to mimic their surroundings. ![](/images/posts/Mantis_religiosa_.jpg) Mantis\_religiosa\_(egg\_case) By © Hans Hillewaert, CC BY-SA 4.0, httpscommons.wikimedia.orgwindex.phpcurid=3980582 Most mantes are ambush hunters and do not have a specific prey, eating everything from; flies to grasshoppers, moths, crickets, mosquitoes, other mantis, birds, frogs and other small amphibians. Of the birds preferred by Mantis, the hummingbird seems to be a favorite. Because they are not specific, they will eat beneficial creatures as well as pests. So, it is up to you if they are beneficial bugs, or not. If you want to see something amazing, try observing a praying mantis on the hunt. They are especially equipped with 3D vision allowing them to see even the slightest of movements. Coupled with their lightening face reflexes and grip, they are able capture the fastest of prey. Cool fact, praying mantis have exceptional hearing which allows them to hear the ultrasonic sound that bats make, helping them to avoid being eaten. The mantis, unlike many bugs, has three stages to its life cycle; eggs, nymphs, and adult, skipping the larva stage completely. When the weather warms, the nymphs will climb out of the egg case. Fragile nymph survivors learn what they can hunt as they grow, leaving them vulnerable to predators. For those that survive, they will shed their exoskeletons many times before reaching maturity. Currently, female and male mantis are looking to mate, which why I am seeing them everywhere! Later this fall, the female mantis will lay its eggs. Whether male or female, the adult mantis will not live through the winter. While I am not sure if I have been seeing the male or female of the mantis, if you keep an eye out, you may just see one too! _Happy Gardening!_
Vegetable Gardening

Outside the Fruit Box

Garden Week Twenty-One 8/28/2018 Outside the Fruit Box I’ve always wanted fruit trees in my yard. This year, not only do we have fruit trees, but we have loads of fruit. In fact, everyone I speak to has an abundance of Apricots, Plum, Prunes, Apples, Peaches and Pears. How much jam, applesauce, pies and breads can a person can handle? I have decided to look outside the fruit box and experiment with some of recipe books I’ve been collecting all these years: I’ve chosen this recipe for my daughter. This summer she was introduced to the Apricot Tart, an Italian pastry. The tart she ate was kind of like an apricot tart in a poach. Since I’m still learning to make tarts, I will go with this recipe from Sugar Rush, by _Johnny Iuzzini_ Apricot Custard Tart: Gather all your tools and ingredients - then bake, bake, bake! Softened butter, for greasing the pan Confectioners’ sugar, for dusting 14 fresh apricots halved and pitted ¾ cup granulated sugar (150 g) 2 large eggs 6 tbls. All-purpose flour (48 g) ½ cup heavy cream (120 g) ½ cup whole milk (120 g) 1 cup almond flour (95 g) ½ shelled pistachios, roughly chopped (70 g) ![](/images/posts/make-a-homemade-mayonnaise-....jpg) I’m going to make a homemade mayonnaise for use in the Sauce Suedoise. There's something special about a sauce from scratch. Preheat the oven to 350ºF. Butter a 10-inch springform pan and dust in with confectioners’ sugar. 1. In a bowl, sprinkle ¼ cup granulated sugar over the prepped apricots; toss lightly and let stand for 10 minutes. 2. To prepare custard: In a medium bowl, whisk the eggs and remaining ½ cup granulated sugar until light and fluffy. One by one, whisk in the all-purpose flour, cream, milk, and almond flour, beating well after each addition. 3. Arrange the apricots in the prepared pan, cut side down, slightly leaning and overlapping each other, in two concentric circles. Gently push the out circle of apricot halves into the center so there is at least ½ inch of space between the outer edge of apricots and the pan. 4. Pour the custard mixture into the spaces in the pan, taking care not to pour directly on the fruit. Bake in the center of the oven for 20 minutes. Carefully remove the pan, sprinkle the pistachios evenly over the top, and return the tart to the oven. Continue baking for about 40 minutes more, until light golden. Cool the tart completely in the pan before running a thin spatula around the edge to release it and remove the outer ring. Dust with Confectioners’ sugar before cutting and serving at room temperature. I’m so excited to surprise my kiddo with this sweet treat! In addition to trying my hand at a tart this year, I am also trying a Sauce Suedoise (Apple-horseradish mayonnaise) found in my all-time favorite book, Sauces, by _James Peterson._ To prepare a sour apple puree; slice about 1 lb. or 2 of your favorite large sour appl. Sprinkle with just a few drops of lemon juice, to prevent browning and balance the acidity of the puree. Cook the apples down in a sauce pan. As the apples soften, add 1 tbls. white wine. Once soft, puree in a food processor, food mill, or drum sieve. Return to the pan and reduce until stiff and no liquid remains, stirring constantly to prevent burning. Mix approximately 1-part apple to 3-parts mayonnaise…to taste, flavor with grated horseradish, about 1 tbls. per cup. I’m thinking this will go nicely on a pork sandwich or panini. So much fun! Wish me luck! And good luck to all the canner’s, preserver’s, and experimental home chef’s. _Happy Gardening!_
Vegetable Gardening

Yikes! Are those bad bugs in my garden?

Garden Week Eighteen 8/7/2018 Yikes! Are those bad bugs in my garden? Every day I walk through the garden. Daily inspections help to identify pests before they become a problem. Thursday, I found a gathering of aphids on several of my tomato plants. I watched them spread to several other plants over the weekend, now action is required! But what should I do? As a mother, I have done my best to feed my children organic, non-GMO foods, where possible. In the garden, this is definitely something I can make happen. To that end, I use insecticidal soaps and old-school other tricks rather than chemical pest controls. One such method is insecticidal soap. But what is it? How does it work? When should it be used? What does it work on? According to Marriam-Webster’s dictionary: Soap: noun \\ ˈsōp \\ a: a cleansing and emulsifying agent made usually by action of alkali on fat or fatty acids and consisting essentially of sodium or potassium salts of such acids b: a salt of a fatty acid and a metal It is these fatty acids which are believed to disrupt the life cycle of the pest without damaging the plants we are caring for. It is not thoroughly understood how insecticidal soap affects bugs. However here are some possibilities as described by Larry Kelley: Dehydration: by disrupting the body’s ability to retain water. Cytolysis: Disrupting the cell membranes, causing the cells to break down. Suffocation: by blocking the insect’s tracheal causing it to drown or suffocate. Sounds unpleasant, but this method can used without harming children, animals and of course our plants. ![](/images/posts/The-invasion-of-aphids.-Yikes-my-Tomatoes-are-being-attacked.jpg) With the move towards more organic methods of pest management, companies are now making insecticidal soaps available for sale. When you read the label of these products the main or active ingredient will likely be listed as “potassium salts of fatty acids" or "potassium laurate". However, when it is necessary, I like to make my own. For my current pest, the aphid, I will use a Castile Soap based insecticidal soap. Recipe: ½ gallon spray bottle 2-1/2 tablespoons Dr. Bronner’s Pure Castile Soap ½ gallon water (Tap water is fine) Test spray on a small area. After 24 hours, if the plant shows signs of distress, wilting, browning, spotting, do not proceed. If all looks good, focus the solution on the affected area, avoiding beneficial bugs. Why am I using it now? I don’t use insecticidal soaps until the beneficial insects are not keeping up with the problem. Once I have identified an area of infestation, I will watch the progress of the pest over a couple of days. If the problem moves beyond one or two plants, I will introduce additional beneficial bugs, like the Lady bug. While waiting for these to be delivered a dose of insecticidal soap will stave off the pest’s progress. Do not worry, the spray works on contact and will not hurt the newly introduced beneficial bugs. This particular recipe is good for use on soft bodied pests like, aphids, mealybugs, and to a lesser degree, earwigs, mites, and thrips. While I prefer to let things work themselves out in the garden, sometimes, we have to help out. There are many homemade and organic methods for pest management. Remember to do your homework and think outside the box when trying to limit chemical exposure of your garden. Some methods, while being time consuming, can be just as rewarding as planting or harvesting when you know what you’re putting on your plate! _Happy Gardening!_
Vegetable Gardening

Let’s Fall for the Garden again!

Garden Week Seventeen 7/31/2018 Let’s Fall for the Garden again! Summer harvest has begun! Yum! But does the pleasure have to end with the summer heat? Why no, it does not. Rather than just tilling in the used beds and leaving them fallow or just letting them run rampant until spring; you can start planting for fall harvest. Because it is really hot, there is no need to start inside; however, this summer heat can be too much for precious germinating starts. Try these tricks to protect your new plants. • There is no need to rototill, as this may bring weed seeds to the surface; just fork, rake or till and amend soil as usual. * * * • Plant seeds deeper than you would in the spring. • Cover seeds with straw or row cover to hold moisture and shade new starts. • Water seeds, then seedlings daily to avoid heat stress and plant loss. • For the most tender of plants, start indoors and transplant when the weather is milder. Don’t forget to harden these plants off before sowing into the garden. Once you get your fall plants growing you will want to protect them from the temperature changes of the fall. Knowing your first frost date will help you to prepare. Here in Zone 5b, our first freeze date ranges from August 1st – 31st. Be prepared to cover plants with protective row covers or PVC Arch. If you use a cold frame, make sure it is good order before the fall freeze comes on. You still have time to plant: Root veggies like beets, radish, parsnips and carrots; Cabbage, kale, collard greens, broccoli and cauliflower; Lettuce, swiss chard, spinach and endive; Mustard and Asian greens; Cilantro; and Spinach. If you do not plan to grow more veggies, consider planting a cover crop or cover crop mix to revitalize the nutrients and soil composition for next year. Here are a couple of cover crops to consider. To help with soil structure by maintaining aeration and adding organic matter, consider using an annual Rye Grass or Winter Rye. These have to be started when temperatures are between 60-75 degrees daytime and soils are still between 50-65 degrees. Planting these too late will inhibit germination and not be beneficial. Buckwheat, also called a smoother crop, because is germinates and grows quickly, this heat loving plant will add valuable organic matter to your garden and keep weeds at bay while the summer heat persists. Buckwheat will thrive in the cooler days but is not tolerate the freeze. Because the plant grows quickly, and the bees love their flowers, these can be a great benefit to bees during the dearth of summer. If you haven’t burnt out from the all spring and summer garden work, I wish you luck in growing a fall garden too! _Happy Gardening!_ Brad's Atomic Grape: Bundle upon bundle...tomatoes for day!
Vegetable Gardening

Sweet, Crispy, Crunchy Carrots!

Garden Week Fifteen 7/17/2018 Sweet, Crispy, Crunchy Carrots! Pusa Rudhira Red: high in beta-carotene and lycopene and so yummy! Whether you like orange, white, yellow, red, pink, or purple carrots, if you planted carrots this spring, you may be harvesting carrots now or soon. I myself harvested, some lovely St. Valery (orange), Parisienne (short, round, orange), Cosmic Purple (orange inside) and Pusa Rudhira Red (Coral red) carrots, so good! You may have heard the story of King Orange and his love of all things orange. As I heard the story, carrots were cultivated through either a mistake or intention to satisfy this “King Orange”, an affectionate nickname giving to King William I, being the reason we know carrots to be orange today. Sounds more myth than truth. So, how much of this story is rumor and how much is true. Let’s find out. Way back, an ancestor of the carrot has been identified through fossil records as far back as 55-34 million years ago. Shoo, that is a long time! Much later, as far back as 5,000 years ago, our ancestors were eating wild carrots throughout Europe and in now Afghanistan. Drawings, of what is believed to be a purple carrot, can found in ancient Egypt as far back as 2000 BC. Carrot seeds can be found in pharaoh crypts, but it not clear whether the carrot was cultivated as a food source. Romans, as with many foods, thought the carrot seeds had aphrodisiac properties. Parsnips, which are also white, appear to have easily been confused with carrots, due this it is difficult to trace the long history of the carrot. As society developed, it was the seed, which was used first for medical purposes, as wild roots carrots may not have been as delectable as our current scrumptious carrots. History suggests that the bulbous nature of the carrot developed around the 9th century. The wild carrot doesn’t appear to have domesticated until the later Middle Ages. Additionally, it is not until the around the 11th century that Europeans begin to describe the carrot as being red or orange. This may have been due to hybridization. The purple and yellow varieties appear to have been largely cultivated where the Himalayan and Hindu Kush mountains meet the Middle East and Russia areas, later migrating to the Mediterranean and Western Europe in the 11-14th centuries. And eventually finding its way to China, India and beyond in the 14-17th centuries. Prior to the 16th Century, carrots remained largely purple and yellow, with the yellow being prefer for its flavor, and appearance when cooked. It was Dutch growers who developed the denser orange carotene carrot we know today. Modern genetics confirms the orange carrot is derived from these early yellow varieties. While orange, due to carotene, carrot varieties are most common in grocers today, we can still find purple, black, white, yellow and red varieties. It is anthocyanins, which pigment the lovely purple and black carrot varieties. Lycopene, a type of carotene causes us to have red carrots. Yellow carrots contain xanthophylls, a pigment similar to beta-carotene. White carrots, still often confused with the parsnip, comes in more of a cream, ivory or golden-brown color, and are pigment free. Additionally, white carrots contain lipophilic (a carotene) and hydrophilic (phenolic compounds). Each of these pigments, carotenes and compounds have specific health benefits. As for the story of cultivators growing the orange carrot as tribute to King Orange, or as one story suggests, to give thanks to King William I as tribute for him leading the Dutch revolt against Spain, this appears to have been a fiction started by a creative, possibly ambitious scholar. No matter which carrot you prefer, whether roasted, mashed, hashed, or straight out of the garden, you can’t go wrong with this sweet, crispy, garden treat! _Happy Gardening!_
Vegetable Gardening

Common garden troubles this June:

Garden Week Twelve 6/26/2018 Common garden troubles this June: The weather has warmed, the gardens are growing and so are the pests. According to the Pacific Northwest Pest Alert Network, the first summer pests and diseases are Potato Psyllid, Scale on Honeylocust, Spider Mites, and Powdery Mildew. Let’s take a closer look at Potato Psyllid and Spider mites this week. Bactericera cockerelli, commonly referred to as the Tomato Psyllid or Potato Psyllid, this species can affect other members of the solanaceous family, including potatoes, tomatoes, peppers, eggplant, and other nightshade plants. First identified as a potentially invasive pest in the early 1900’s, it became a serious problem by the 1920-1930’s. The small winged pest lays individual yellow eggs along the edge and mostly on the underside of leaves. Pale green upon emergence, they begin turning dark grey to brown within 2-3 days, eventually becoming grey or black. Identifying features include: White markings on the head, thorax, first and last segments of the abdomen. Often confused with the nymphs of whiteflies, they remain sedentary, while whiteflies will move if disturbed. Diseases associated with this pest are Pysllid Yellow and Zebra Chip. It is believed a toxin associated within this insect may cause ‘psyllid yellow’ found both in potatoes and tomatoes. Pysllid Yellow presents as a yellowing of the plant, disrupts plant growth and damages fruit size. Zebra Chip presents with discolored and curled leaves. When fried, potatoes present with blotches, stripes or streaks. While the appearance may not be acceptable in the potato chips, I have found no information regarding the health risks to humans. Spider Mites, a member of the arachnid family, bruise the cells of plants when feeding, causing lightening or bleaching spots where the cells have been damaged. Seen through a magnifying glass, spider mites come in various colors and produce masses of webbing. Plants which are not watered well provide more nutrients to the spider mite. Taking care of your plants will help them to stave off an infestation. Note that the use of pesticides will kill the spider mites’ predators, which include, the lady beetles (aka “spider mite destroyers”), trips, predatory mites, minute pirate bugs, and big-eyed bugs. Other than biological controls, it is best to cut and remove invested branches and leaves, as spider mites are resistant to chemical treatments. For more information on identifying and managing these pests, check out: http://extension.colostate.edu/topic-areas/insects/spider-mites-5-507/ Maybe next time we will take a closer look at Powdery Mildew or Scale on Honeylocust. In the mean time you can learn more at: http://pnwpestalert.net/alerts/crops/ https://pnwhandbooks.org/plantdisease/host-disease/sugar-beet-beta-vulgaris-powdery-mildew http://ipm.ucanr.edu/PMG/PESTNOTES/pn7410.html _Happy Gardening!_
Vegetable Gardening

Summertime Tomatoes!

Garden Week Eleven 6/19/2018 Summertime Tomatoes! For most people, the garden is green and growing. I think the most popular vegetable will be the Tomato. With all the different options in growing tomatoes, what are we growing? Let’s look at the size of the plant and the fruit. How much plant will grow? Determinate: Growing between 2 and 3-foot-tall and require little or no staking or pruning. These plants will produce fruit all at once, then decline in production. Flowers are produced at the end of the shoots, which stops growth determining their length. Indeterminate: Whether you like it or not, these plants will grow all summer. Rather than producing flowers at the ends of the branches, these plants produce flowers along the vines making them indeterminate. Because these plants will continue to grow or vine, they will require support and pruning. Without maintenance, these plants can run wild. With pruning, these plants can be trained and trellised. Pruning indeterminate tomato plants: 1. Maintain the first main branch, which will become the main vine. Some choose to leave a strong sucker branch in place which will become a second vine. Sucker branches which are not removed will become additional tomato-producing vines. 2. Remove sucker branches which are located in the crook or just above a branch coming off the main vine of the tomato plant. Enjoy eating and cooking with tomatoes, let’s look closer and the types of tomatoes available. Bite-sized tomatoes often referred to as cherry, grape or pear tomatoes mostly have shorter growing seasons, with production in 55-70 days and can be prolific producers. These tomatoes tend to be 1-2 inches or 1-2 oz in overall size. Roma, plum and other egg-sized tomatoes tend to produce in 60-75 days ranging from 2-3 inches or 2-3 oz. Slicer, salad or globe tomatoes are mid-season tomatoes maturing in 70-80 days ranging from 2-4 inches and from 3-8 oz. Beefsteak tomatoes are your largest tomatoes with production in 70-90+ days. Unlike the globe varieties, Beefsteaks have ridges rather than being perfectly round and weights come in at 1-2lbs each. All tomatoes come in a variety of colors and flavor profiles. My favorites, include: Brandywine: a pink beefsteak variety, maturing in 80 days and up to 1-.5 lbs. I enjoy the season’s first green tomatoes breaded and deep fried with egg on the side. When they mature they can be messy, but I like slicing and eating with a sprinkle of salt, so juicy! Last beefsteaks of summer 2017: Mostly, lovely Amana orange tomatoes and a couple Brandywines hiding. Amana Orange: an orange beefsteak, maturing in 80 days and up to 2 lb. With a hint of tropical flavor, these are a perfect summertime tomato. We roast with herbs and olive oil before canning and storing for winter use. You can also add some red wine vinegar for a more Italian-styled tomato. The master chef of our house prefers to eat tomato like candy or apples: She is excited for: Tommy Toe tomato: an old-fashioned red cherry tomato, producing perfect 1 oz. round cherries in 75 days. These are perfect in salads and just popping like candy, sweet and juicy! Principe Borghese tomato: another perfectly red tomato, maturing in 70-75 days and producing 1-2 oz. cherries. Unlike most sweet cherry tomatoes these are drier making them perfect for drying and saucing. I have a feeling we will have plenty of sun-dried tomatoes and some experimenting with sauces once these start producing. German Lunch Box: these egg-sized red tomatoes are produced in 70-80 days and are aptly named, because you want to through them in your lunch box and eat them like an apple. Millionaire Tomato: a famous coral-pink beefsteak tomato, which was popular in grocers till the 1950’s, produces in 80 days and can weigh up to 1lb. Our chef is excited to taste the very tomatoey tomato of the Millionaire, which is great for slicing and canning. White Tomesol Tomato: A unique white large slicer tomato, yes, white inside and out, which matures in 80 days. This is our first year growing these and she is excited to experiment with these beauties. I’m going to make myself a ‘mater sandwich (classic summer sandwich in the south). _Happy Gardening!_
Tomatoes

What’s all the hype about?

Garden Week Ten 6/4/2018 What's all the Hype About? What’s all the hype about? We’ve heard the terms, GMO (Genetically Modified Organism), Hybrid, and Heirloom. But what does it mean to you and me? Let’s define each and look at some pros and cons. GM foods: define by the WHO (World Health Organization); “are foods derived from organisms whose genetic material (DNA) has been modified in a way that does not occur naturally, e.g. through the introduction of a gene from a different organism.” • Pros: May produce higher quantities, disease resistant, and be more draught resistant, See the history of corn in America and Rice in India. • Cons: May loose flavor, cause illness, See Diabetes and other obesity related disease research, effect indigenous plant and animal life, and may be a factor in Colony Collapse Disorder a major problem for bees, will not reproduce. • GMO plants include: Tomatoes, Squash, Potatoes, Soybeans, Corn, Rice, Sugar beets, Canola and more. Hybrid: As the name indicates, hybrids are the product of cross breeding two plants, which may or may not be of the same variety. As long as there have been farmers, people have experimented with taking the best of two things to make a better one. Mother nature also does this and that is how we have plants today. This process produces features like seedless fruits and longer shelf life. • Pros: Fun! • Cons: will not reproduce. • Common Hybrid Plants: Grapple (one of my daughter’s favorites), Mandarin Orange, Boysenberry, Grapefruit, Loganberry, Broccoflower. Heirloom, Heritage, Open-pollinated or Standard: Basically, to me anyways, a plant must be able to reproduce itself. Some people treat heirlooms like it has to be historically documented between time A and time B. I do not. I believe that a plant that has developed the ability to reproduce itself is legit. People have been saving the seeds of the healthiest, tastiest, best producing plants for millennia. For that reason and through my own gardening experience, I know the value, strength, flavor and production I have gotten from heirlooms. • Pros: Flavor, disease resistant, climate tolerant (when you buy seeds from your hardiness zone), abundance, color, texture, smells, they reproduce. • Cons: Can cost more for rarer varietals. • Common plants: Everything! No matter what you choose, fresh vegetables make everything better!! _Happy Gardening!_ Garden Inspiration! When I was a little girl, my class went to the Edison & Ford Winter Estates, located in Ft. Myers, Florida. I can still vividly recall Mr. Edison’s laboratory, with all the workbenches, tools, and experiments. The houses and buildings were of the old Florida style with big porches and high open ceilings. But what I remember the most were the gardens. Either side of the paths were more plants than I could ever have imagined. The colors, textures and smells were nearly impossible to consume and made me feel small in the giant garden. Living in Florida, walking through botanical gardens is a pretty regular experience, but there was something special about the gardens that day. Nearly every year; when I begin to ready the garden, as the season carries on and just about every time I find a new plant or flower, I recall that walk through the garden. Since then I have made it a point to visit gardens, whether public or private. I love learning from other gardeners and seeing what they have growing and listening to their stories. If you have a special gardener or garden, plant you would like to share, please call, text, mail, or snail mail me. My info is listed below. ![](/images/posts/Tomatoes-Removing-sucker-banches-for-better-production-with-note.jpg) ![](/images/posts/Tomatoes-No-more-suckers-with-note.jpg)
Vegetable Gardening

It’s Idaho Weed Awareness Week!

Garden Week Nine 5/22/2018 \[caption id="" align="alignnone" width="671"\]! Screenshot: Bingham County Website – Simple and easy to use. Screenshot: Bingham County Website – Simple and easy to use. \[/caption\] It's Idaho Weed Awareness Week! Oh No! Weeds! Yep, everything is in full growth and bloom…including weeds. Check out what Dan Eldredge over at the Bingham County, Weed Department is doing to educate us on weeds and weed management. At the Bingham County Weed Department Website (listed below), you will find information on The Chemical Cost Share Program, Idaho Weed Awareness, and the Noxious Weeds of Idaho Glossary. What you’ll find: Noxious Weeds of Idaho Glossary: where you will find information on weeds such as: Black Henbane Musk Thistle, Oxeye Daisy, Parrotfeather Milfoil, Perennial Pepperweed, Perennial Sowthistle, Plumeless Thistle, Poison Hemlock, Russian Knapweed, Salt Cedar, Scotch Broom, Scotch Thistle, Small Bugloss, Yellow Flag Iris, Dalmation Toadflax, Diffuse Knapweed, Giant Hogweed, Hoary Alyssum, Hoary Cress, Jointed Goatgrass, Leafy Spurge, Matgrass, Meadow Hawkweed, Meadow Knapweed…and many others. Information on Idaho Weed Awareness is searchable with links to http://idahoweedawareness.com/ where you can find more information on the Idaho Weed Awareness Campaign. There are links with information on plants and management resources, children’s and educational activities among other things. I picked up a handy dandy Idaho’s Noxious Weeds Booklet, which is portable and water resistant, at a Weed presentation Mr. Eldredge put on this spring, but you can order yours through this site as well. I know Mr. Eldredge has worked to bring the Chemical Cost Share Program to Bigham County. Going to the site you will find information on this program along with related forms. For more information check out https://www.co.bingham.id.us/weed\_department/weed\_department.html It’s going to be a short article today, I’m heading out to handle my own weeds! _Happy Gardening!_
Vegetable Gardening

Watching baby plants grow up!

Garden Week Eight 5/15/2018 Watching Baby Plants Grow Up! It is always such a treat watching seeds become plants. But what makes up a seed and becomes a seedling? We know that the genetic material of a male and female plant comes together to create a seed. But what does that seed look like and why do we want to know? First let’s look at the anatomy of seeds and seedlings: 1. Testa or Seed coat: This outer coat protects the seed from the dangers of insects, bacteria and fungi. Along the seem of the seed call the hilum, we find the micropyle, which allowed fertilization of the seed and later allows water to the embryo starting germination process (we might think of this as a belly button). 2. Radical or Tap root: Becomes the first root and provides the seeds first underground support. 3. Hypocotyl: Provides support between the Plumule and Radical and becomes the seedlings stem. 4. Epicotyl: The embryonic shoot, which the first structure to break the ground, located above the Cotyledon, and produces the first leaves. These first leaves do not resemble the second or true leaves and will fall off. 5. Plumule: The first true structure of the plant, where the first true leaves will grow. 6. Cotyledon: Produces the first leaves and can (in some plants) work like an embryonic sack providing initial nutrients to growing seedling. What does all this mean and why is it important? Plant seeds: Vary in size and shape We now know that water must get into the seed to start germination. We can see how small and fragile this structure is. And, we understand why we plant seeds in loose soil; to allow water and oxygen to access the inside of the plant and germinating the seed. When planting seeds, we can consider placing the radicle or tap root in a downwards position. This cuts down on efforts to stabilize the future plant and allow energy to be used efficiently. Additionally, the stem structures will have the energy to force through the to the surface allowing the first leaves to start collecting sunlight for photosynthesis. For many seeds placing the tap root down is not possible, nor necessary as the plant seeds are too small. As the seedling is pushing to the surface, keeping the top soil moist will allow the first leaves and stem structures to push through to the surface more easily, allowing more energy to grow the plant. I have heard gardeners in the past say that sprouting in the dark is preferable. However, I think that the sooner the first leaves can get sunlight, the sooner they can create new energy for the growing seedling. I don’t know about you, but I feel like I am back in school after today’s article. I won’t be handing out any homework assignments, but maybe you will look at your seedlings a little differently this year. _Happy Gardening!_ ![](/images/posts/Anatomy-of-a-seedling-We-can-seed-the-sed-structures-as-they-turn-into-a-plant..jpg) Anatomy of a seedling: We can seed the sed structures as they turn into a plant. ![](/images/posts/Seed-Coat-if-you-look-closely-you-can-see-Belly-Button-or-Water-Vent.jpg) Seed Coat: If you look closely you can see the Belly Button or Water Vent (Micropyle). ![](/images/posts/Anatomy-of-a-seed-There-will-be-a-test-later..jpg) Anatomy of a seed: There will be a test later.
Vegetable Gardening

Sweet, Crisp, Colorful Lettuce!

Garden Week Seven 5/8/201 Lolo DeVino (Loose-leaf) Lettuce - Heirloom variety from Merlot by Frank Morton. and Tennis Ball (head) Lettuce - grown by Thomas Jefferson in his Monticello Garden, located in Charlottesville, VA Sweet, Crisp, Colorful Lettuce! One of the treasures grown in my garden is fresh lettuce. I prefer the loose-leaf varieties which range in color and textures, with many varieties being suitable sautéed or in soup, in salads or on a sandwich. With the popularity of lettuce, we are seeing more and more varieties in the grocers and markets. Lettuce ranges in color, size and textures; from traditional Iceberg and Romain to Butterhead and Summercrisp varieties. So, how did lettuce come to be a food staple? The common lettuce, Lactuca sativa, has a long history; being depicted in murals of Min, the Egyptian god of fertility, as far back as 2700 BCE. It is believed that Min consumed a plant similar to the Romain lettuce we find today, as an aphrodisiac. Layfolk used the oils of the seeds for cooking, medicine and as an aid in mummification. The Greeks later learned the value of lettuce and considered it to aid in digestion and would use lettuce medicinally as a sedative. Lettuce is also mentioned in the death of Adonis, Aphrodite’s lover and came to be associated and presented at funerals; which may have some correlation to the Egyptian mummification uses. When the Romans were introduced to lettuce, they carried it with them to the far reaches of the then known world. This distribution coupled with time has lent to the development of the many varieties we know and love today. In the far east, specifically China, lettuce was cultivated to produce more stem than leaf, hardly resembling lettuce as we might find at the local market. The stalks are thick with shoots of leaves from the top. I have never tasted this interesting looking plant, but I am putting it on my to-do list, I hope you will too. Europe contributed to cultivation of lettuces such as butterhead and crisphead varieties sometime in the 15th century. Until the passage to the America’s, where emigrants carried the seeds to the new world. Of this we now have four main lettuce varieties: Romain or Cos Lettuce derives its names from the gardens of Rome’s papal gardens and from the Greek isle of Kos, a major lettuce producing region. The popular Bibb Lettuce, of the head variety owes its history to Major John “Jack” Bibb of Frankfort, KY on the late 1860’s-1970. Boston and Butter varieties so closely resemble Bibb lettuce, it is difficult to tell them apart. The most recognizable Crisphead lettuce is probably the Iceberg lettuce. Cultivated by W. Atlee Burpee & Co., in 1894. This very cool-cold weather tolerant lettuce was great for packing and shipping, lending to its popularity. Fantastic on toast, with a tomato, mayo and bacon, Yum! And, my favorite, the Silasia or loose-leaf varieties, developed in France. Near the end of the 19th Century, Mr. Eugene Davis of Grand-Rapids, Michigan, considered to be the father of forced lettuce, developed a loose-leaf variety, he named “Grand Rapid’s”, said to have put Grand Rapids on the map. If you haven’t already planted your lettuce, it is not too late. Most lettuce prefer the cooler weather and can become bitter in the heat of summer. You may consider planting lettuce where it will get the afternoon shade. Lettuce that gets hot or thirsty will bolt and go to seed, reducing produce. ![](/images/posts/Lettuce-Leaf-Basil-A-stunning-little-addition-to-any-garden-or-salad.-Can-t-wait-till-this-little-beauty-is-ready-to-eat.jpg) Caring for lettuce: Most lettuce prefer the cooler weather and can become bitter in the heat of summer. Planting and maturing lettuce in cooler weather will prevent rot and disease. Lettuce that gets hot or thirsty will bolt and go to seed, reducing production. You may consider planting lettuce where it will get the afternoon shade. Elliot Coleman often discusses Oxygen or airflow to plants. He believes as many do that, allowing oxygen to the base of the plant will also prevent rot and disease. Consider plants spacing to allow plants to reach full potential and production. Time to keep an eye out for those slimy, no good, green leaf eating, critters! If the morning light reveals little munches on your favorite greens, and you find no evidence of other pest, you may have slugs. I’ve used the tried true method of placing shallow dishes, such as pie pans level with the ground and filled with beer, nearly everywhere I have lived. You may also consider diatomaceous earth or other harsh material to cut off the passage to your plants. _Happy Gardening!_
Vegetable Gardening

Prepping the dirt for gardening!

Garden Week Six 5/1/2018 Prepping the dirt for gardening! Earlier this month we looked at testing our soil. Now, it is time clean the garden areas of weeds, to make amendments, based on the results of our soil tests, and prepare the dirt for planting. Before clearing the weeds, I like to know what my soil structure looks like. Because plant roots require oxygen, water, nutrients and vertical area to grow, it is a good idea to check the soil for hardpan. Hardpan is a compact layer of soil which prevents roots from penetrating into the deep soil, moisture and nutrients. When the plants roots cannot reach down to gather nutrients and water, the roots will grow horizontally, limitng the stability and resources of the roots. Signs of hardpan in your soil will include; rapid wilting, discoloration or yellowing, waterlogging, and ill formed roots. Knowing if you have hardpan will help you in determining how deep you should till or Broadfork the soil. To determine if you have a hardpan which will interfere with your garden, dig a hole about 24-30 inches deep. Observe the layers of soil. If you find a thick, compact layer of soil, likely clay in this area, note the depth. You may consider doing this in multiple locations to determine the consistency of the hardpan. Once you have located your hardpan, if you have it, you can then determine how deep to till or Broadfork. I like to fork my area when the soil is damp, but not wet. This loosens the soil and allows me to pull out the deep roots of unwanted plants and weeds. Because I fork, or Broadfork the soil with tines which are 10-20 inches long, I don’t often use a tiller in my garden. When using a tiller be sure the soil is not too wet, as wet soil will make the chore more difficult and limit aeration of the soil. You may find it easier to till over the garden area with a shallower setting first, the make additional passes with deeper settings, depending on the hardness of the soil and hardpan. If tilling, remember that some plants and weeds spread through their root systems. These broken-down root systems can cause a lot of work later. Taking the time to thoroughly remove weeds prior to tilling, will help with weeding throughout the summer. Do not put weeds, invasive plants, or diseased plants into your compost pile. Dispose of or burn these plants to prevent recurring issues. At this time, we also want to add our soil amendments. Here in the Rockies and Snake River Plain, we tend to have alkaline or basic soil PH, which means that our soil may test at 7.5 or high on the PH Scale. The higher the PH, the more nutrients are bound up, preventing plants from accessing valuable nutrients. In order to break up this binding, we want to bring our PH balance down. Adding organic matter like compost or peat moss can provide a longer lasting solution. Additional amendments like Elemental Sulfur, or sulfur combination, can provide long term results. Note, these amendments do not provide immediate results as they require time and oxygen to break down into accessible nutrients. If looking for immediate results, you may consider using an all-around fertilizer found at most garden and hardware stores. These come in both dry and soluble forms. When choosing you fertilizer consider the N-P-K formula or Up-Down-All around formula. N or \*\*Up=\*\*Nitrogen, which encourages green growth; P or \*\*Down=\*\*Phosphorus, which promotes healthy root structures; and K or \*\*All around=\*\*Potassium, which contributes to healthy blooms, fruit and vegetable production. When choosing a fertilizer, it is a good idea to take the results of your soil test to your local garden supply store to help determine what fertilizer may work best for your needs. Soil Amendments - Measure and mix well. Using ergonomic tools will make the job easier. ![](/images/posts/Earthworm-helping-to-aerate-and-breakdown-soil.-Nice-work.jpg) Earthworm – helping to aerate and breakdown soil. Nice work! ![](/images/posts/Fertilizer-labels-All-fertilizers-will-have-a-breakdown-of-nutrients-and-what-the-product-in-made-of..jpg) Fertilizer labels - All fertilizers will have a breakdown of nutrients and what the product is made of. ![](/images/posts/Earthworm-Casting-I-use-this-in-my-garden-starts.-I-nice-subtle-nitrogen-kick-which-will-not-burn-my-starts..jpg) Earthworm Casting - I use this in my garden starts. I nice subtle nitrogen kick which will not burn my starts. Planting for the soil you have. Rather than fight the soil, you may consider growing plants which like your soils PH. Plants that like or tolerate PH as high as 7.5 include: Artichoke (which tolerate up to 8.0), Bok Choy, Broccoli, Cabbage, Cauliflower, Collards, Dill, Okra, Spinach and Turnips. You may see a trend here. These are often cool weather tolerating green plants as well. Plants which will prefer a 6.0-7.0 PH balance, includes most vegetables. Some plants prefer the soil more acidic of 6.8 or lower. This includes: Arugula, Beans, Carrots, Chives, Corn, Eggplant, Leeks, Lettuce, Pumpkins, Radish, Scallions, Shallots, Squash, Tomatoes and Zucchini. This doesn’t mean your plants will not thrive if the PH is a point or two higher or lower. A general goal of 6.5-7.0 PH should provide a good soil for most garden vegetables you’d like to grow. _Happy Gardening!_
Soil & Microbiology

First Spring Vegetables: Planting Spinach and Peas

Garden Week Five 4/24/2018 First spring vegetables! * Plants are started in doors. * Soil is tested and amended. * Part of the garden is turned in, and a bed is prepped. * IT’S TOO EARLY TO PLANT!! – OR IS IT? No, it is not too early to plant…Spinach and Peas. Bee & Pea: A lovely spring pollinator helping to make peas. Spinach: What a lovely and versatile plant spinach is. From sandwiches, soups, salads, pasta dishes or just have it blanched as a side. Spinach can be added to most dishes for added flavor, color and nutrition. Yum! Spinach is an edible flowering plant of the Goosefoot family (Chenopodiaceae) a branch of the Amaranthaceae family and is related to beets, chard and quinoa. In china, spinach is referred to as “Persian Green” or “Persian Vegetable” as it is believed to have originated, like many plants, in ancient Persia. Possibly, being cultivated as far back as mid 200 AD. This delectable vegetable has established itself throughout the world and time. But how do we cultivate in our chilly climate successfully? One way is to start your seedlings inside. If you are a seasoned gardener, you may have already started your spinach seeds. These can be transplanted outside anytime after the first four leaves have developed and soil temperature has is reached 45-75ºF. According to “Clyde’s Garden Planner”, you can direct seed spinach to the garden anytime in the next week. As with any spring planting, you may consider having some season extending Row cover available, for the last spring snow or freeze. While Spinach is a hardy vegetable it will still not tolerate temperatures below 20ºF. Sweet, Sugar or Garden Peas: The Princess and the Pea, by Hans Christian Anderson. Wherein a pea is placed under many mattresses to test a young lady’s sensitivity, proving that she was a princess. In my mind, this is not the best use of a pea. If you are like me, you like to snap them right off the plant and eat them fresh, add them a green or cold salad, or steam them with a touch or olive oil, salt and pepper till bright green, then enjoy! The Pea has a much longer history than the lovely spinach. According to Hirst, K. Kris. "Plant Domestication." ThoughtCo, Apr. 9, 2018, thoughtco.com/plant-domestication-table-dates-places-170638, the mighty Pea was domesticated somewhere in the Near East around 9000 BCE. That is a long time! No matter the history, the mighty pea belongs to the Fabaceae family, commonly referred to as the Pea, Bean or Legume family, and are related to plants such as alfalfa and clover. Unlike beans, which are warmer weather plants, we can start peas when our soil temperate get to 40-75ºF. While the plants can defend against mild frost, the seed pods and flowers will not. To give your peas a good start, try starting germination by placing in an air tight container or zip lock between damp paper towels for about 24 - 72 hours, checking every 24 hours. Once you see the shell has softened or expanded and the first root is reaching out, you can plant the seeds to the garden, root down. Peas grow in bush and vine varieties. Because of the wind, I would advise staking your bush varieties for support. As you can imagine, vining varieties will reach far and wide to climb. A trellis and regular direction will keep your peas where you want them. You can be enjoying spinach by the end of May and peas by the middle of June. _Happy Gardening!_ !Cold-Sweetening: Cabbage, Beets, Spinach, Kale, Carrots, among other plants are sweetened with a little cold....brrrrr! Cold-Sweetening: Cabbage, Beets, Spinach, Kale, Carrots, among other plants are sweetened with a little cold....brrrrr! “Cold-sweetening”, why some vegetables taste better in the spring: Luckily, some plants like the cooler days and evenings of early spring and will in fact taste sweeter for it. Many cool whether plants experience “cold-sweetening” and will tolerate and thrive to a certain degree of cool and even cold weather. But what is Cold-Sweetening? We all know how sunlight is photosynthesized to create energy for plants. This energy is then stored by plants in the form of starches. But, when the temperature drops, some plants turn this energy into “free sugars” known in fruits and vegetables as intrinsic sugars. We find the simplest free sugars naturally occurring in syrups, fruits and honey. Because sugar water freezes at a lower temperature, this process acts to strengthen the plant’s cell structure against the cold and frost. Try tasting plants in your garden after cooler weather to see if it tastes sweeter.
Vegetable Gardening

With spring flowers come bees

Garden Week Four 4/17/2018 With spring flowers come bees Honey Bees? Bumble Bees? Sweat Bees? Mason, Carpenter or other Solitary Bees? Why do you want bees in your garden…that is other than to pollinate? The strongest defense against pests of all kinds is a healthy garden and lawn. Which means the more beneficial flowers, lawn and beneficial critters in your garden and yard, the less room there is for the bad guys. Weeds. Thrips. Voles. Just to name a few. When we have healthy plants, with the help of our friendly pollinators, we encourage healthy environments for those other beneficial critters, and less weeds by limiting room for them to grow. So, what are our friendly bees looking for? Food and shelter. What do bees eat? Nectar and pollen. The nectar is a sugary liquid created by plants to attract bees and other insects known as pollinators. When pollinators stop by for their meal, they pick up the pollen, which is found in male flowers. Then, when the pollinator stops by female flowers, fertilization occurs. And viola, the female flower is now able to create seeds. In some cases, this will mean fruit or vegetables, and in others, more flowers for next year. The bees then carry the nectar back to create honey. They also carry pollen back to feed the baby bees, as pollen is packed with protein necessary for the growth of the baby bees. The theories of what to plant to attract bees are endless. A good rule of thumb, is to have several varieties of plants flowering throughout the season. As we are coming into spring, let’s look at some of the plants which bees will enjoy. Last week we discussed bulbs, like the Crocus. These are great flowers for attracting our first buzzing friends. You may also consider: Yarrow: A compact bundle of little flowers ranging from yellow, red, white and pink. Flax: Commonly found in blue but can come in a wide variety of color including whites, red and yellows. Firecracker Penstemon: A plant which produces long shoots full of bright red trumpet-like flowers. I remember growing up see these flowers from purples to reds and whites, and full of bees! Flowers don’t have to be just on flowering plants, they can be on shrubs and trees alike. You may consider: Lilac: Who doesn’t love the smell of Lilacs in the spring? These flowering bushes can produce an abundance of white to the classic lilac purple bundles of tiny flowers. Siberian Pea Shrub: Which have lovely yellow flowers resembling those found on the vegetable pea plants. These are some of my favorite flowering bushes because I love the leaves as well as the flowers. No matter what you are planting remember that local bees and flowering plants have a long history and are well suited to work together. Check out these sites for suggestions on native plants to help our pollinator friends. https://www.wildflower.org/collections/printable.php?collection=ID and http://www.xerces.org/wp-content/uploads/2011/02/nrcstechnote\_plantsintermtnwest.pdf So what kind of shelter do our little friend look for? Honey bees as you know are often domesticated, in the sense that we work in conjunction with honey bees to raise honey. Bee boxes, as we often know and see them today, have been developed over thousands of years. Look for a story in Friday’s Outdoor section on what to do when you find a hive where it may not belong. But where do all the other bees live? Most of the other Bee types will steal or take a previously made holes of a vole or other small underground critter. They may make their home in the hollow of a tree or any dried hollow reed or similar plant. Carpenter bees will borrow holes into wood and be quite the pest. Others still, will dig their hole into the ground where flooding is less likely. Bearing this in mind, you may help to attract our friendly pollinator bees by providing refuge for them. There are many varieties of Solitary “Bee houses”. These are often made up of a collection of reeds in an attractive configuration. While others still will resemble a birdhouse with holes just the right size for bees. You can make your own by bundling reeds or drilling holes into wood and mounting them at least a yard off the ground, facing full-sun, and in a secure location. Bees will not take up habitation if the wind is blowing the house around or is cold. Wait! Don’t forget to water your bees. Yes, even bees need water. Birdbaths or Bee watering holes can bee a lovely feature in your garden. Not to mention a great location to Bee Watch! _Happy Gardening!_ Crocus: Look at all that lovely pollen!  A little-known fact about Bumble bees. Some flowers are particular in choosing to be pollinated by special bees.  The Bumble bee.  We’ve all heard the sound of a Bumble bee.  That quick vibrating sound, especially when collecting pollen.  The reason is that some plants keep their pollen inside of their anthers or end structure on the stamen of the male flower.  The Bumble bee cuts the anther then vibrates to shake the pollen free. So, next time you here a bumble bee buzzing in your back, remember it is doing its job. Nice work Bumble bees!
Beekeeping

First Spring Flowers: Planting and Caring for Spring Bulbs

Garden Week Three 4/10/2018 Daffodil Deadhead: Snip of YouTube video by Gardening at 58 North. Clearly shows the nodule below the seed pod of a Daffodil. First Spring Flowers Tulips are my favorite flower. To my delight the house I moved into has many bulb naturalized spring plants, including, you guessed it Tulips! Unlike annuals, bulbs are perennial which can return year after year and can produce loads of color with little work. So, what do your bulb plants need to produce those flowers every year? We think of planting flower and plants in the spring, however, bulb plants need to be overwintered. This means they should be planted before the ground freezes. Be sure and check the hardiness of your bulbs prior to planting. Bulbs, in general, have a top and a bottom. When planting, place the bulb pointed side up, roots side down, in a hole twice as deep as the bulb is long. For example, if the bulb is two inches long, place the bulb four inches deep; three inches long, place the bulb six inches deep. Bulbs can be placed in the same hole or planted individually. A rule of thumb for planting multiple bulbs in the same location; place bulbs no closer than eggs are in a carton. Be aware that some bulbs can cause skin irritation. You may consider wearing protective clothing when planting. Bulbs like an onion have a husk. Leave the husk intact when planting. Most spring bulbs last days to about two weeks and come in early bloom, mid-season bloom and late bloom varieties. Consider planting some of each and enjoy spring flowers from early April through Mid to late May. Now that winter is over, we are can enjoy Spring’s colorful bounty. To ensure next year’s bounty, we want to put the plants energy back into the bulb, rather than the seed pod. Once the flowers petals start to wilt, turn brown or drop off, the plant will start putting energy into seed production. At this time, we want to deadhead the flowers. Deadheading consists of cutting the flower head off below the nodule just beneath the seed pod. Do not cut anything else, yet. You can place the cuttings back into the ground adding biomass and nutrients for the bulbs. Over the next six or so weeks, the green foliage of the plants will photosynthesize energy which will be directed into the bulbs. This energy will be apparent in next years blooms. Once the foliage begins to brown, go ahead and remove. Consider breaking foliage down a bit before composting to speed up the decomposition process. About every 3-5 years your bulbs will need to be thinned. When you are cleaning up the foliage is a perfect time to thin your bulbs. Clear dirt and debris from the bulbs. Throw away any bulbs which are soft. The new smaller bulbs may not bloom the first year. Keep this in mind when replanting. Place the bulbs in the ground as described above. _Happy Gardening!_ A little more about spring bulbs Daffodils _(Narcissus_) of the Narcisseae family: A six-petal flower with a horn or trumpet, varies in color from the traditional yellow or orange.  I am surprised to learn that there are thousands of highbred varieties with configurations of yellow, orange, white and many shades of pink.  \*note that wild daffodils can come in 5 or even 4 petals.  Tulips _(Tulipa)_ of the Liliaceae family: We often think of the flower which looks a cup on a stem, with soft rounded petals.  Most commonly found to be red, white, yellow and orange. But, there are many highbred variations with colors ranging from deep purple to light pink, some wilder colors have stripes or spots.  The flowers vary from a simple cup variation to frilled petal and can even resemble a small Peony, to more pointed petals resembling stars.    Crocus _(Crocus sativus)_, of the Iridaceae family: The small, vividly colored flower will be found close to the ground and can come in colors from bright orange, to purple or white.  Variations of the Crocus also flower in the fall.  The word Crocus is believed to derive from the Arabic word for saffron “Saffron Yellow”.  Keep an eye out for the bright yellow/orange crocus, and you will see how appropriate this name is.  Puschkinia _(Scilloideae)_ of the Asparagaceae family: These spears or spikes of tiny, 2 cm, mostly white flowers can be found with blues, purple and pink hints of color.  While the flower bundles can resemble Hyacinth prior to blooming, they are distinctly different and far more delicate in appearance.
Vegetable Gardening

Garden Fever

Garden Week One 3/27/2018: Garden Fever If you are not already, it is time to start thinking about the garden. We, gardeners, are a funny species. We all have a theory and evidence and experience to back it up. I take and give advice with a grain of salt. What works for me, may not work for, and vice versa. As I think about the garden A favorite quote comes to mind. “All of life is an experiment. The more experiments you make the better.” – Emerson I find this to be true in many things. Gardening is no exception. Through advice and experiment, I have found the following to be true: Plants and seeds found in local stores and nurseries often survive planting or the move to the garden more successfully. This is because we live in hardiness Zone 5, which means that our last freeze of the year tends to come around or after May 30th. Plants propagated or raised in the local area are naturally prone to survive the local climate. This is true everywhere. No matter where live plants originate, they will have been in a greenhouse or protective shelter until the ground is warm enough. To prepare the plant for the garden, place outside in a sunny area for 2-3 hours, extending by 2-3 hours a day for several days. This is called hardening-off. The purpose is to prevent the plant from going into shock. I cannot tell you how many times I’ve heard, “Don’t buy from this place or that…the plants are terrible.” Unfortunately, the plants probably died of shock. Taking this little precaution can save you time and money. You do not have to wait till the end of May or the first part of June to start your garden. Some plants like, even love the cool spring weather. Yum…cold-hardy plants like lettuce, chard and kale, carrots, beets and radish, let us not forget peas, can go in the garden soon! Many cold hardy plants taste better after a bit of cool or cold weather. In addition to loving cool weather, these plants take fewer nutrients from the soil. In fact, after harvesting these delicious plants, you can work the rest of the plants back into your garden to feed your warm-weather loving plants. To protect your plants from the hardest frost, starting plants indoors, can be fun and easier than you may realize. I have used just about every type of tray or seed starting pod you can find. They all work. The trick with all methods is sunlight, moisture and warmth. I have set trays with a clear cover on my porch in the sun all day then moved them into the basement or garage at night with much success. Want to upcycle, try using, berry, cookie or other clear plastic containers (make holes for drainage in needed) as a make-shift greenhouse. This year I am also experimenting with egg cartons. Don’t want to hassle with indoor or greenhouse starts, you can direct sow most cold-hardy plants once the soil temperature reaches 40 to 45 degrees. Row covers or caterpillar tunnels can protect young plants from frost and help to warm the soil for faster germination. Once seeds are in the ground, all you need is sun, water and warmth or well frost protection. No matter how you start your garden, you could be enjoying fresh roots and greens right out of the garden before the weather warms. _Happy gardening!_ Get orgainzed, experiment, and have fun! Learn from a Gardener: Funny story. When I was a young person I had an uncanny ability to kill plants.  It wasn’t until a friend who had gone to school for horticulture told me that plants are hardier than I realized, that I began to really thrive as a gardener.  Don’t get me wrong, there are times and plants which require more care, but on the whole, plants are pretty hardy.  Books, articles, YouTube, Grandma, let me count the ways to learn more about gardening.  There is so much knowledge it can take a lifetime to master the art.  Fortunately, we don’t have to do it alone. A friend of mine once told me that Agriculture is one of the most unusual industries because everyone knows that sharing your knowledge only strengthens the industry.  I believe the same is true in our own back yards as well.  Ask around, someone you know may just be a Gardener too.
Vegetable Gardening